フラグメントツールキットの使用
フラグメント ツールキットは、お気に入りのツールを使用してフラグメントをローカルで作成および管理するのに役立ちます。 ここでは、ツールキットを使用して、サンプルのフラグメントを含むフラグメント プロジェクトを生成し、デプロイして、独自のフラグメント セットを追加します。
Liferay DXP 7.4以降の場合、フラグメントコレクションはLiferay UIではフラグメントセットと呼ばれます。
ツールキットの設定
ツールキットには次のソフトウェアが必要です。
NPMとYarnは、ツールキットとそれが依存するモジュールをインストールするために使うパッケージ・マネージャーだ。
-
Node.js LTS を介して NPM と Node.js をインストールすることから始めます。
-
サンプルの JavaScript プロジェクトの ZIP ファイルをダウンロードして解凍します。
-
setup_tutorial.shスクリプトを使用して、フラグメント ツールキットとその依存関係を設定します。notesetup_tutorial.shスクリプトは、Yeoman、Yarn、ツールキットのセットアップのためのコマンドを提供します。 スクリプトは、サンプルプロジェクトのZIPファイルで利用できます。
スクリプトによって報告された満たしていない要件をすべて解決し、環境の準備が整ったと報告されるまでスクリプトを再実行してください。
フラグメント プロジェクトを作成する
フラグメントツールキットの yo liferay-fragments コマンドは、フラグメント プロジェクトを生成するためのインターフェイスを起動します。
フラグメントプロジェクトをネストしないでください。 新しいフラグメントプロジェクトは、既存のフラグメントプロジェクトとは別の場所に作成してください。
liferay-x2y6 プロジェクト フォルダにいる場合は、それを終了します (例: cd ..)。
フラグメント プロジェクトを生成する方法は次のとおりです。
-
yo liferay-fragmentsコマンドを実行して、プロジェクト ジェネレータを起動します。 -
プロジェクトに名前を付けます。 この例では、Enter をクリックしてデフォルトのプロジェクト名を受け入れます。
-
サンプル コンテンツを追加するかどうかを示します。 この例では、
Yesと入力します。
これでフラグメント プロジェクトが生成されました。
ジェネレータは、プロジェクト名から派生したフォルダに各プロジェクトを作成します。 この例では、プロジェクト名を Sample Liferay Fragments としたので、ジェネレータは sample-liferay-fragmentsというプロジェクト フォルダを作成します。
サンプルのフラグメントセットをインポートする
新しいLiferay インスタンスを起動し、以下を実行します。
http://localhost:8080でLiferayへのサインインします。 メールアドレス test@liferay.com とパスワード test を使用してください。 プロンプトが表示されたら、パスワードを learn に変更します。
次に、以下の手順でサンプルのフラグメントセットをLiferayにインポートします:
-
プロジェクトのルートフォルダ(例:
sample-liferay-fragments)でyarn run importコマンドを実行して、フラグメントセットを Liferay インスタンスにインポートします。あるいは、手動でフラグメントセットをインポートすることもできます。 -
プロンプトに答えます。
-
フラグメントセットが利用可能であることを確認します。 サイトメニュー(
 ) を開き、 [デザイン] → [フラグメント] に移動します。 セットがリストに表示されます。
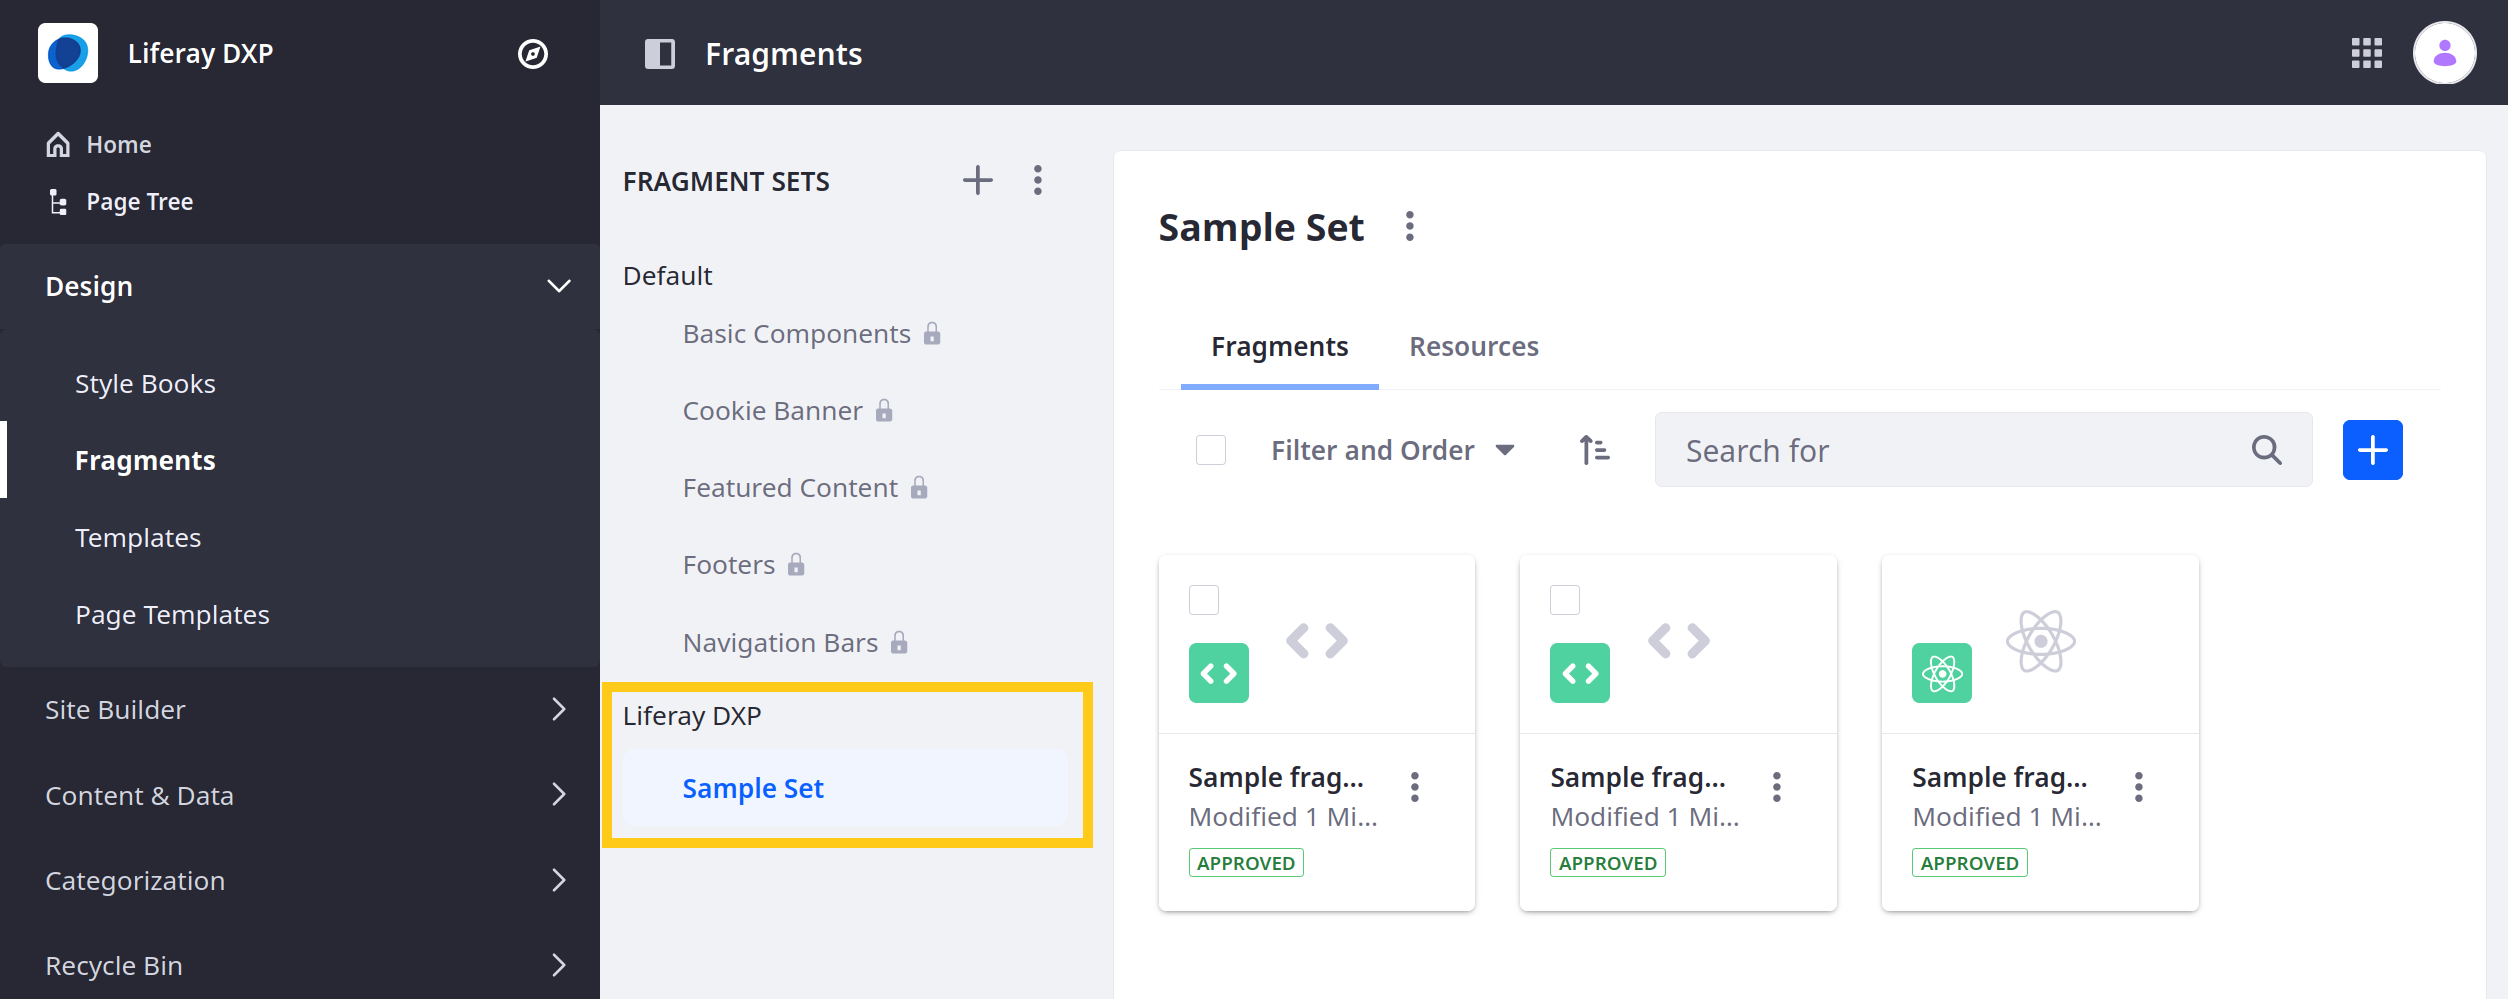 note
noteLiferay DXP 7.1および7.2では、代わりにプロダクトメニューのサイト → サイトビルダー → ページ フラグメントに移動して、フラグメントページを表示します。
フラグメントセットを正常にデプロイしました。
フラグメントセットのストラクチャー
各フラグメントセットは、次の構造を使用します。
-
collection.json: フラグメントセットを説明するテキスト ファイル。 -
language.properties(オプション):フラグメントセットに定義された言語キー。 -
[fragment-name]/: フラグメントのすべてのファイルを含むフォルダ。-
configuration.json(オプション): フラグメントの構成を定義する JSON ファイル。 詳細は、フラグメントへの構成オプションの追加を参照してください。 -
fragment.json: フラグメントを説明するJSONファイル。 詳しくは fragment.jsonの修正 を参照。
-
-
resources/(オプション): フラグメントが必要とする追加の画像またはファイルを含むフォルダ。 詳細は、フラグメントにデフォルトのリソースを含めるを参照してください。
フラグメント・ツールキットを使えば、この構造で素早くプロジェクトを作成できる。
fragment.jsonの修正
fragment.json には、フラグメントの機能と使いやすさを向上させるために変更できるフラグメントの属性が含まれています。
| キー | Description |
|---|---|
cssPath | .css、.scss、または .sass ファイルを指定します。 |
configurationPath | フラグメントの設定ソースを指定します。 |
htmlPath | フラグメントの HTML ソースを指定します。 |
jsPath | フラグメントの JavaScript ソースを指定します。 |
name | フラグメントの名前。 |
type | コンポーネントまたはReactフラグメントを指定します。 |
icon | インポートしたフラグメントに粘土のアイコンを追加する。 利用可能なアイコンについては、 クレイアイコンリスト を参照してください。 |
sass {loadPaths:[]}} | 外部の依存関係を指定する。 |
プロジェクトにフラグメントセットを追加する
add-collection コマンドを使用して、プロジェクトにフラグメントセットを追加します。
-
プロジェクトのルートフォルダに移動して、次のコマンドを実行します。
-
プロンプトが表示されたら、フラグメントセットの名前と説明を入力します。
-
新しいフラグメントセットがプロジェクトの
srcフォルダに正常に作成されたことを確認します。collection.jsonファイルのみが含まれているはずです。
新規フラグメントを作成する
add-fragment コマンドを使用して、新しいフラグメントをセットに追加します。
-
プロジェクトのルートフォルダに移動して、次のコマンドを実行します。
CLI がプロセスを開始します:
-
フラグメントに名前を付けます。
-
React または別の JavaScript フレームワークを使用するかどうかを選択します。 React には Liferay 7.3 以降が必要です。 このチュートリアルでは、React の使用を拒否してください。
-
Liferay 7.3 以降の場合は、新しい編集可能な要素の構文を使用します。
noteフラグメントで React の使用を受け入れた場合、ツールキットは Liferay 7.3 以降を使用していると想定し、新しい編集可能な要素の構文を構成します。
noteLiferayの編集可能なデータ構文については、フラグメント固有のタグ を参照してください。
-
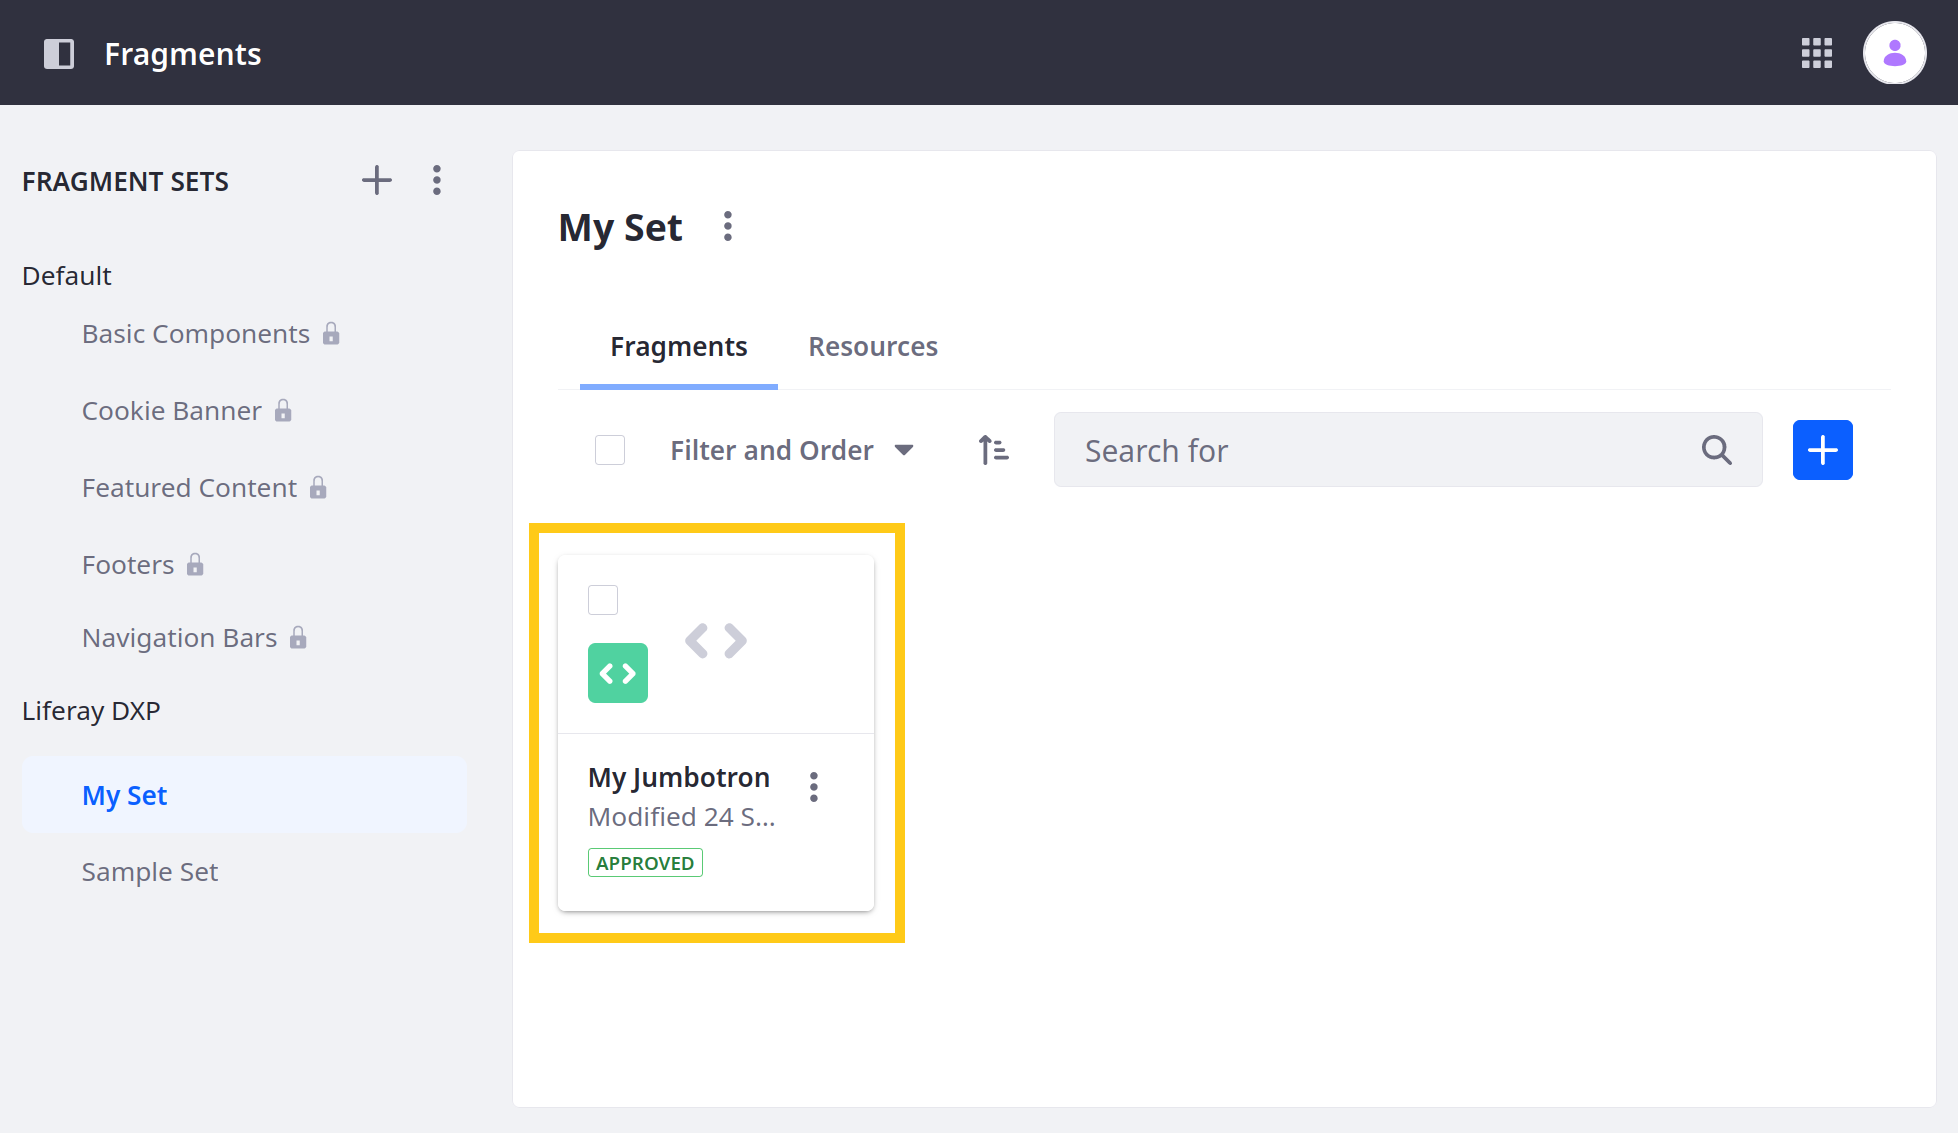
先ほど作成したフラグメントセットを選択します(
My Set)。notefragment.jsonは、フラグメントのCSS、HTML、JavaScriptへのパスを定義します。 これらのファイル名のいずれかを変更した場合は、fragment.json内のパスを更新してください。
フラグメントの index.html は次のとおりです。
フラグメント HTML は、data-lfr の新しい編集可能な構文を使用します。
フラグメントを編集する
フラグメントの任意の部分を変更します。
- HTML (
index.html) - CSS (
styles.css) - JavaScript (
main.js) - フラグメントの属性 (
fragment.json) - 構成オプション (
configuration.json)
たとえば、上記の HTML から構築し、 Clay の Bootstrap ベースのコンポーネントを使用して、次の index.html に示すように、注目を集める見出しと説明を持つフラグメントを作成できます。
Liferay 7.2以下を使用している場合は、フラグメント固有のタグ にあるように、data-lfr-editable-[id|type] 属性を削除してコンテンツ要素を lfr-editable 要素で囲んでください。
最初の div 要素の class="component-my-jumbotron" 属性は、ページ上のこのフラグメントを一意に識別しようとします。
フラグメントのHTMLファイルでは、メインラッパー要素(上記の例では <div> )を使ってフラグメントを一意に識別し、ページ上の他のコンポーネントと競合しないようにします。
次に、 <div class="jumbotron"/> 要素がコンテンツをラップし、 Bootstrap のジャンボトロン コンポーネントを適用します。 このコンポーネントは、コンテンツを際立たせます。 コンテンツ要素は次のとおりです。
<h1 class="display-4" ...>Editable Jumbotron ...は、フラグメントの見出しを作成します。 Bootstrap のdisplay-4サイズ スタイルを使用します。data-lfr-editable-属性は、見出しテキストを編集可能にします。data-lfr-editable-id="03-text"属性は要素を識別し、data-lfr-editable-type="rich-text"属性はコンテンツ タイプを宣言します。<p class="lead" ...>Edit this text ...は、Clay のleadスタイル コンポーネントで識別されるリード本文テキストです。data-lfr-editable-属性は、段落を編集可能にします。<hr/>要素と次の<p ...要素は、それぞれ水平方向の罫線と別の編集可能な段落を生成します。<a class="btn btn-primary btn-lg" ...は変更可能なリンクを指定します。btn-primaryクラスはそれをメイン ボタンとしてスタイル設定し、btn-lgはそれを拡大します。href="#"属性は、リンクをクリックしたときにユーザーをページの上部に移動します。data-lfr-editable-type="link"属性は、リンクを編集可能にします。
フラグメントにリソースを含めることもできます。 詳細は、 フラグメントにデフォルトのリソースを含める を参照してください。
フラグメントと設定オブジェクトは JavaScript の引数として渡され、それぞれ fragmentElement と configurationパラメーターとして利用できます。
新しいフラグメントをインポートする
元のサンプルフラグメントと同じように、新しいフラグメントをインポートできます。
-
import コマンドを実行し、資格情報を提供します。
-
フラグメントセットが利用可能であることを確認します。 サイトメニュー(
) を開き、 [デザイン] → [フラグメント] に移動します。 セットがリストに表示されます。
これで、フラグメント ツールキットを使用してフラグメントを作成および管理する方法がわかりました。 ツールキット コマンドの詳細は、 フラグメントツールキットコマンドリファレンス を参照してください。