Configuring Liferay Authentication With Okta Using OpenId Connect
This tutorial guides you through the basic steps needed to integrate Okta, your Identity Provider (IdP), with your environment using OpenID Connect.
Prerequisites
- Okta Dev account
- Liferay DXP environment
- A user who has administrative access Okta Admin Console
- A user who has administrative access to Liferay’s Control Panel
Okta Configuration
-
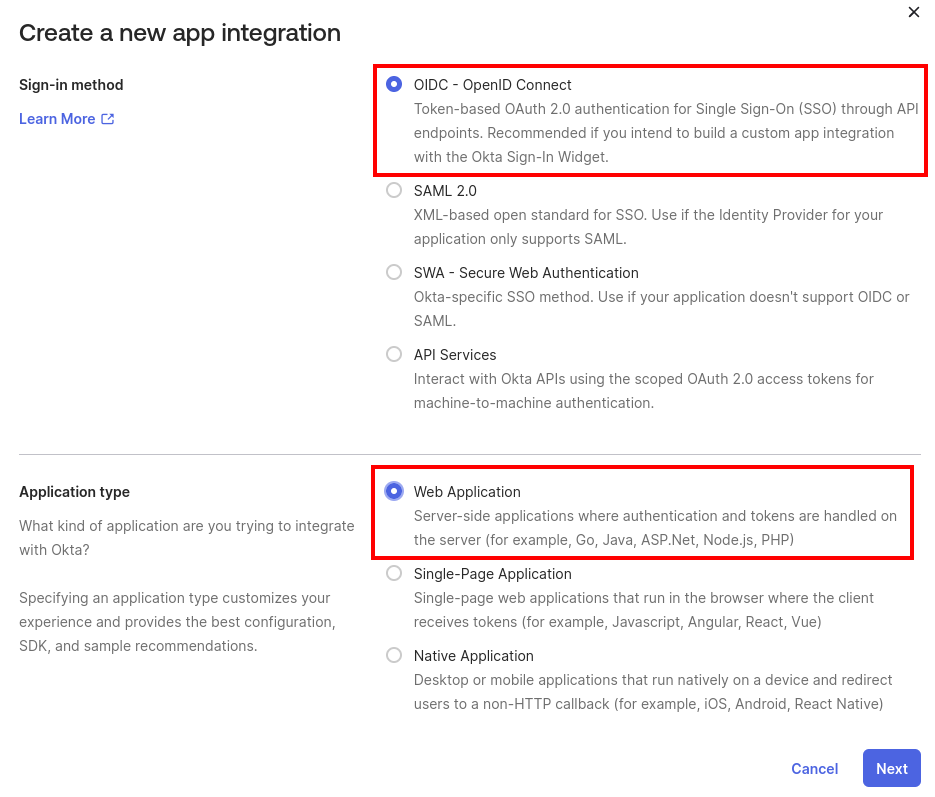
Log in to Okta Dev and navigate to Applications → Add Application → Create App Integration.
-
Select OIDC - OpenID Connect, under Sign-in method, and Web Application, under Application type.
-
Enter Liferay DXP - OIDC as the app integration name.
-
For grant types, select Authorization Code and Refresh Token
-
Enter
https://[your_instance_url]/c/portal/login/openidconnectfor the sign-in redirect URIs. -
Enter
https://[your_instance_url]for the sign-out redirect URIs. -
Under assignments, select Skip group assignment for now.
-
Click Save.
-
On the Assignments tab, assign users to this application.
NoteMake sure to assign yourself and provision your own user account so that you will still be able to log in as the Liferay administrator.
Obtaining endpoint URLs
-
In your Okta Dev account, go to the side panel and navigate to Security → API.
-
Under the “Authorization Servers” tab, locate the server named
defaultand click on it to edit its configuration.
-
Click on the “Metadata URI” link, which typically looks like this: https://dev-123456.okta.com/oauth2/default/.well-known/oauth-authorization-server
issuer: "https://dev-123456.okta.com/oauth2/default" authorization_endpoint: "https://dev-123456.okta.com/oauth2/default/v1/authorize" token_endpoint: "https://dev-123456.okta.com/oauth2/default/v1/token" registration_endpoint: "https://dev-123456.okta.com/oauth2/v1/clients" jwks_uri: "https://dev-123456.okta.com/oauth2/default/v1/keys" -
This will give you the necessary URLs, with the exception of /userinfo endpoint. You can construct that endpoint by combining your base URL with the Auth Server name. For example: https://dev-123456.okta.com/oauth2/default/v1/userinfo.
Liferay OIDC Configuration
Your installation must have a configured connection to a mail server to send email notifications. Alternatively, you can disable the feature Require strangers to verify their email address. See Tips and Troubleshooting for more information.
-
On your DXP instance, navigate to Global Menu → Control Panel → Instance Settings → Security → SSO.
-
Go to OpenID Connect Provider Connection tab and add a new connection entry.
-
Fill in the fields with the data you find at the endpoint URLs, as shown in the table below.
Field Data Provider Name Okta OIDC Scopes scopes_supportedAuthorization Endpoint authorization_endpointurlIssuer URL issuerurlJWKS URI jwks_uriurlSubject Types subject_types_supportedToken Endpoint token_endpointurlUser Information Endpoint Follow step 4 from obtaining endpoint URLs OpenID Connect Client ID Under your application’s General tab in Okta OpenID Connect Client Secret Under your application’s General tab in Okta
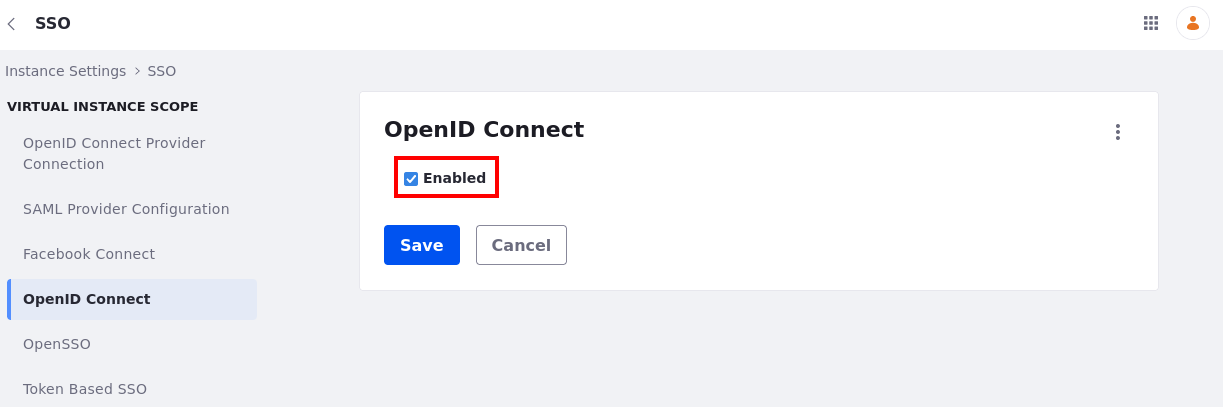
Once that is done, OpenID Connect needs to be enabled. To enable the OpenId Connect:
-
Navigate to Global Menu → Control Panel → Configuration → Instance Settings.
-
Click on SSO under the security section.
-
Go to the OpenID Connect tab, click the Enabled checkbox and click Save.
Validation
-
Start your Liferay DXP instance
-
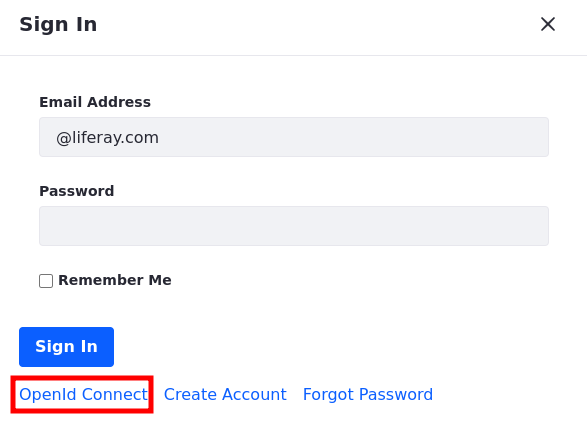
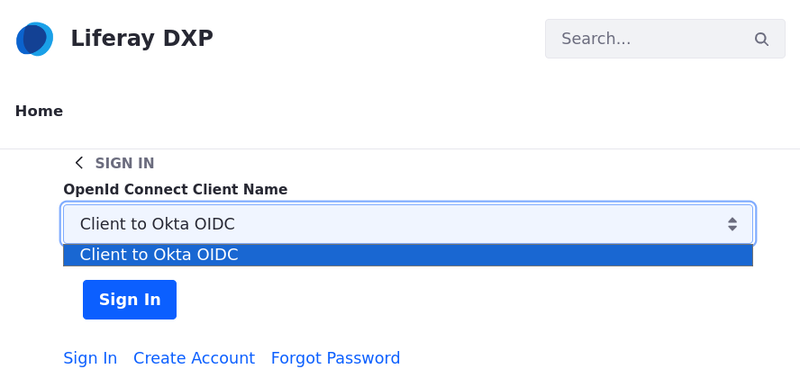
Click on the Sign In button and choose OpenId Connect.
-
Choose Client to Okta OIDC from the list.
-
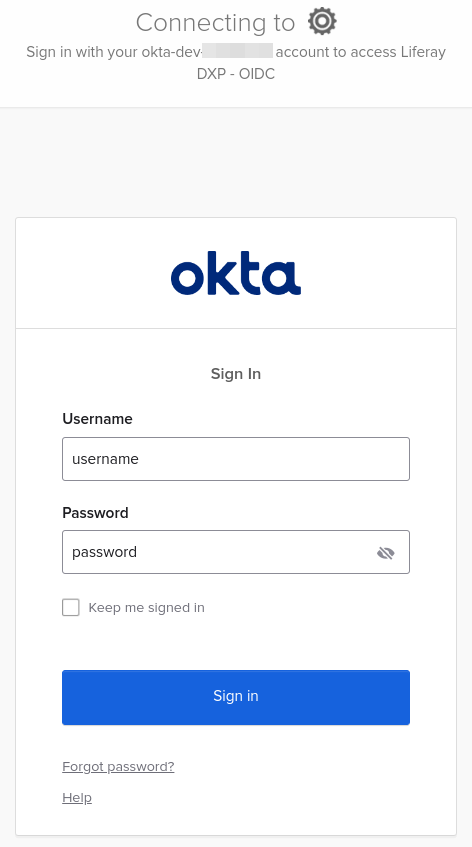
Sign in with your Okta account.
Conclusion
Congratulations! You have successfully completed this Solution Tutorial.
Tips and Troubleshooting
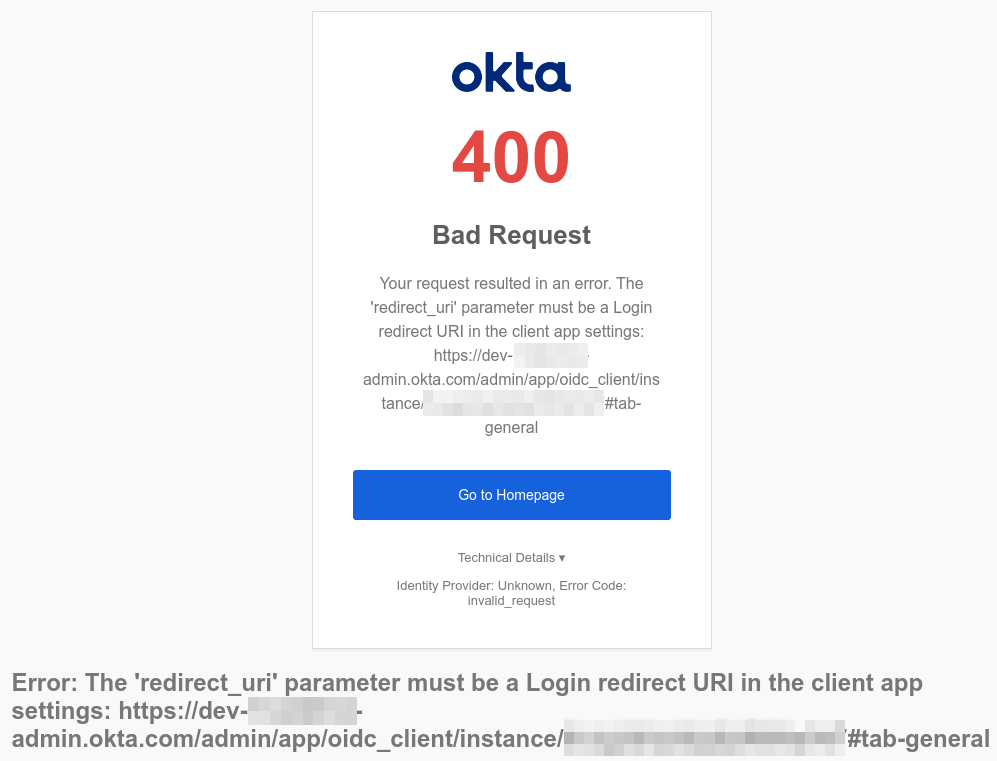
Sign-in and Sign-out Redirect URIs
If you encounter an error like the image below, verify that your sign-in and sign-out redirect URIs are configured correctly in Okta with the appropriate path and Hypertext Transfer Protocol (HTTP or HTTPS). You can find them in your Dev Okta account by navigating to the application you created → General tab → General Setting → Login section.
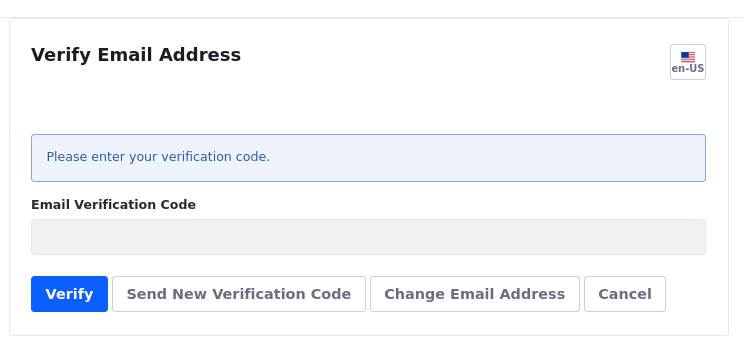
Verify email address
By default, new users must verify their email address upon first login. To disable this requirement, in your Liferay DXP unselect the “Require strangers to verify their email address” checkbox. Navigate to Control Panel → Instance Settings → Platform → User Authentication and unselect the checkbox. However, if you want to keep email validation enabled, a configured connection to a mail server is necessary for your installation.