Configuring Liferay Authentication With Auth0 Using OpenId Connect
This tutorial guides you through integrating Auth0, your Identity Provider (IdP), with your Liferay environment using OpenID Connect.
Prerequisites
- Auth0 account
- Liferay DXP environment
- A user who has administrative access to Auth0’s dashboard
- A user who has administrative access to Liferay’s Control Panel
Auth0 Configuration
-
Log in to Auth0.
-
Open Auth0’s dashboard
-
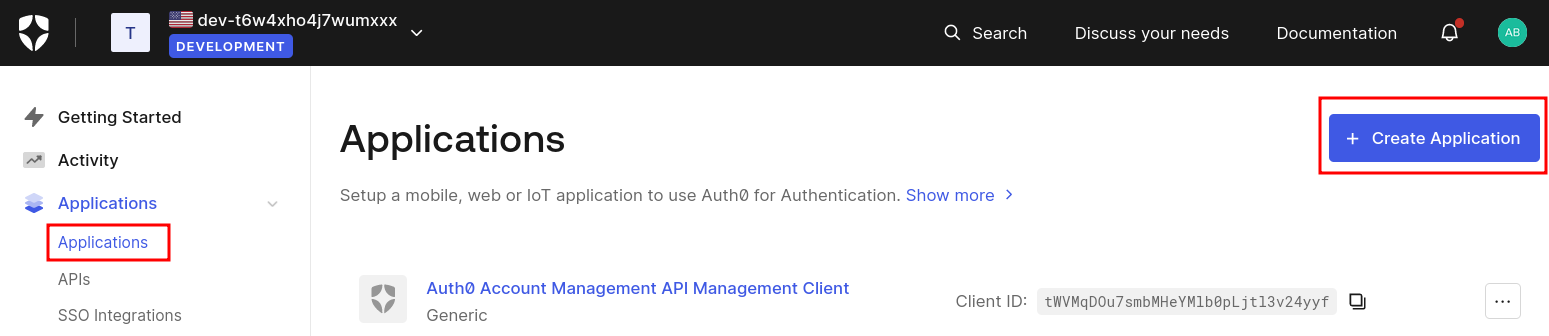
Select Applications from the side menu and create a new application.
-
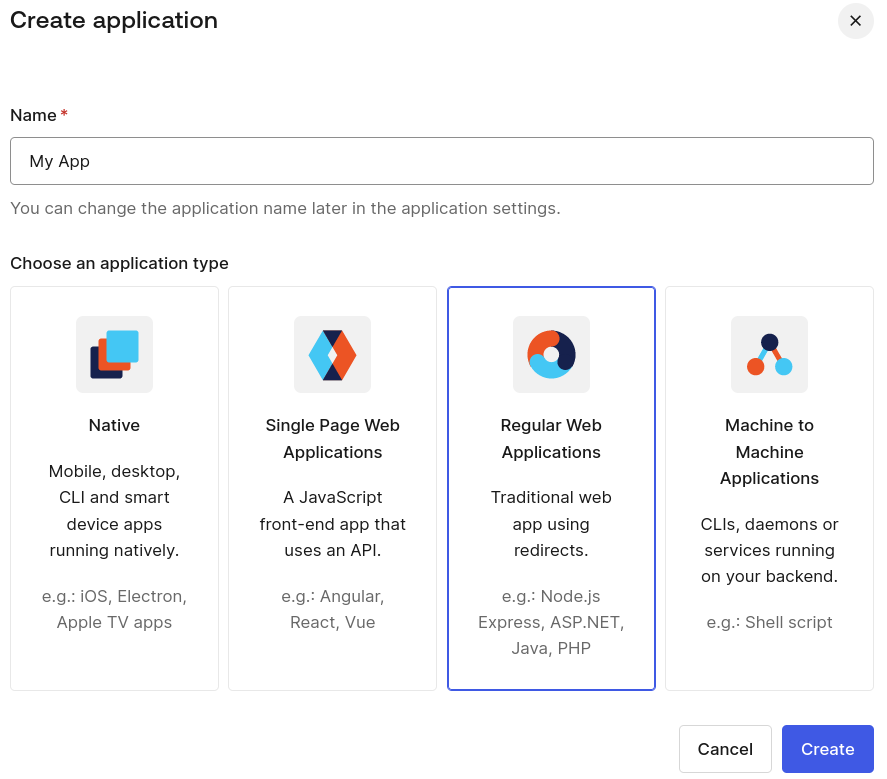
Set a name of your choice, and choose Regular Web Applications for your application type.
-
Click Create to have your application ready.
-
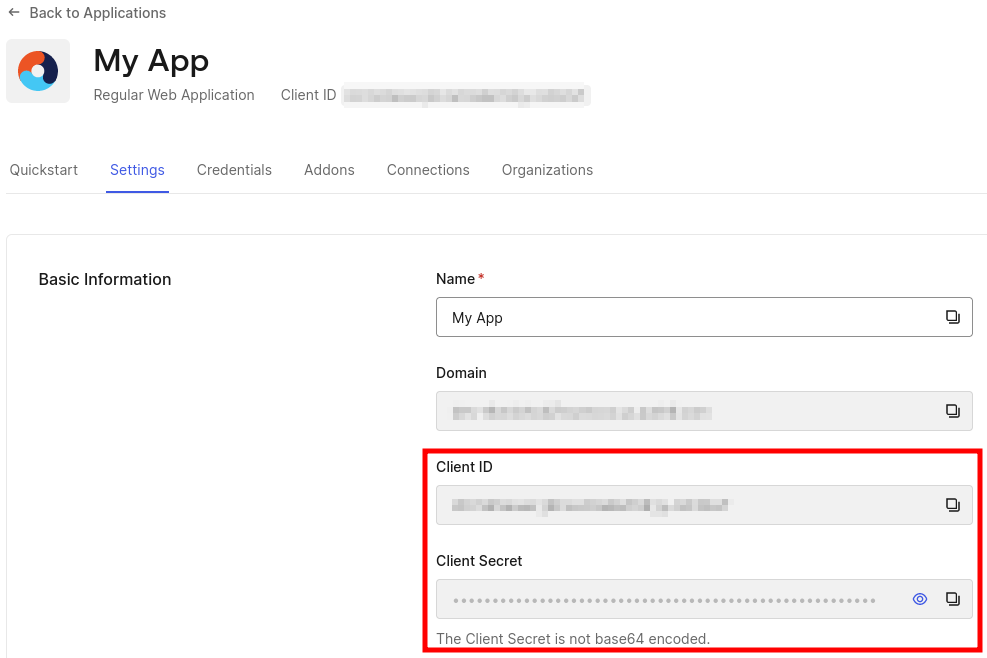
The Client ID and Client Secret can be found in the Settings tab. You’ll need them later on.
-
Scroll down to the Application URIs section to set the Allowed Callback URLs field, and enter
https://[your_liferay_environment]/c/portal/login/openidconnect.
-
Access the Advanced Settings at the bottom of the page to edit any additional settings.
-
Click Save Changes to save your application settings.
-
With the Auth0 configuration complete, you can now configure your Auth0 application to Liferay DXP.
If you are testing and do not have any users, make sure to create your users by navigating to User Management → Users.
Configuring the OpenID Connect Provider Connection
Now that Auth0 is configured, use Liferay’s interface to set up the provider connection. All configuration is done through the provider’s Well-Known Configuration Endpoint.
The Auth0’s Well-Known URI is https://[your-default-tenant].us.auth0.com/.well-known/openid-configuration. To find your default tenant, navigate to your profile and look for Default Tenant, or on the url before /profile.
-
On your DXP instance, navigate to Global Menu → Control Panel → Instance Settings → Security → SSO.
-
Go to OpenID Connect Provider Connection tab and add a new connection entry.
-
Fill out the fields with the requested data, as showed in the table below. These values you can find on the Well-known URL mentioned on the note above.
Field Data Provider Name Auth0 OIDC Scopes scopes_supportedurlAuthorization Endpoint authorization_endpointurlIssuer URL issuerurlJWKS URI jwks_uriurlID Token Signing Algorithms id_token_signing_alg_values_supportedurlSubject Types subject_types_supportedurlToken Endpoint token_endpointurlUser Information Endpoint userinfo_endpointurlOpenID Connect Client ID Under the Settings tab of your application in Auth0 OpenID Connect Client Secret Under the Settings tab of your application in Auth0
Be sure to click Save to ensure your changes are preserved.
Once that is done, enable OpenID Connect. To enable the OpenId Connect:
-
On your DXP instance, navigate to Global Menu → Control Panel → Configuration → Instance Settings.
-
Click on SSO under the security section.
-
Go to the OpenID Connect tab, click the Enabled checkbox and click Save.

Validation
-
Start your Liferay DXP instance
-
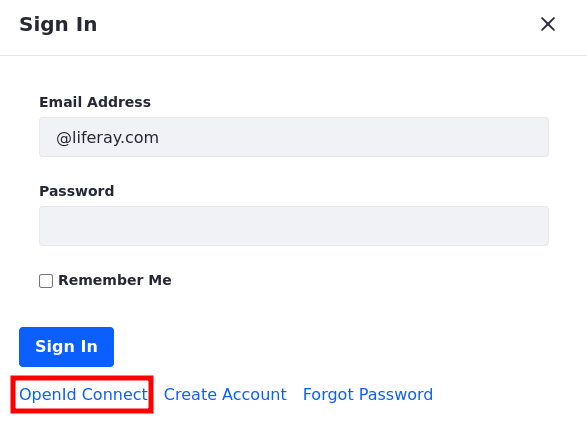
Click on the Sign In button and choose OpenId Connect.
-
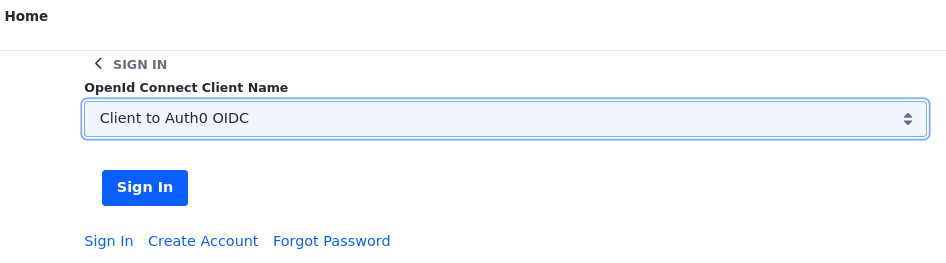
Choose Auth0 OIDC from the list and sign in with your Auth0 account.
-
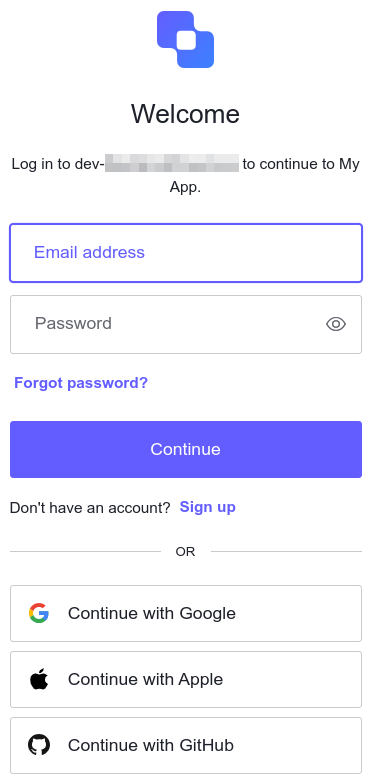
Once you click Sign In, you’ll be redirected to Auth0’s log in page.
-
Type in the email address and password for your user. You have successfully logged in.
-
Sign back in with your Liferay administrator account. Navigate to Control Panel → Users and Organizations, and verify that the account came into Liferay.
Conclusion
Congratulations! Users may now authenticate to your environment by using Auth0.
Tips and Troubleshooting
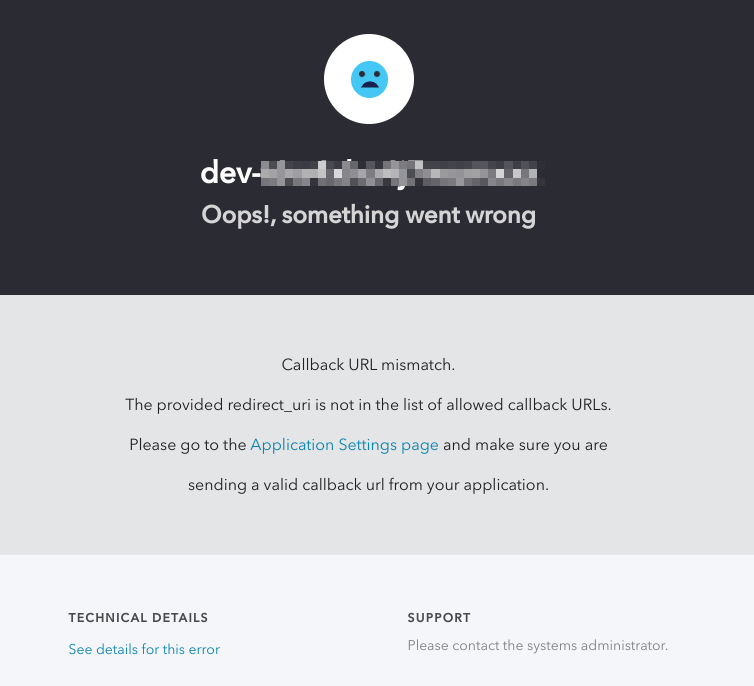
Callback URL mismatch
If you encounter an error like the image below, verify that your Allowed Callback URLs are configured correctly in Auth0 with the appropriate path and Hypertext Transfer Protocol (HTTP or HTTPS). You can find them in your Auth0 account by navigating to the application you created → Settings tab → Application URIs section.