Configuring Asset Auto-Tagging
Tagging assets is a great way to organize content. Typically, the content creator manually applies tags during creation, but you can configure Liferay to tag content automatically. For example, you can scan an image on upload and apply tags that describe the image’s content.
By default, asset auto-tagging is only triggered when content is created. Beginning with Liferay 7.4 U36/GA36, you can configure virtual instances to allow auto-tag assets on updates as well. See Virtual Instance Scope Configuration for more information.
Global Scope Configuration
Open the Global Menu (
 ), click the Control Panel tab, and go to System Settings.
In the Content and Data section, click Assets.
Under System Scope, click Asset Auto-Tagging.
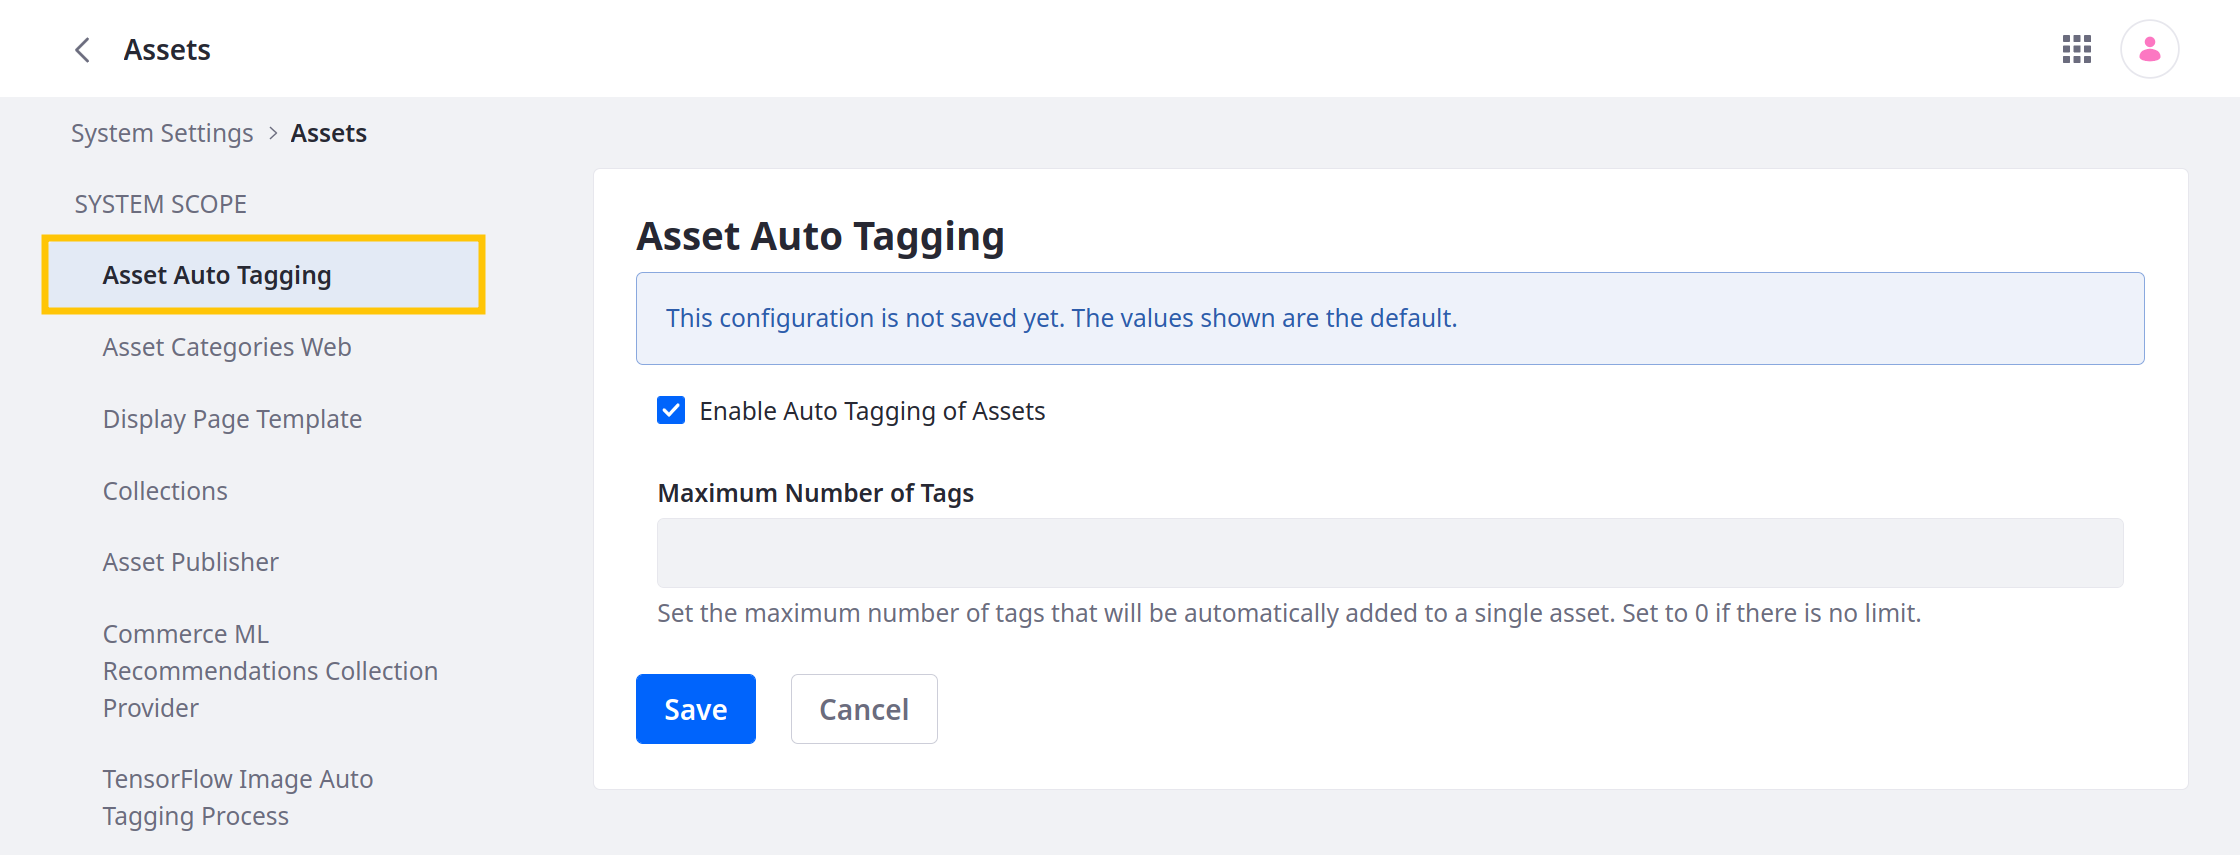
Check the box to enable or disable Asset Auto-Tagging globally.
Set the Maximum Number of Tags that can be added automatically to an asset. Setting the value to
0means there is no limit.Click Save when finished.
To set the default auto-tagging configuration for all instances, select Asset Auto-Tagging under Virtual Instance Scope. The available settings are the same as those in the System Scope.
Virtual Instance Scope Configuration
When enabled globally, auto-tagging is also enabled by default for each Virtual Instance. You can, however, disable or configure it for each instance.
Follow these steps to configure auto-tagging at the Virtual Instance scope:
Open the Global Menu (
), click the Control Panel tab, and go to Instance Settings.In the Content and Data section, click Assets.
Under Virtual Instance Scope, click Asset Auto-Tagging.
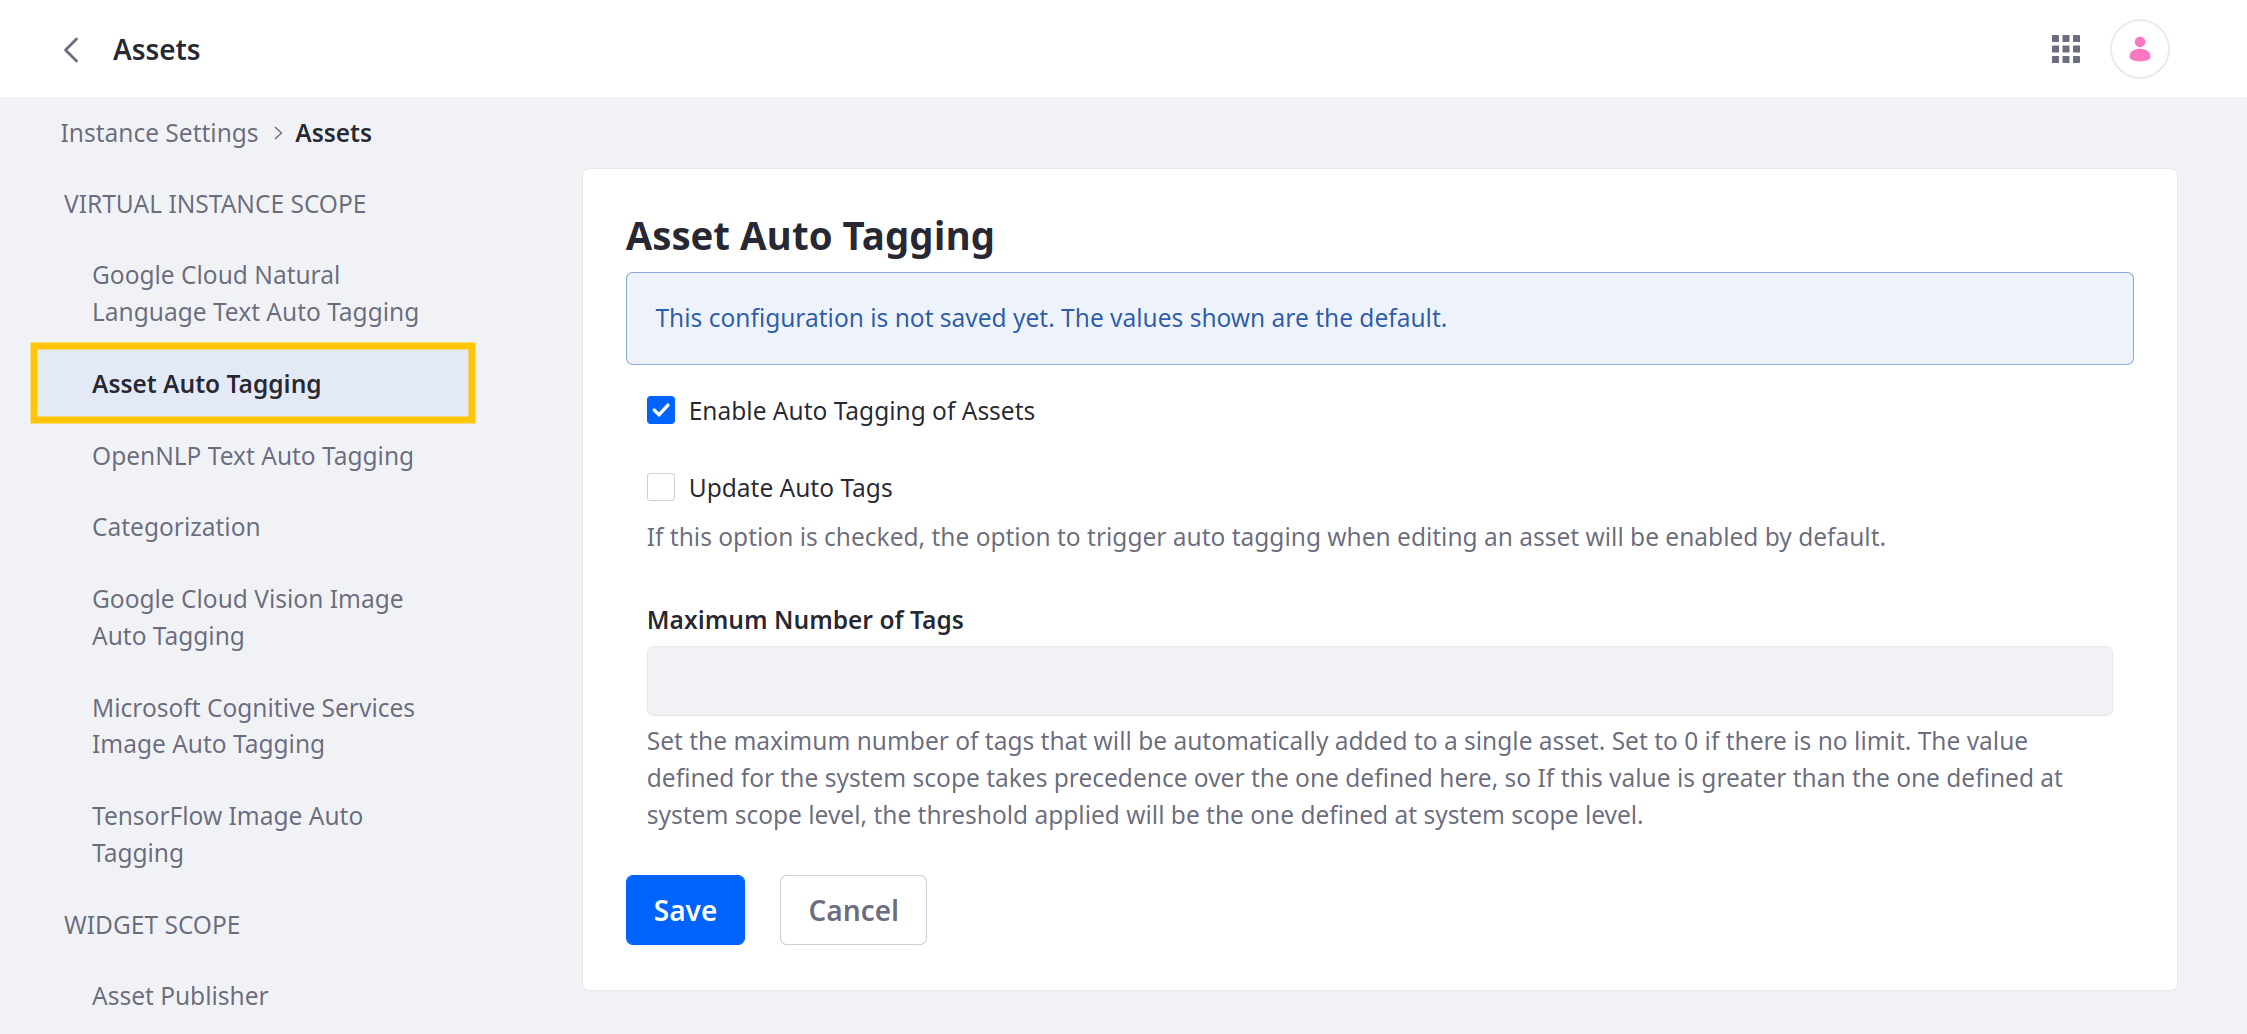
Check/Uncheck Enable Asset Auto-Tagging.
Check/Uncheck Update Auto-Tags. If unchecked, auto-tagging is only triggered during asset creation and upload. If checked, auto-tagging is triggered when assets are edited.
Set the Maximum Number of Tags that can be added automatically to an asset. Setting the value to
0means there is no limit.Click Save when finished.
Once saved, this determines the default configuration for the current virtual instance. If you’ve enabled the Update Auto-Tags feature, editing supported assets triggers auto-tagging. If desired, you can disable this behavior for existing content items.

Site Scope Configuration
Open the Site Menu (
 ), expand Configuration, and go to Site Settings.
For 7.4+, go to Assets under Content and Data and click the Asset Auto-Tagging tab.
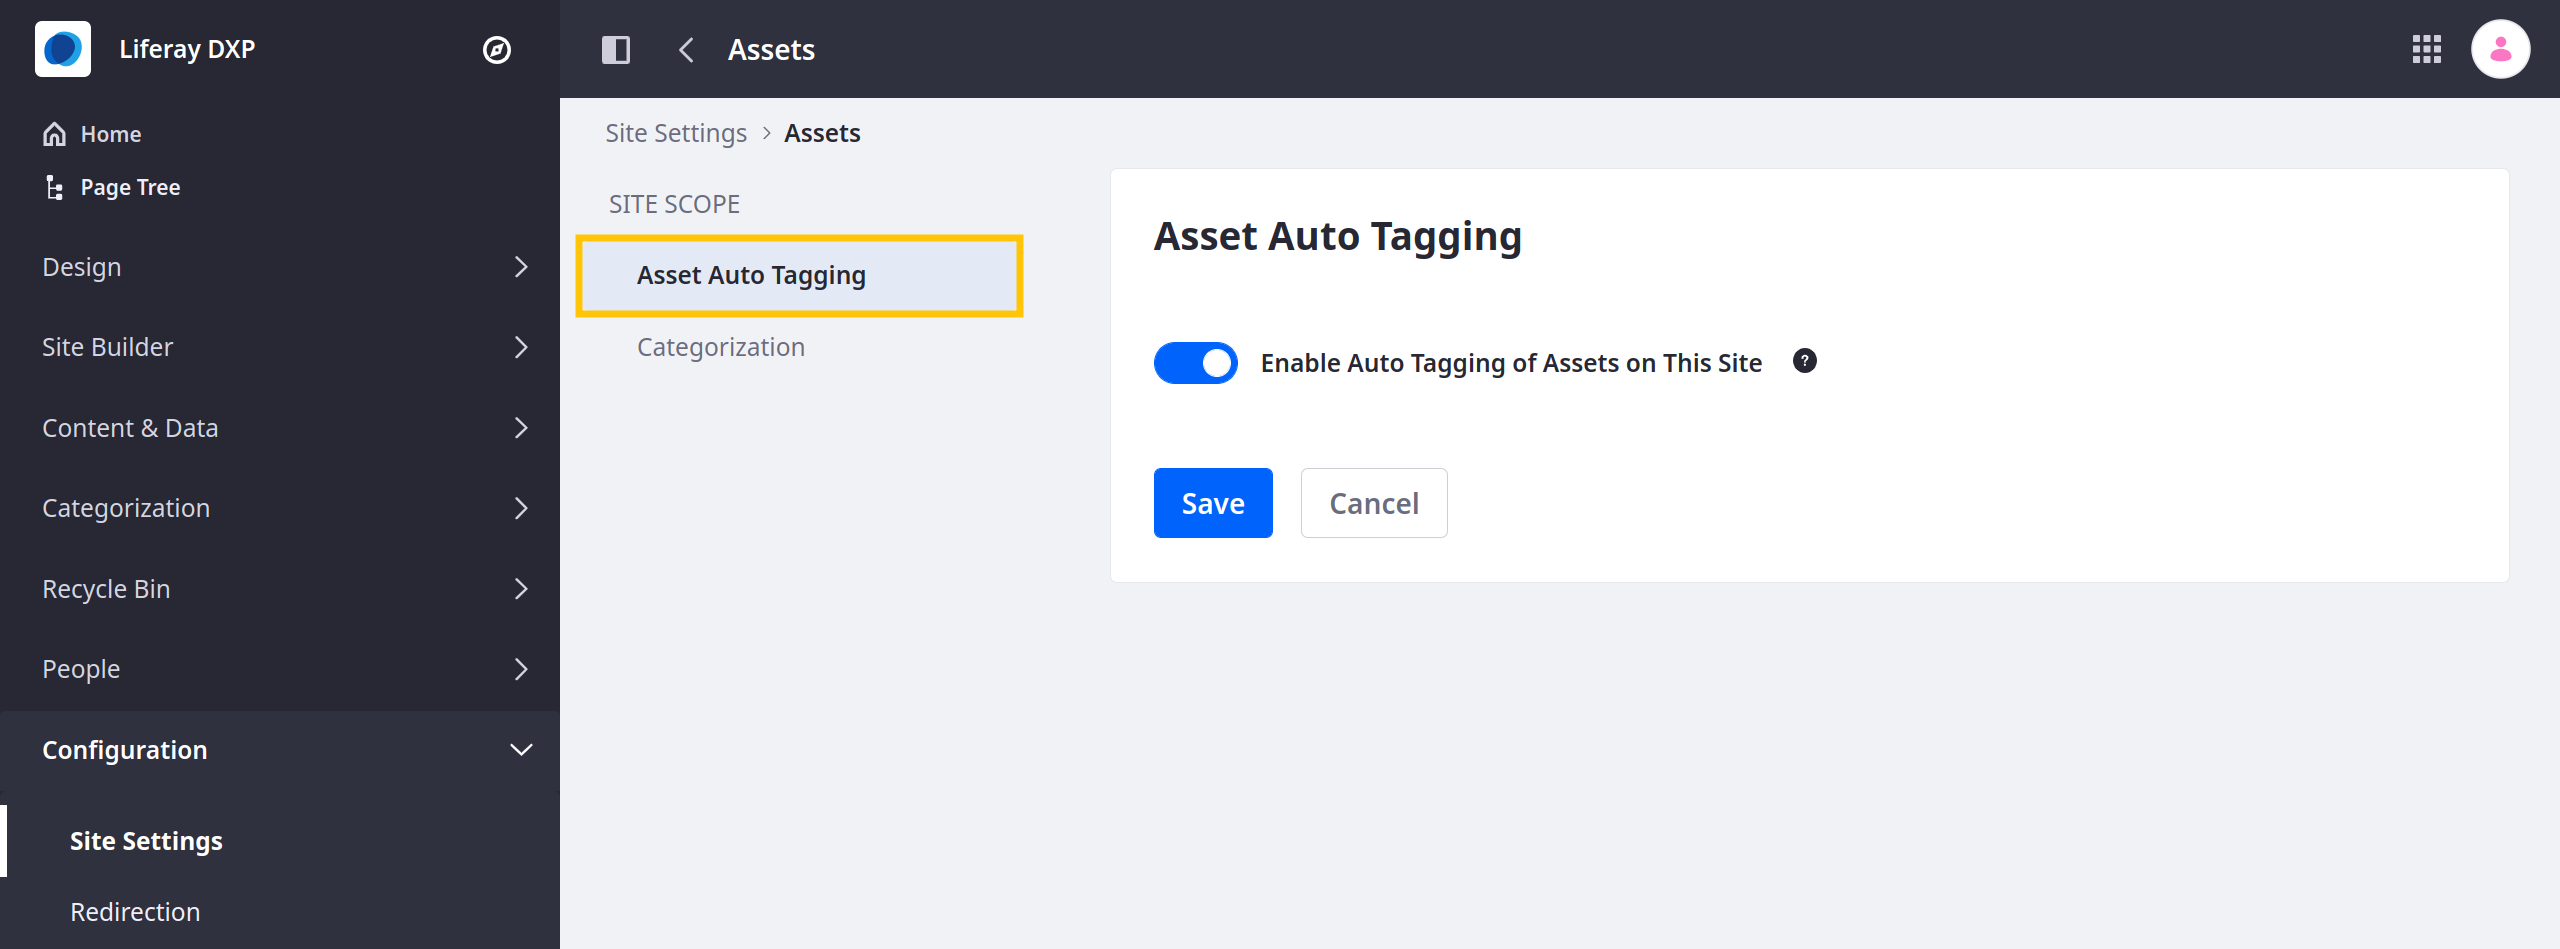
For earlier versions, go to the General tab and expand the Asset Auto-Tagging section.
Use the toggle to enable or disable auto-tagging for the site.
Click Save.