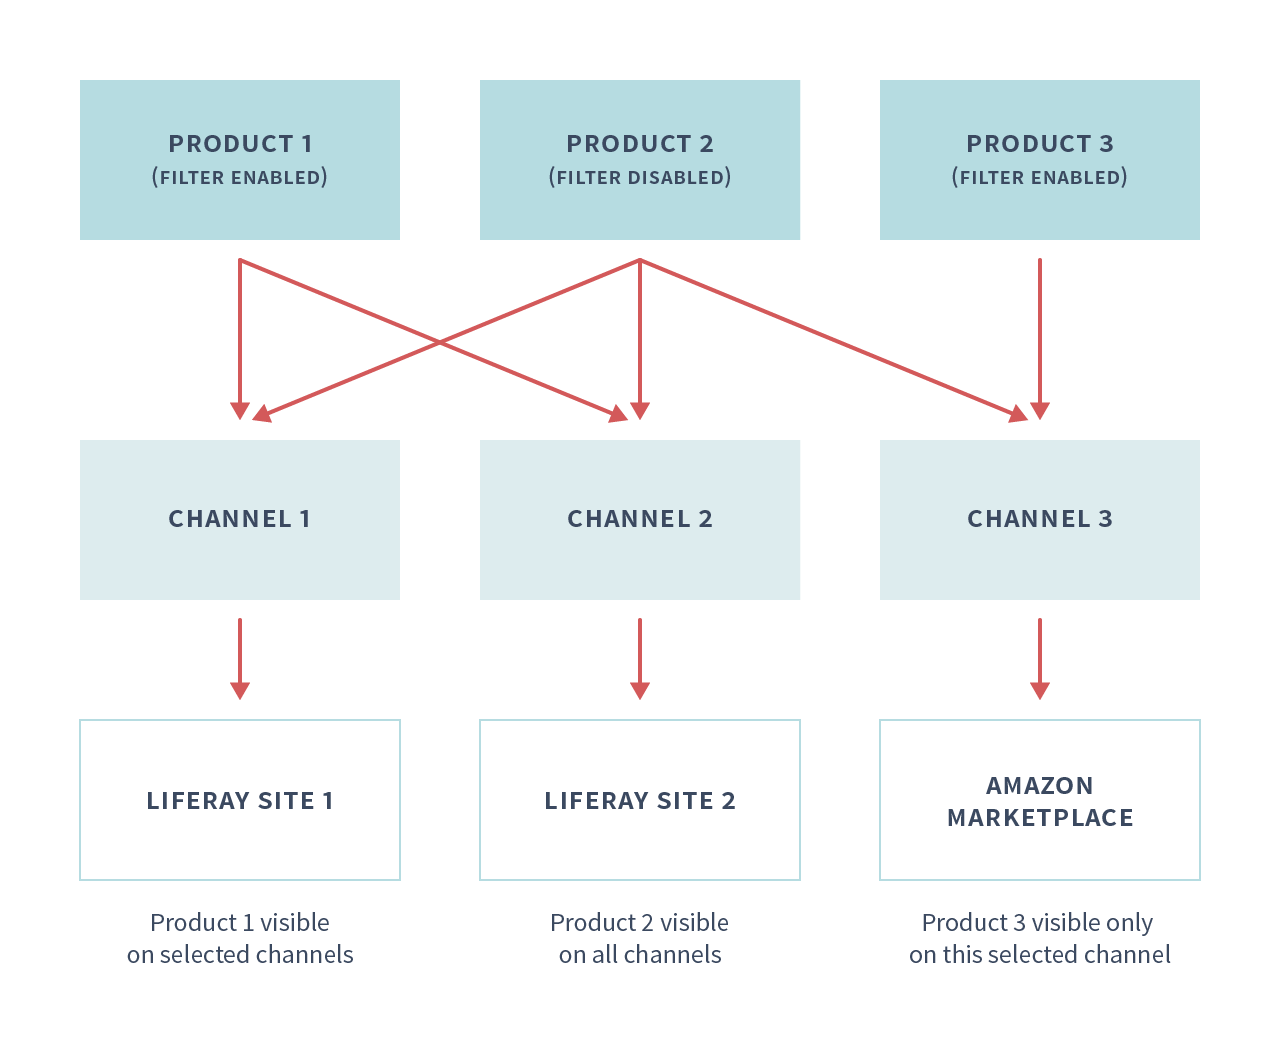
Configuring Product Visibility Using Channels
When you create a product, it is visible across all channels, but you can limit visibility to specific channels.
Consider a multi-brand scenario where multiple brands share the same products. Here, each site has a different brand experience.
Filtering Products By Channel
These instructions assume you have products in your catalog, and two or more channels.
Open the Global Menu (
 ) and navigate to Commerce → Products.
Select a product.
Go to the Visibility tab.
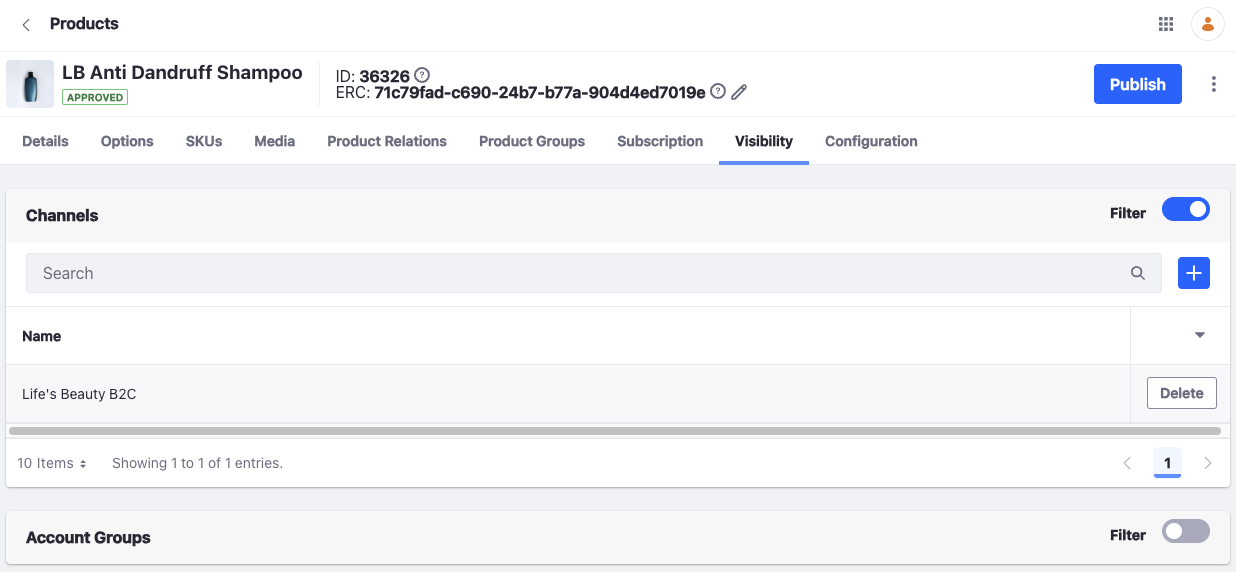
You can filter a product by channels and account groups.
Activate the toggle for channels.
Click Add (
 ).
).Check the desired channel and click Add.
Click Publish.
The channel is now associated with the product.
Commerce 2.1 and Below
Navigate to the Control Panel → Commerce → Products.
Select a product.
Go to the Visibility tab.
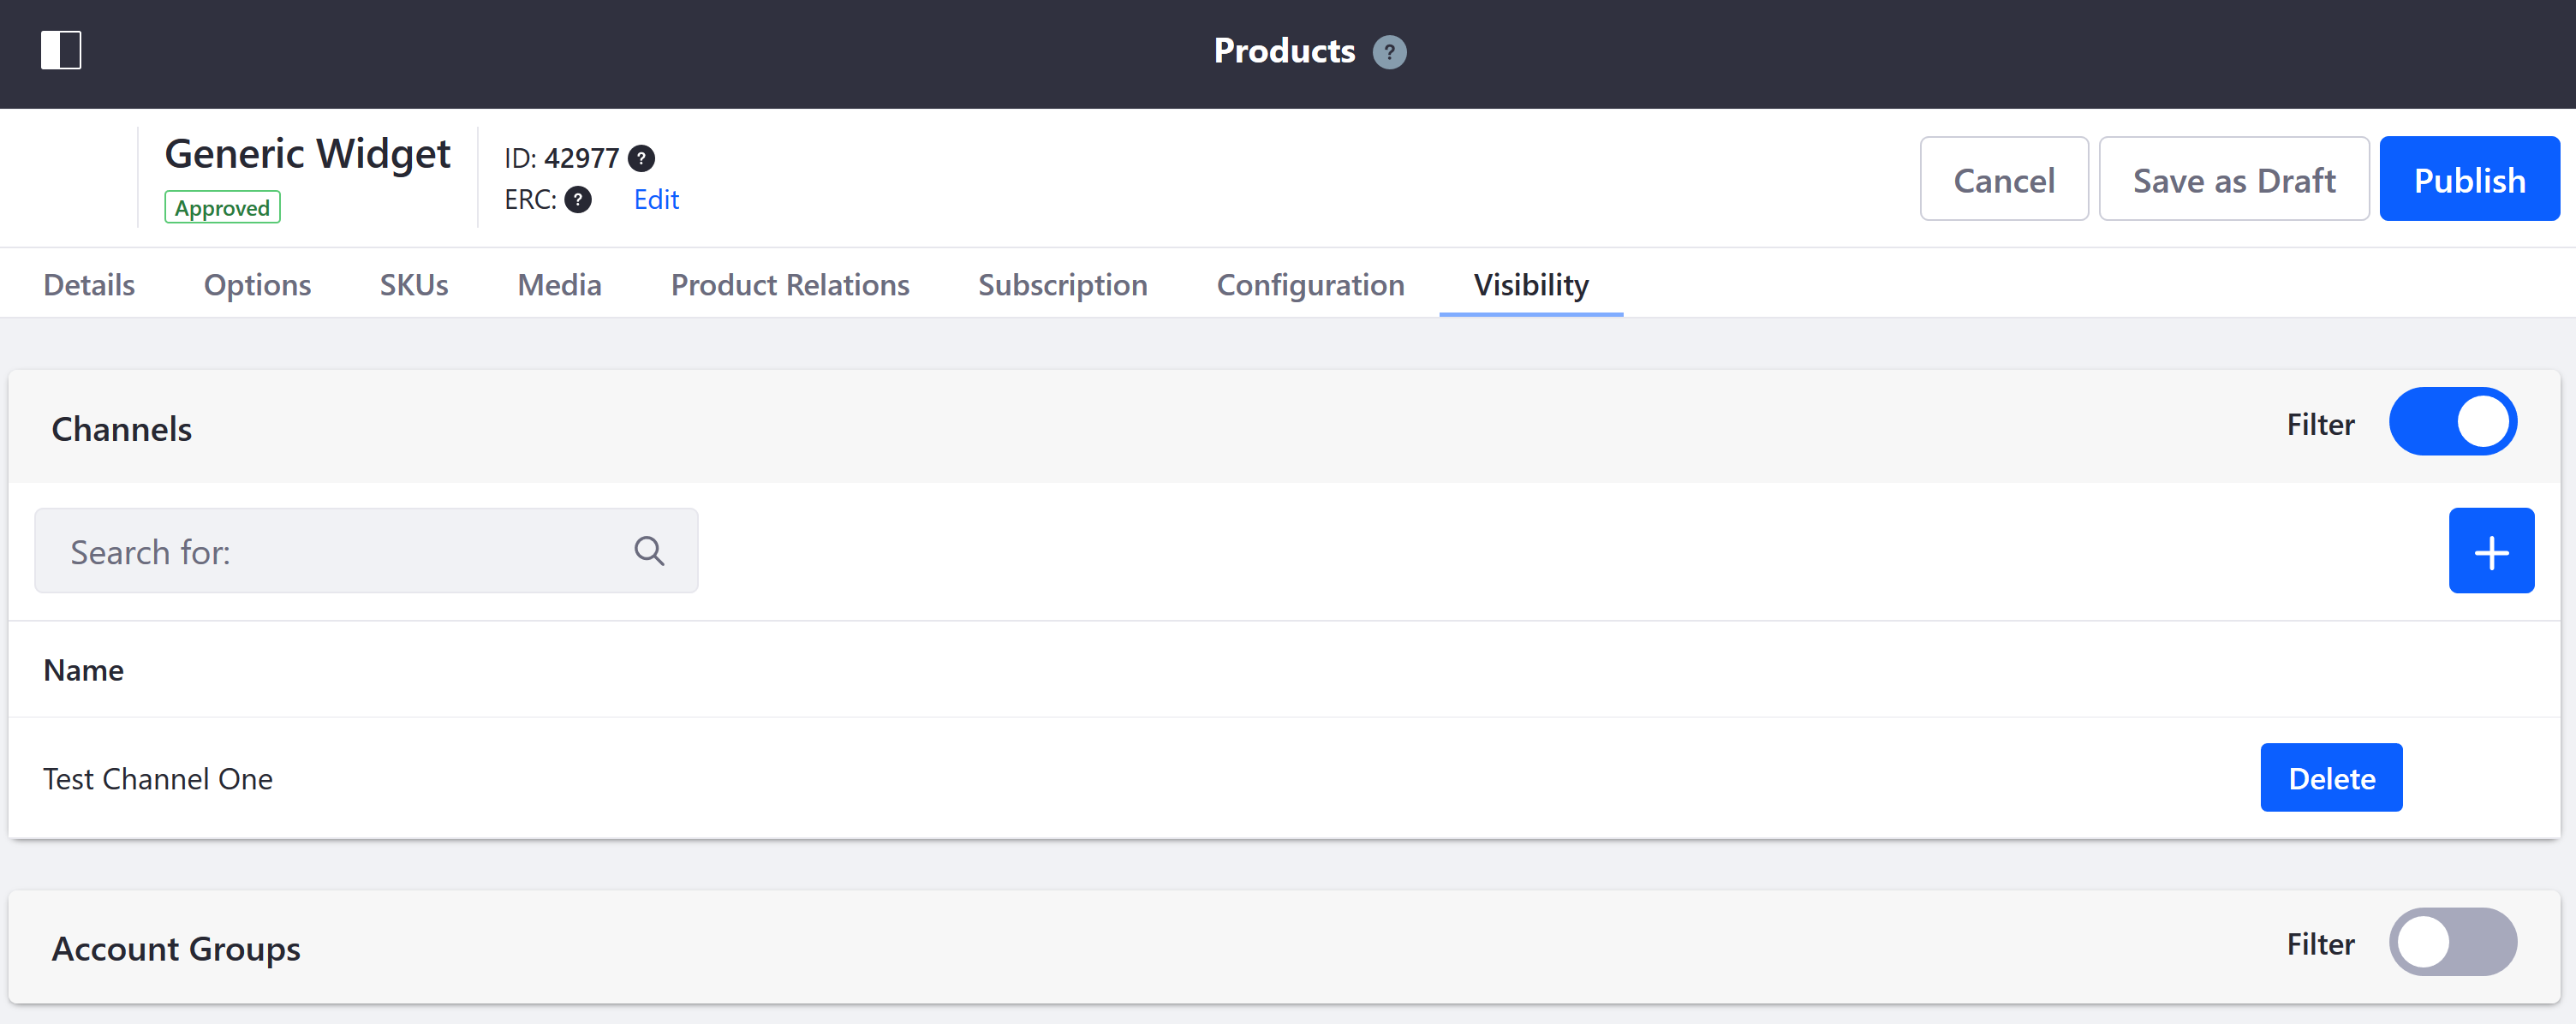
Click Add (
).Click on the desired channel.
Click Add.
The channel is now associated with the product.
Commerce 2.0 and Below
Navigate to Control Panel → Commerce → Products.
Select a product.
Click the Configuration sub-tab.
Select Channels from the sidebar.
Activate the Enable filter channels toggle.
Check the boxes for each channel (in this case, the NA Minium Store) where the product should be visible.
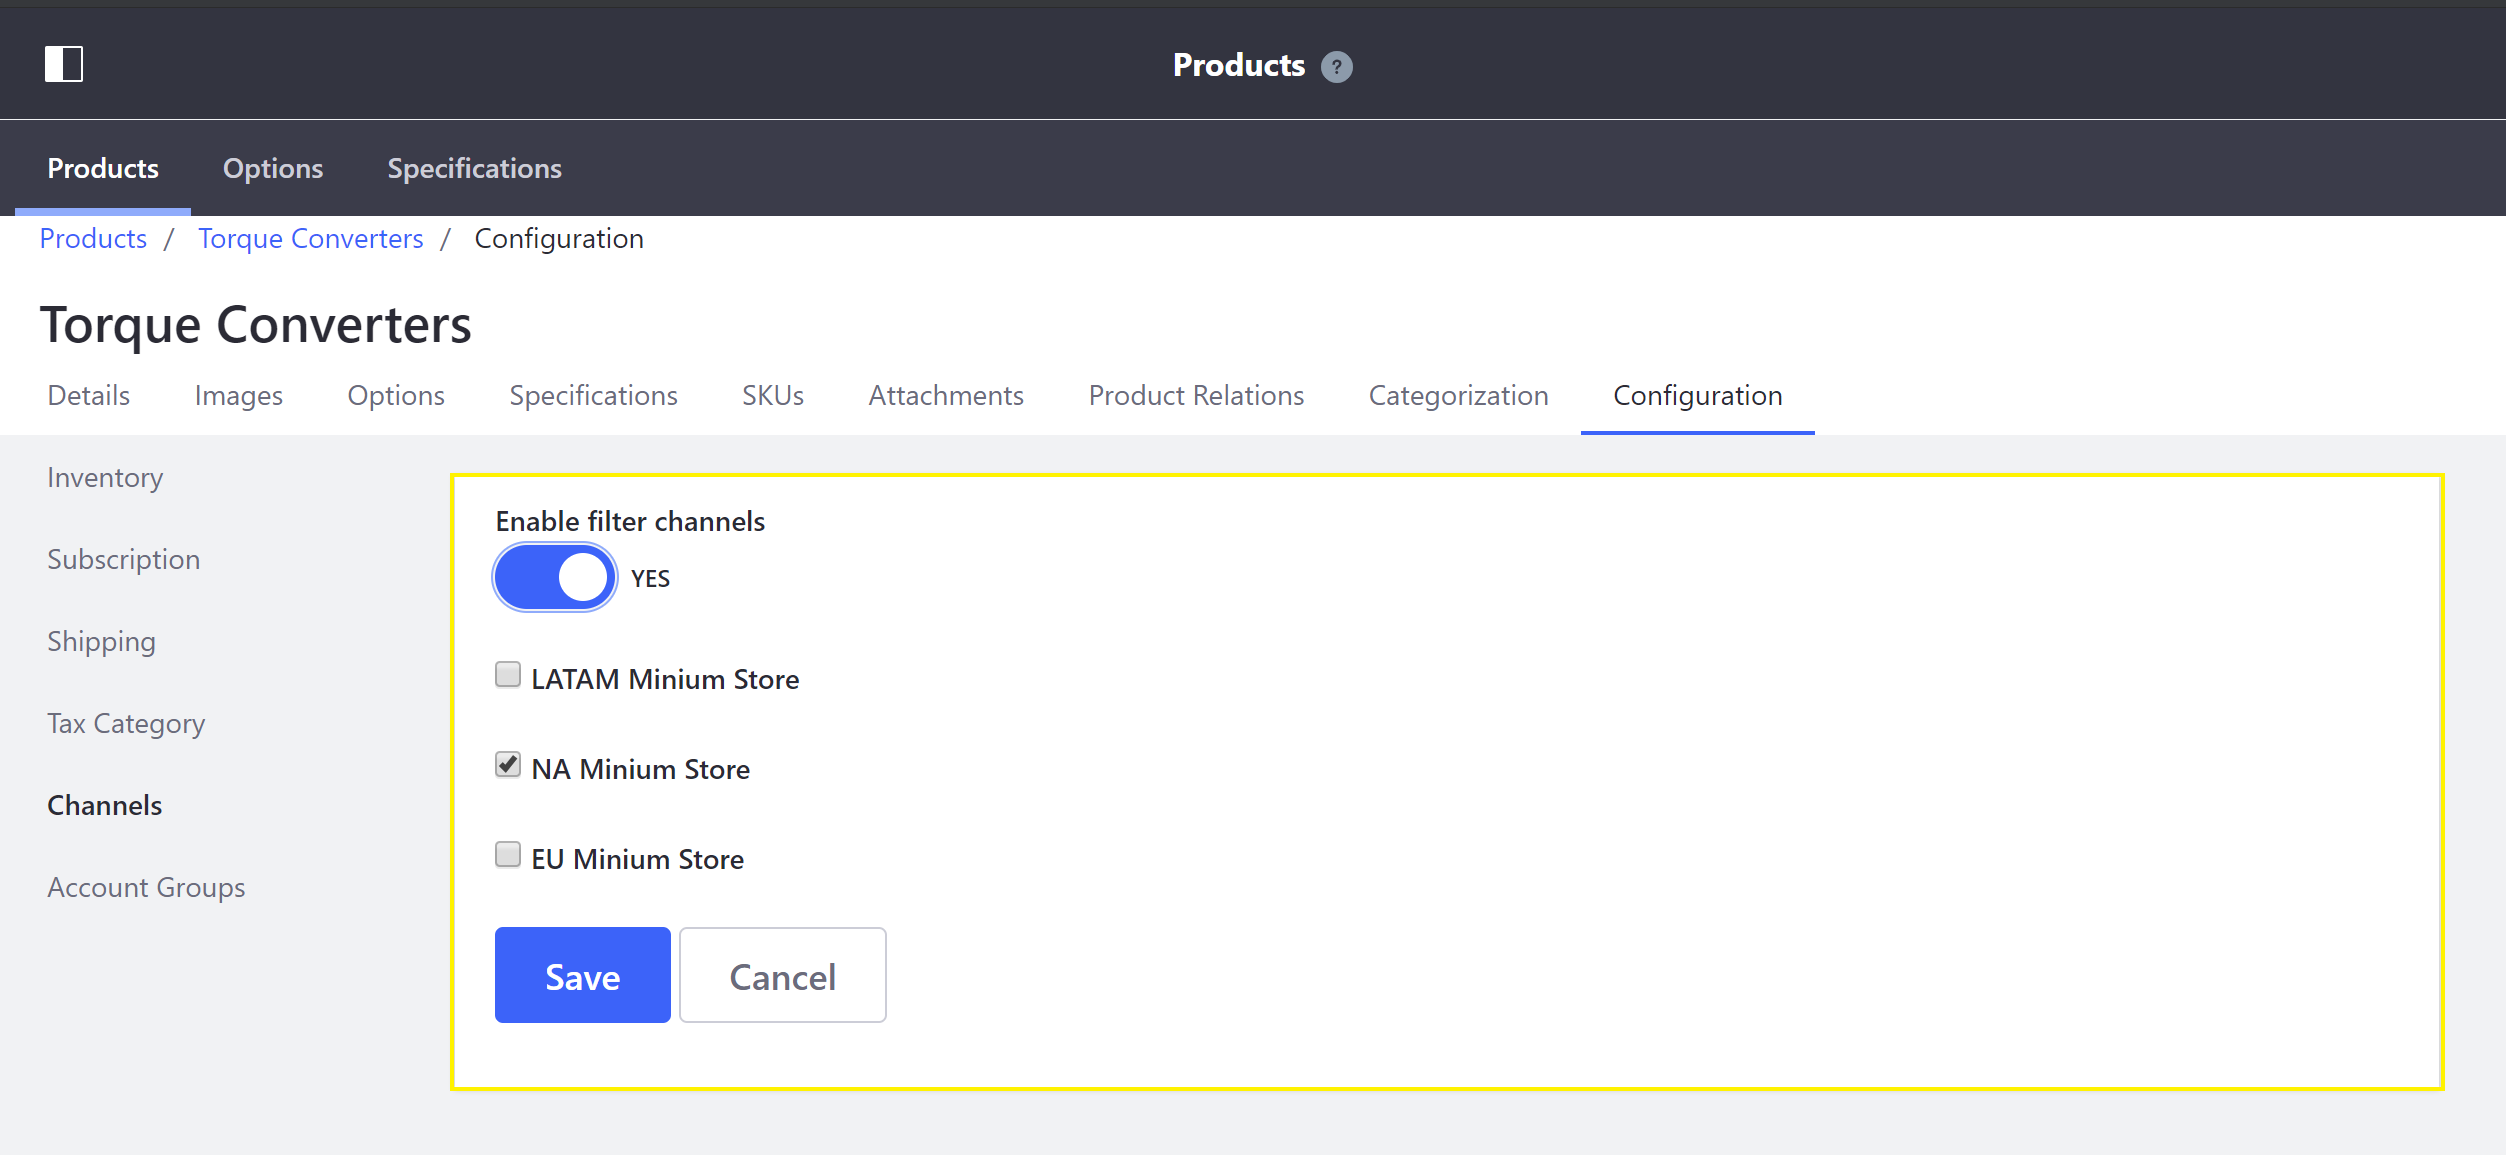
Click Save.
The product only appears in the selected channels.