Completely Custom Configuration
A configuration UI is generated automatically when you create a configuration interface. But in some cases you want a completely custom UI for your configuration. For example, you plan to handle the configuration programmatically instead of using Liferay’s Configuration Admin. Or maybe you want the flexibility of creating a completely custom UI. Here’s how to do it.
See the Example Project
Start a new Liferay DXP instance by running
docker run -it -m 8g -p 8080:8080 liferay/dxp:2025.q1.6-lts
Sign in to Liferay at http://localhost:8080 using the email address test@liferay.com and the password test. When prompted, change the password to learn.
Then, follow these steps:
-
Download and unzip Completely Custom Configuration.
curl https://resources.learn.liferay.com/examples/liferay-u2g5.zip -Ounzip liferay-u2g5.zip -
From the module root, build and deploy.
./gradlew deploy -Ddeploy.docker.container.id=$(docker ps -lq)NoteThis command is the same as copying the deployed jars to /opt/liferay/osgi/modules on the Docker container.
-
Confirm the deployment in the Liferay Docker container console.
STARTED com.acme.u2g5.web_1.0.0 [1034] -
Verify that the example module is working. Open your browser to
https://localhost:8080. -
Navigate to Control Panel → Configuration → System Settings → Third Party. Click U2G5 Configuration.
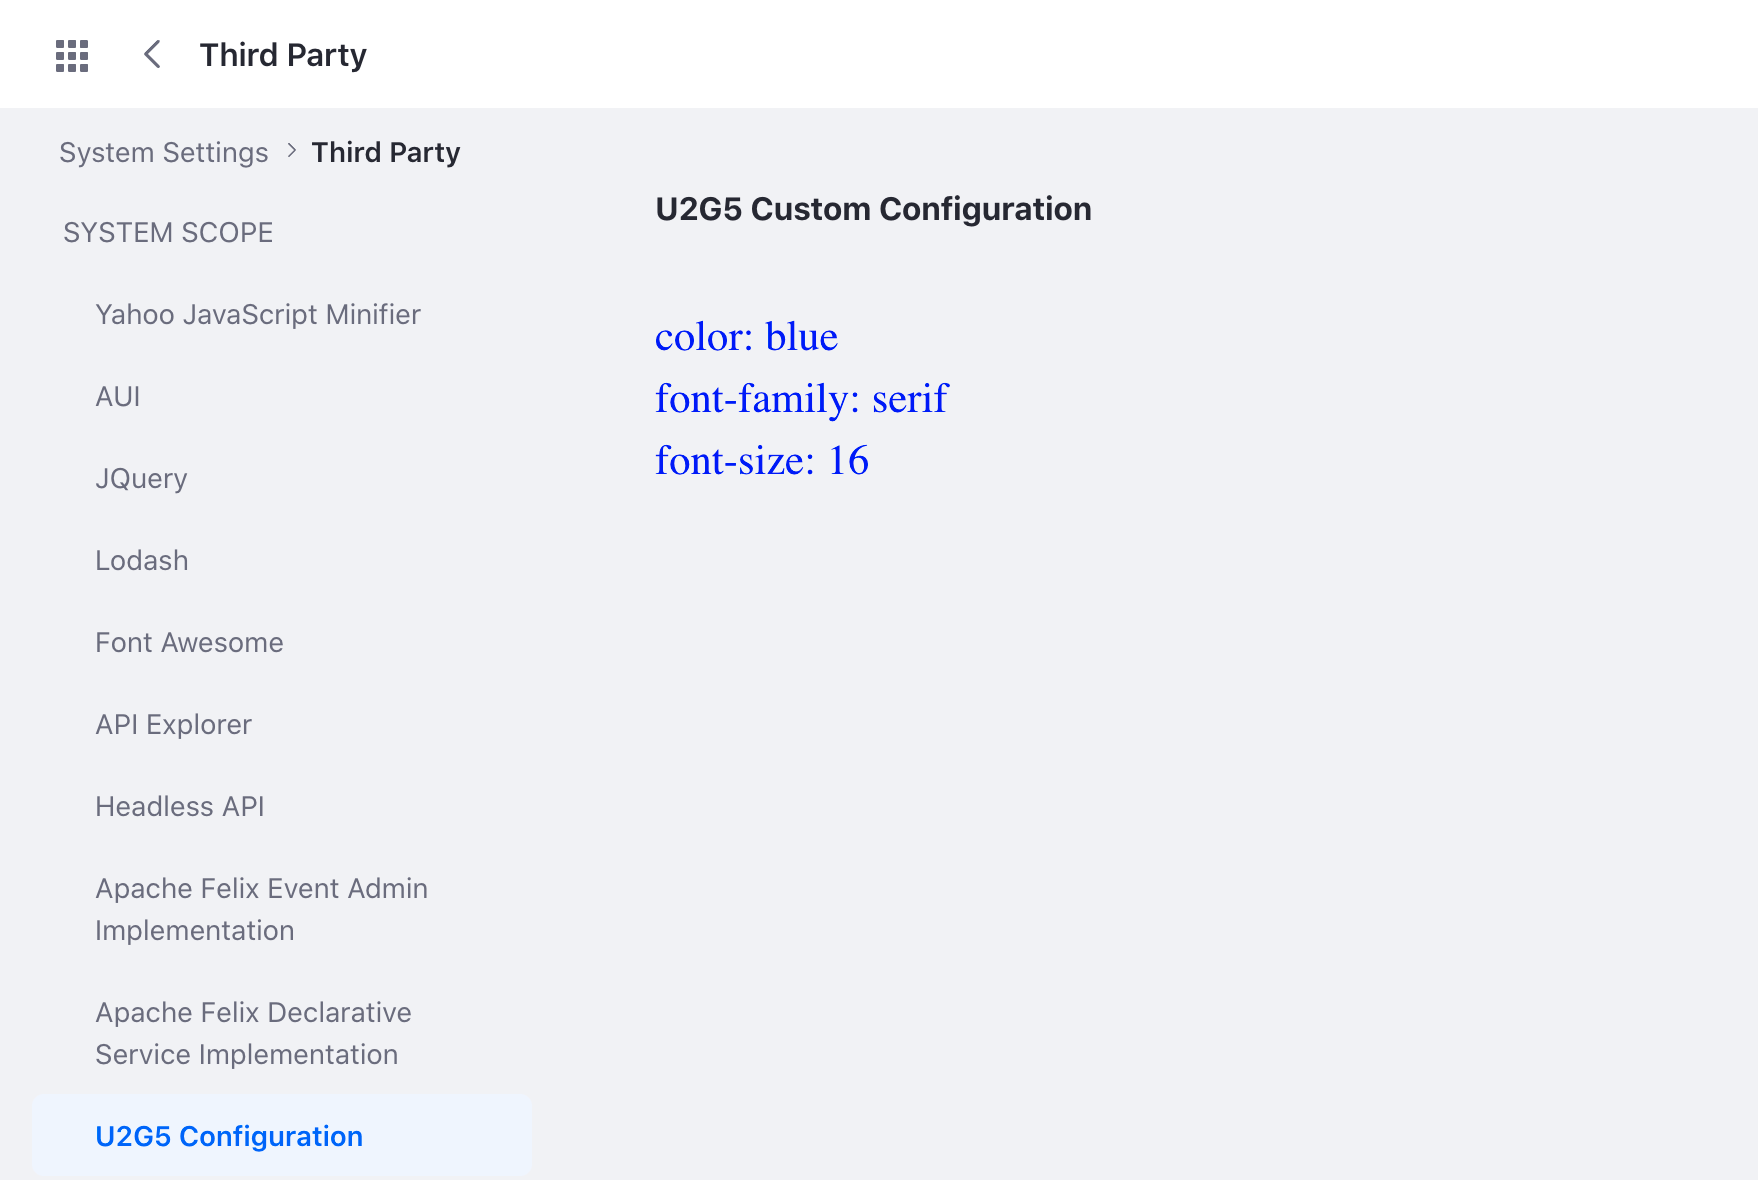
Note that this view is delivered by a custom JSP file.
Create the Configuration Interface
Define the configurable attributes in the configuration interface. The sample project has three configurable attributes: fontColor, fontFamily, and fontSize.
@ExtendedObjectClassDefinition(
	category = "u2g5", generateUI = false,
	scope = ExtendedObjectClassDefinition.Scope.SYSTEM
)
@Meta.OCD(
	id = "com.acme.u2g5.web.internal.configuration.U2G5WebConfiguration",
	localization = "content/Language", name = "u2g5-configuration-name"
)
public interface U2G5WebConfiguration {

	@Meta.AD(deflt = "blue", required = false)
	public String fontColor();

	@Meta.AD(deflt = "serif", required = false)
	public String fontFamily();

	@Meta.AD(deflt = "16", required = false)
	public int fontSize();

}
Note that under the @ExtendedObjectClassDefinition annotation, generateUI is set to false. This excludes the configuration UI from being auto-generated.
A ConfigurationBeanDeclaration is required for Liferay versions before DXP 7.4 U51 or Portal 7.4 GA51. See ConfigurationBeanDeclaration with Previous Versions of Liferay.
Implement the Configuration Screen
-
Declare the class as an implementation of
ConfigurationScreenwith the@Componentannotation.@Component(service = ConfigurationScreen.class) -
Set the category key, the configuration entry’s key, and its localized name. In the sample project, the category key is set to
third-partyin System Settings. The string value for the configuration’s name is set by the language key in the bundle’sLanguage.propertiesfile.
@Override
public String getCategoryKey() {
	return "third-party";
}

@Override
public String getKey() {
	return "u2g5-configuration-name";
}

@Override
public String getName(Locale locale) {
	return LanguageUtil.get(
		ResourceBundleUtil.getBundle(locale, U2G5ConfigurationScreen.class),
		"u2g5-configuration-name");
}
- For this example, the configuration scope is set to
system. To learn more, see Scoping Configurations.
@Override
public String getScope() {
	return "system";
}
- The
render()method usesConfigurationProviderto get the configuration. The servlet context provides access to the request dispatcher, which allows the custom JSP to read the configuration.
@Override
public void render(
		HttpServletRequest httpServletRequest,
		HttpServletResponse httpServletResponse)
	throws IOException {

	try {
		RequestDispatcher requestDispatcher =
			_servletContext.getRequestDispatcher("/u2g5.jsp");

		httpServletRequest.setAttribute(
			U2G5WebConfiguration.class.getName(),
			_configurationProvider.getSystemConfiguration(
				U2G5WebConfiguration.class));

		requestDispatcher.include(httpServletRequest, httpServletResponse);
	}
	catch (Exception exception) {
		throw new IOException("Unable to render /u2g5.jsp", exception);
	}
}
- Make sure to use the
@Referenceannotation to define the module’s symbolic name.
@Reference(
	target = "(osgi.web.symbolicname=com.acme.u2g5.web)", unbind = "-"
)
Add the Web-ContextPath
Specify your bundle’s Web-ContextPath in the bnd.bnd file. For example, the sample project has Web-ContextPath: /u2g5-web in the Bnd file. This is what registers the ServletContext object in the Configuration Screen file. Note that a servlet context is created automatically for portlets, but since this sample doesn’t have a portlet, you must add this line to the Bnd file.
Create a Custom JSP
-
Import the configuration interface to the JSP.
<%@ page import="com.acme.u2g5.web.internal.configuration.U2G5WebConfiguration" %> -
Access the configuration values from the request object.
<% U2G5WebConfiguration u2g5WebConfiguration = (U2G5WebConfiguration)request.getAttribute(U2G5WebConfiguration.class.getName()); %> -
The attributes
fontColor(),fontFamily(),fontSize()can now be used in the JSP.
This sample project demonstrates a basic example of how to use ConfigurationScreen to read and display configuration values in a custom JSP. In your application, write your own code and create a completely custom configuration UI to meet your needs.