Introduction to the Admin Account
The Admin User account is created by default in any new installation of Liferay DXP and has full permissions to modify every facet of a Liferay DXP instance. The Admin User can create, modify, and delete Sites, Users, pages, and perform all Site administrative tasks.
Accessing Liferay DXP as the Admin User
-
Open a browser to
http://localhost:8080. -
Click the Sign In link.
 Note
NoteIf a Liferay DXP bundle is being used, you may be presented with the Setup Wizard. Follow the on-screen instructions to configure your Admin user.
-
Enter the default admin credentials to log in.
- Email address:
test@liferay.com - Password:
test
Note, if you used the setup wizard and set a different admin user email, enter that email address instead. The default password is still
test. - Email address:
-
Upon first sign in, you are required to change your password. Enter a new password (e.g. learn) and click Save.
In a production environment, you should not use the default admin account. Instead, create admin accounts specific to your business. See the steps below.
Configuring the Admin User
Changing the Login Password
-
Click the User Avatar and navigate to Account Settings → Password.
-
Enter your Current Password and provide a new password.

Changing Account Information
-
Click User Avatar → Account Settings.

-
In the Information tab, change or add User information as needed.

Signing Out
To log out of your account:
-
Click User Avatar → Sign Out.

Creating a New Admin User
Now that you know how to log in, we strongly recommend that you create a new admin account for everyday use.
To create a new admin account follow these steps:
-
See configuring mail to set up Liferay with your email service. Liferay sends an email to the new user’s email address upon account creation.
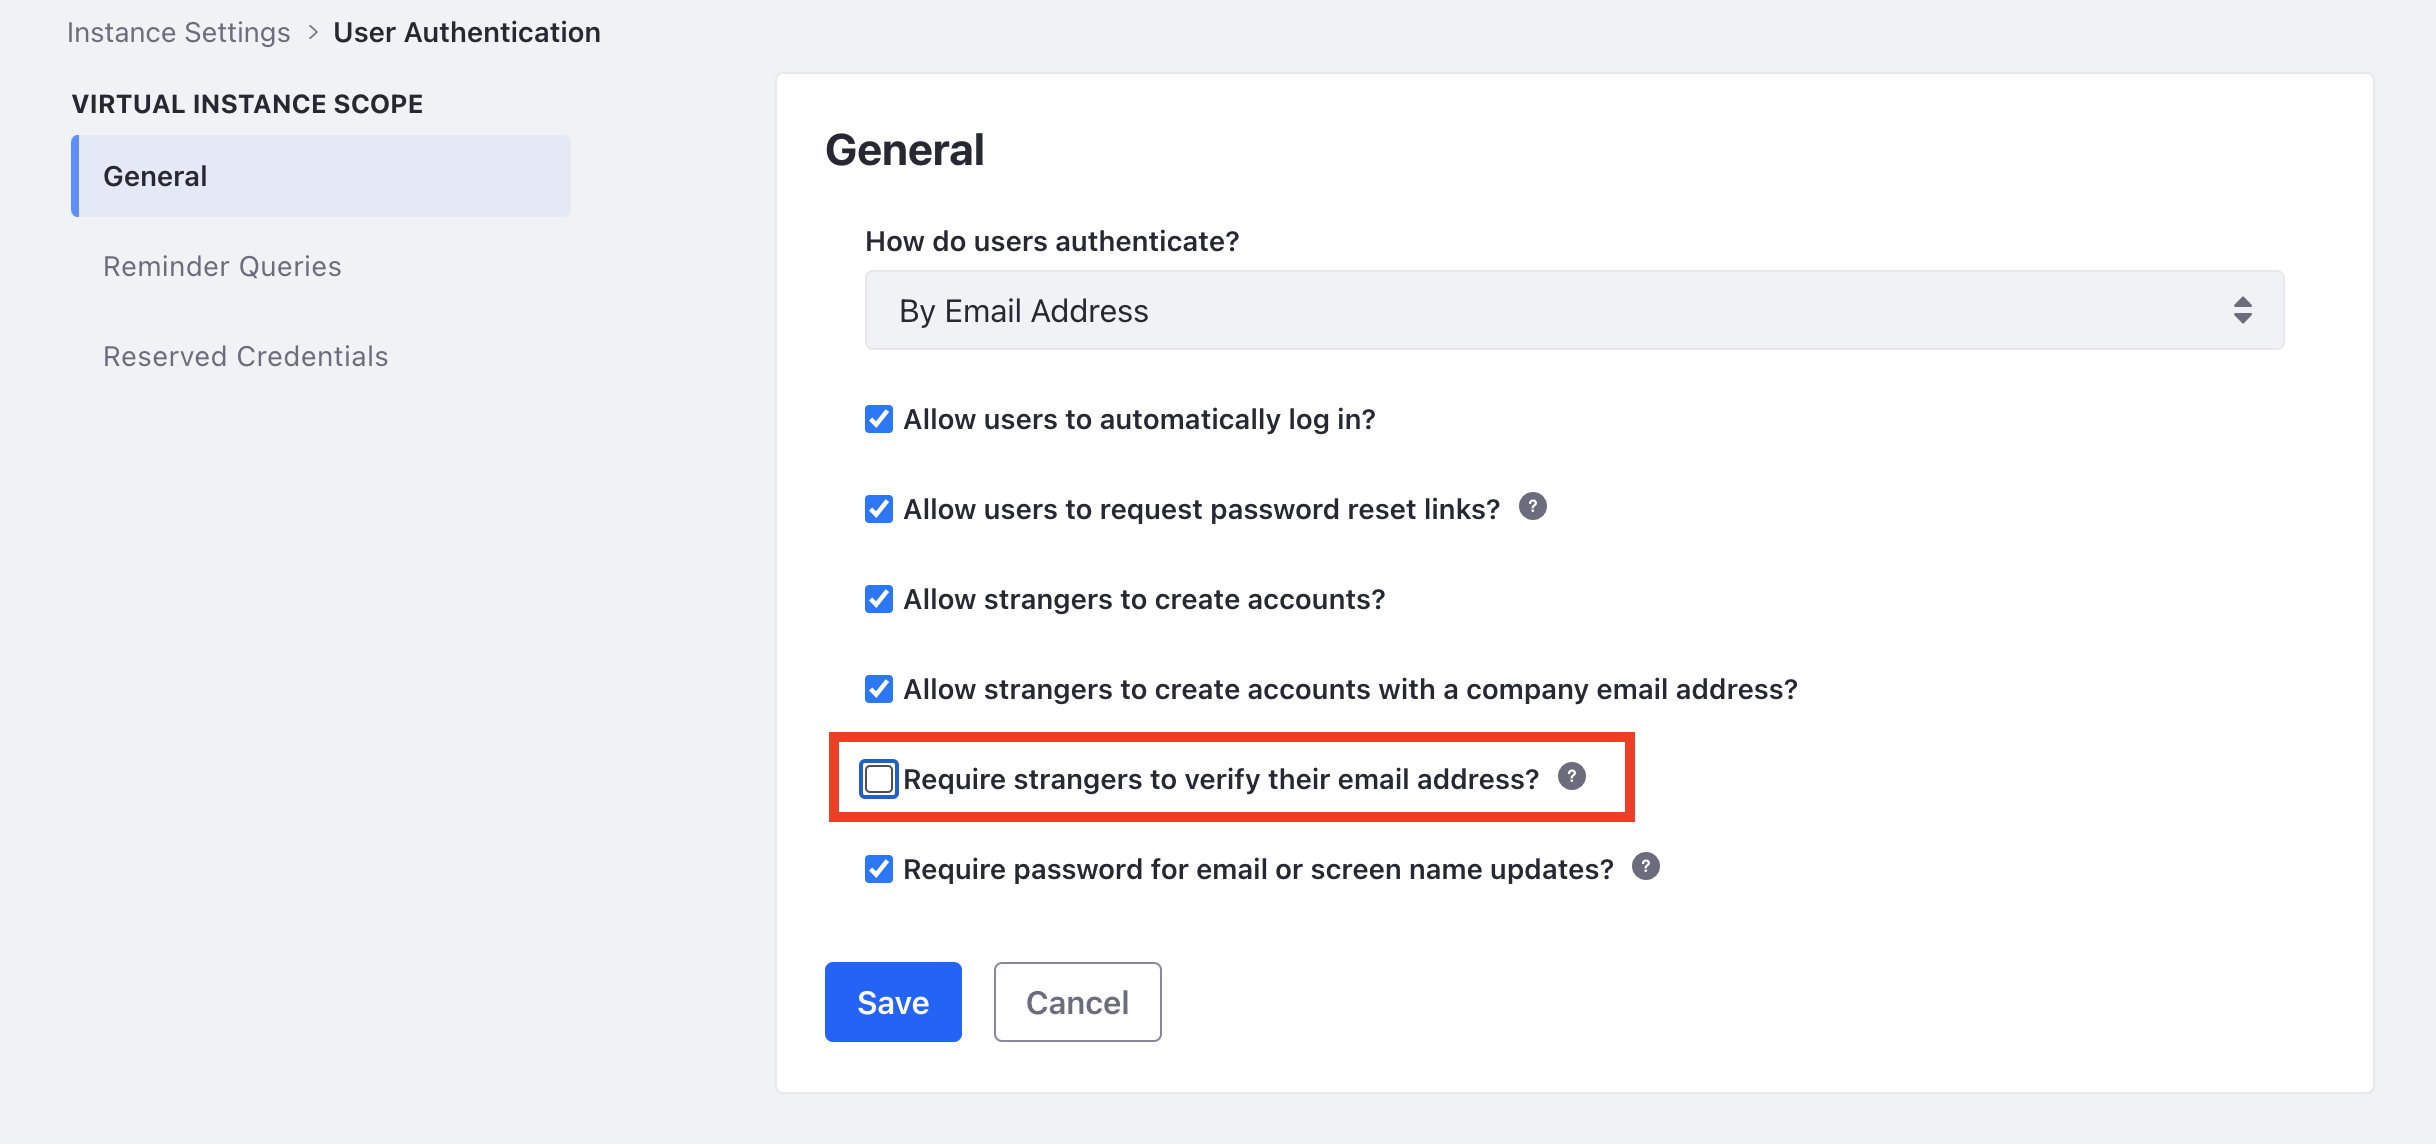
To skip this step (for example, if you are just testing Liferay), disable the feature to require strangers to verify their email address. Navigate to Control Panel → Instance Settings → User Authentication. Uncheck the box for Require strangers to verify their email address?. Note, this is not recommended to be disabled for a production environment.
-
Create a new User. See Adding Users to learn how.
-
Click the Roles link in the left navigation pane (on the Edit User page under General).

-
Click Select beside Regular Roles.
-
Select the Administrator Role from the list (click Choose). The dialog box disappears and the Role is added to the list of Roles associated with your account. Scroll to the bottom and click Save.
-
(Optional) If you did not configure mail in the step above, set an initial password for this new user. Click the Password link in the left navigation pane. Enter a password for the user, reenter the password, and click Save.
The user is now a portal administrator. Log out and then log back in with your new user account.
What’s Next
Continue our Getting Started walkthrough by familiarizing yourself with the DXP Global Menu.
Learn more about configuring how users log into DXP.