Deploying Changes via the CLI Tool
With the CLI tool, you can directly deploy local project changes without triggering a Jenkins build or using the Liferay Cloud Console. This tutorial walks through the process of adding a portal property to the Liferay service and deploying it to the dev using the CLI tool.
To get started, you first need the CLI tool installed and ready to use, as well as a local copy of your project’s Git repository (e.g., GitHub, Bitbucket, GitLab).
Although the CLI tool provides a quick way to deploy changes to your project, it’s best practice to use the CI service and Liferay Cloud console for the majority of deployments. See Deploying Changes via the Liferay Cloud Console to learn how.
Otherwise, you can skip this step and begin the deployment process:
- Adding a Portal Property to the Liferay Service
- Deploying Your New Build via the CLI Tool
- Verifying Your Sample Deployment
Adding a Portal Property to the Liferay Service
Begin the deployment life cycle by adding a portal property to the dev environment’s Liferay service and committing your changes:
-
Ensure your local master branch is up-to-date with the latest version of your project’s repository.
-
Create a new working branch based on your up-to-date master branch.
git checkout -b example-cli-deployment-branch -
Go to
<project>\liferay\configs\dev\, and add the following property to theportal-env.propertiesfile:web.server.display.node=true -
Add and commit your changes with the following commands:
git add .git commit -m "Test - Adding Portal Property"
Deploying Your New Build via the CLI Tool
Once you’ve committed your changes, follow these steps to create a build of your Liferay service with Gradle, and then deploy it to your dev environment using the CLI tool:
-
Open your terminal, and navigate to the Liferay service folder.
cd <project-folder>/liferay -
Run
lcp login. If you’re not already logged in, you are prompted to authenticate your credentials via browser. -
Run the following commands in sequence to create a Gradle build for your Liferay service:
./gradlew clean deploy createDockerfileYou must first create a Gradle build of the Liferay service before running the
lcp deploycommand. No local build process is required for other services, so you can directly deploy backup, CI, database, search, and webserver services. -
Copy the
LCP.jsonfile into the Docker directory before deploying the build.cp LCP.json build/dockercd build/dockerYou must copy the
LCP.jsonfile into the Docker directory, because thelcp deploycommand must be run from a directory with the service’sLCP.jsonfile when deploying that service. -
Run the following command to deploy the build to your
devenvironment:lcp deploy --project=<project-name> --environment=dev
During this process, your new build is added to your project and deployed to the
devenvironment. Now, the Liferay service should restart with the new portal property.
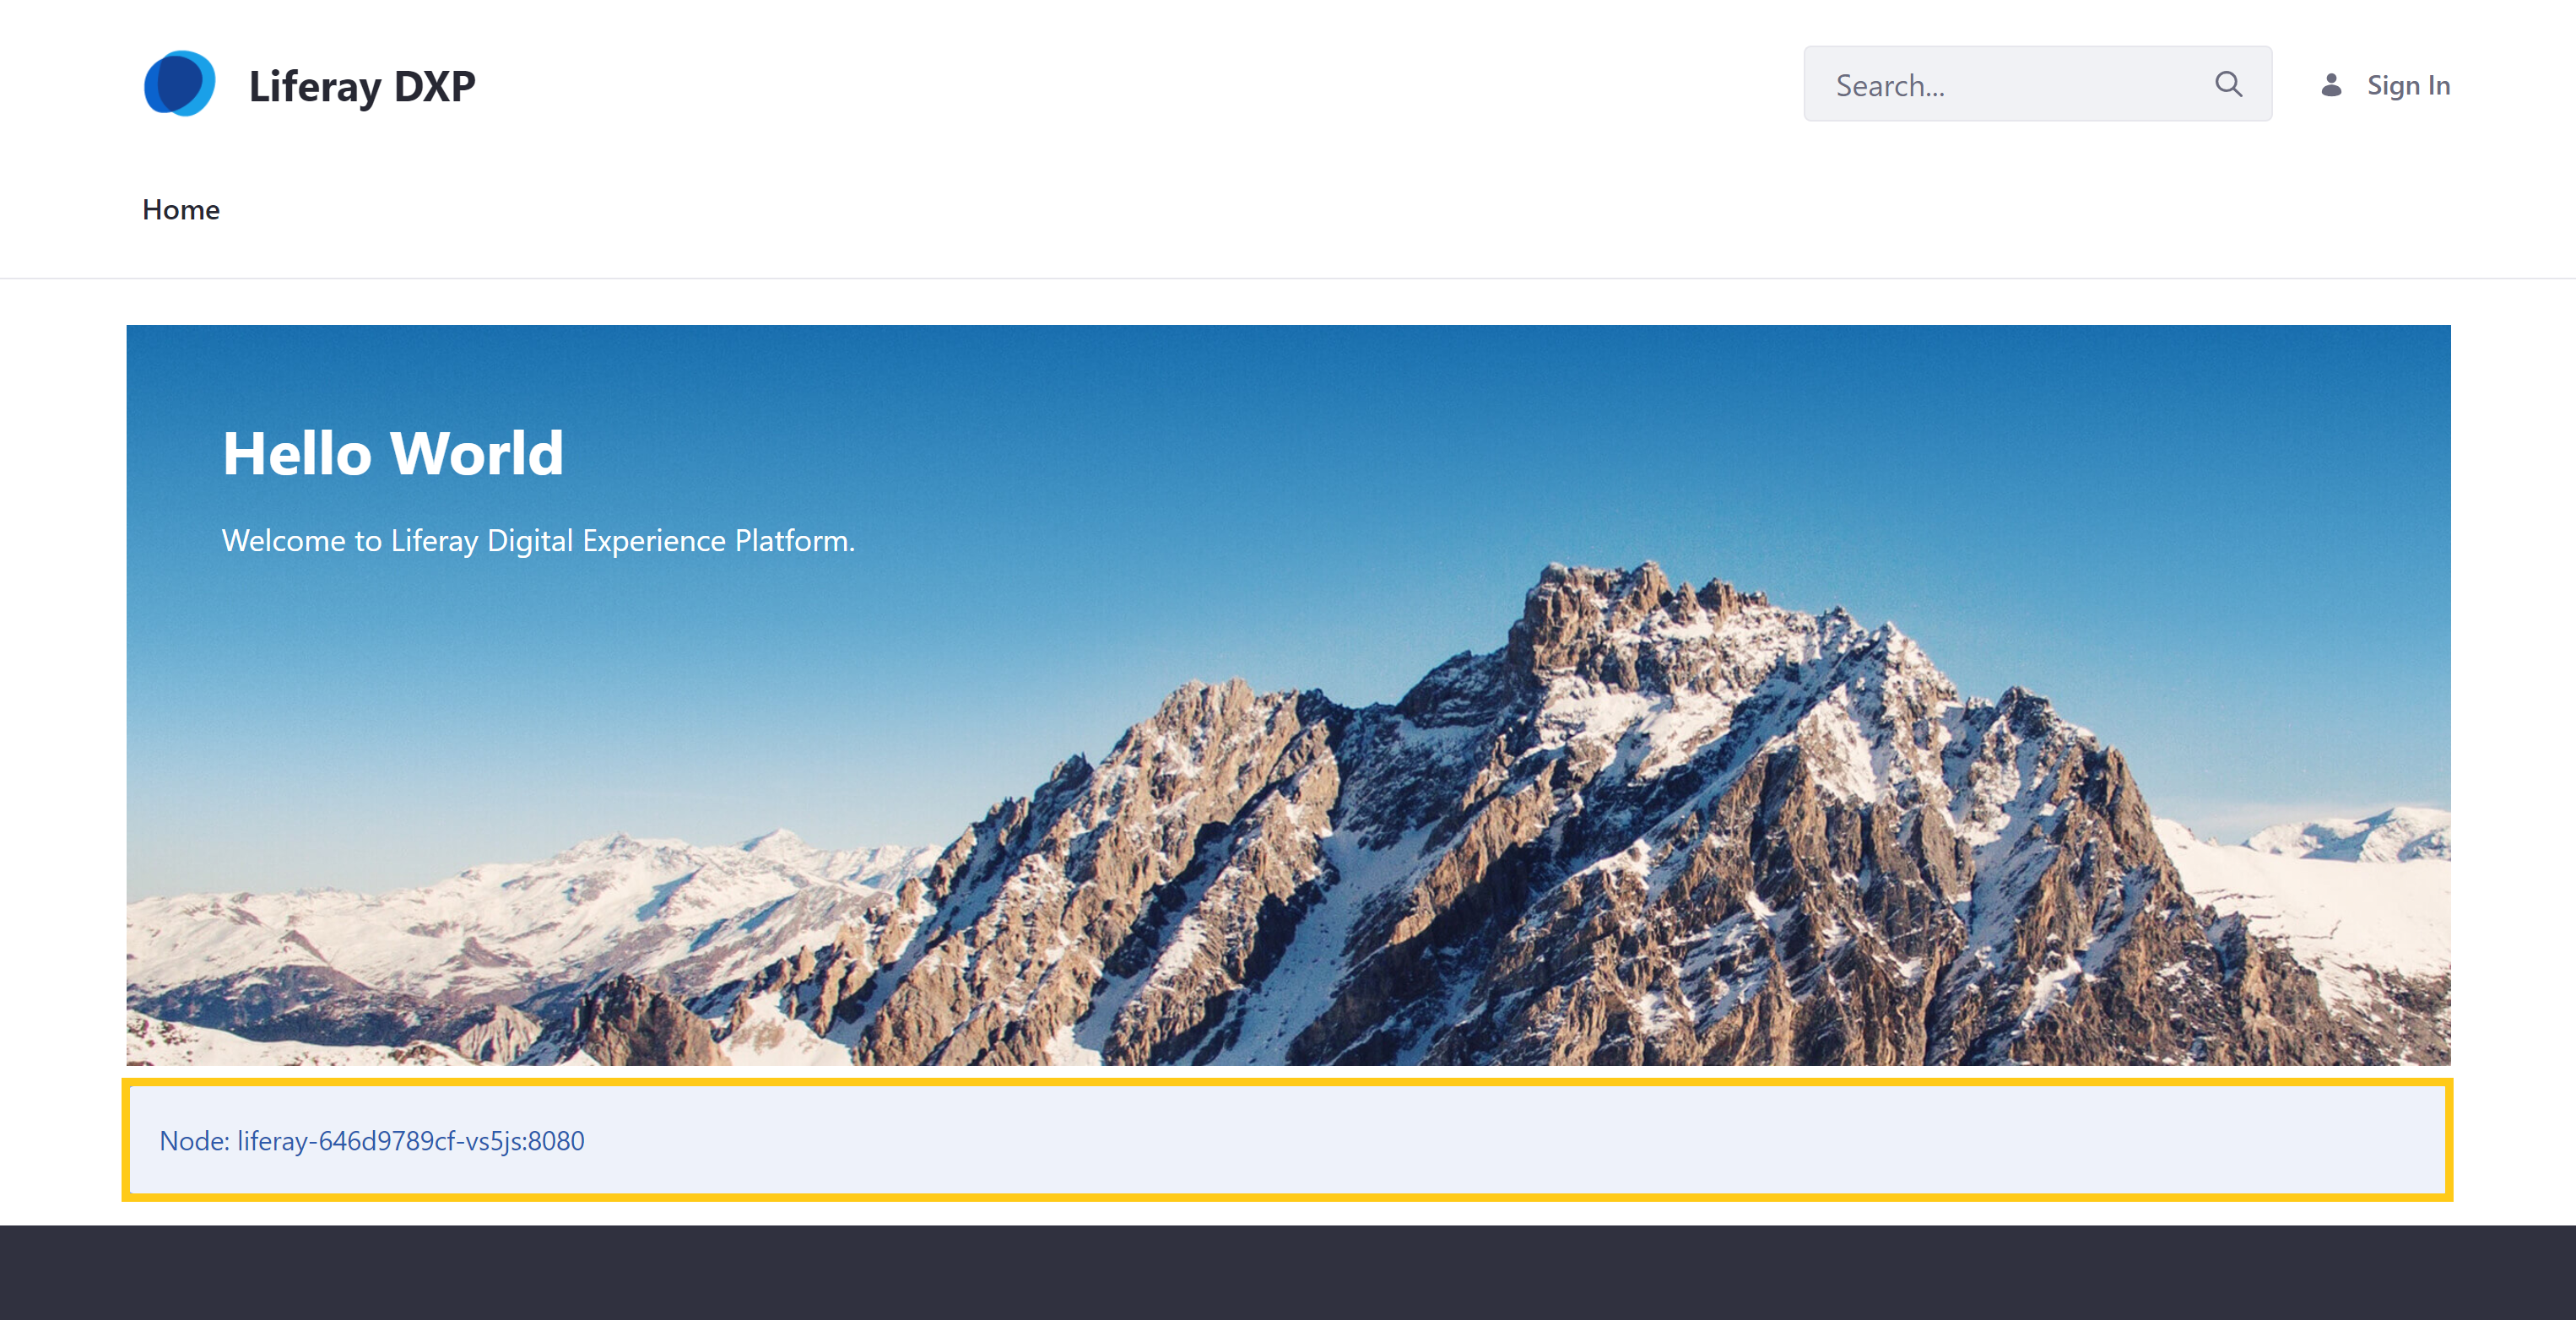
Verifying Your Sample Deployment
Once your build has successfully deployed and your dev environment’s Liferay service is Ready, follow these steps to verify your changes:
-
Navigate to your project’s
devenvironment. -
Go to the Web Server service’s page, and click on its URL to access the
devenvironment’s Liferay instance:https://webserver-<project-name>-dev.lfr.cloud/.
-
Verify the web server node appears at the bottom of the Home Page.