Auto-Tagging Images
Once asset auto-tagging has been enabled, you can also enable image auto-tagging. Image auto-tagging tags images uploaded to the Documents and Media Library.
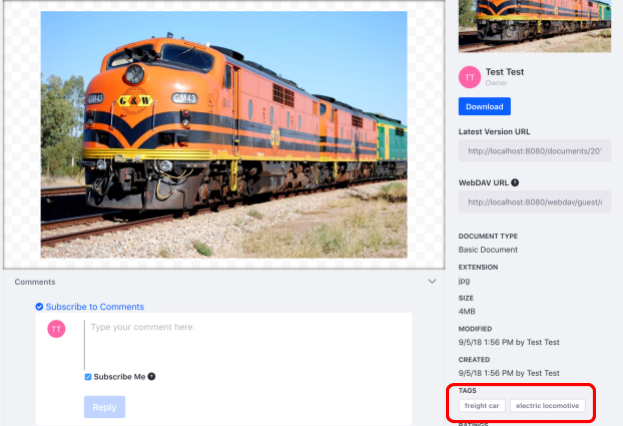
Currently, tags applied automatically are English only.
By default, image auto-tagging is disabled by default. In addition to enabling auto-tagging in DXP, you must also configure an image tagging provider. Three providers are available:
TensorFlow: An open-source library that provides machine learning capabilities. TensorFlow image auto-tagging in DXP is based on TensorFlow’s
LabelImagesample for Java, and uses theInception5hmodel. Use this with caution, since its accuracy is limited.Google Cloud Vision: Uses the Google Cloud Vision API to automatically tag images.
Microsoft Cognitive Services: Uses Microsoft Cognitive Services to automatically tag images.
Configuring TensorFlow Image Auto-Tagging
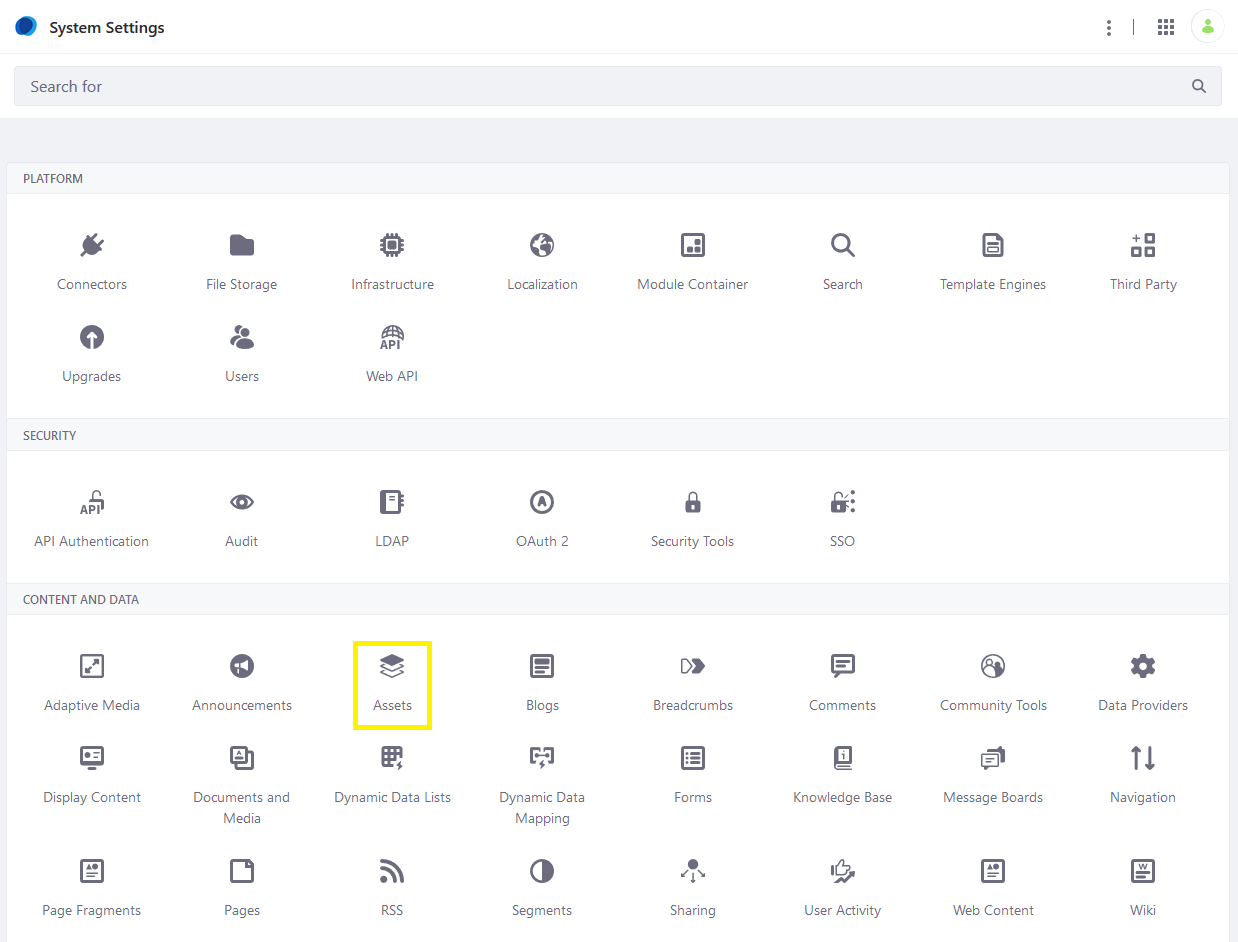
Open the Global Menu and click System Settings under Control Panel.

Click Assets under Content and Data.
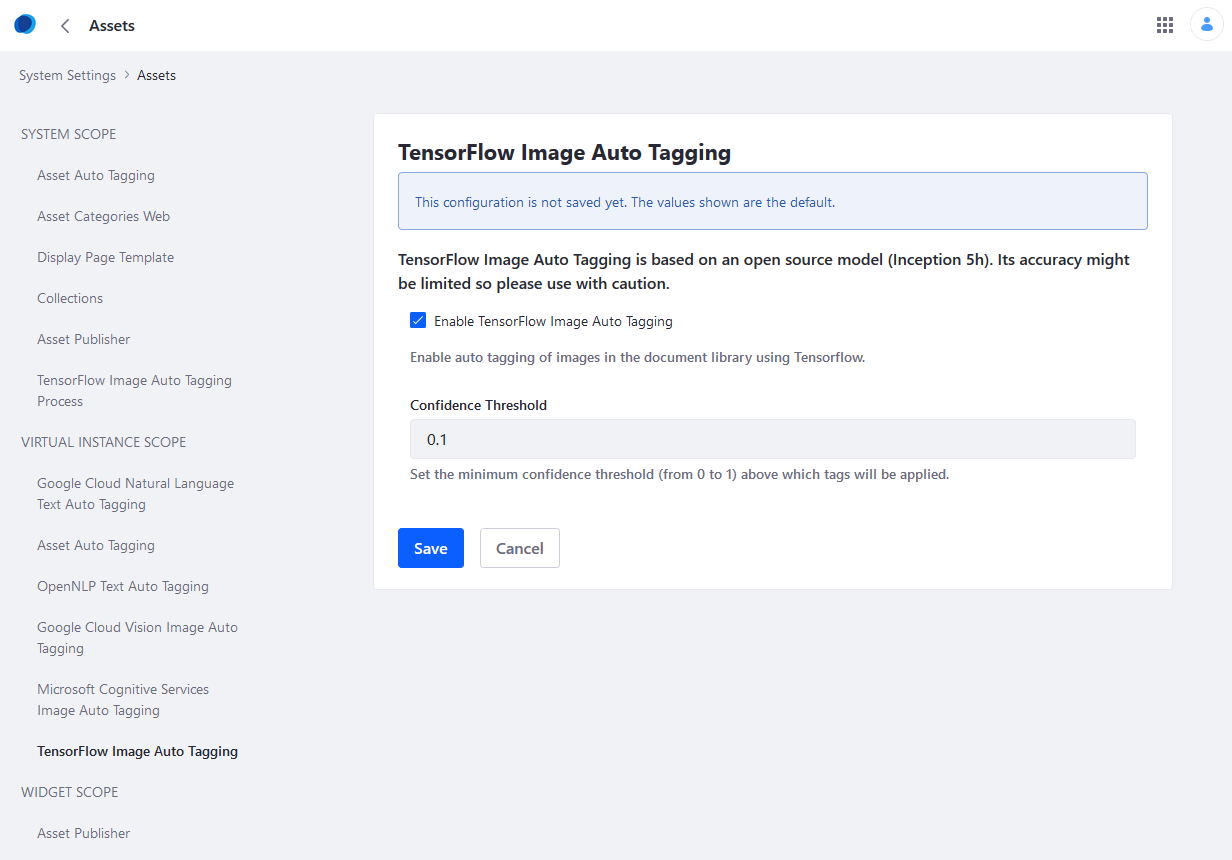
Under VIRTUAL INSTANCE SCOPE, click TensorFlow Image Auto-Tagging.
Fill out the form.
Click Save when finished.
The form asks for this information:
Enable TensorFlow Image Auto-Tagging: Check this box to select whether image auto-tagging is enabled by default in any instance that has asset auto-tagging enabled.
Confidence Threshold: TensorFlow assigns a confidence level between 0 and 1 for each tag, where 1 is the highest confidence and 0 is the lowest. This field sets the minimum confidence level that TensorFlow needs to apply a tag. Higher values yield fewer tags because TensorFlow needs more confidence before it applies a tag. Lower values yield more tags.
Optimizing TensorFlow Auto-Tagging Performance
Open the Global Menu and click System Settings under Control Panel.
Click Assets.
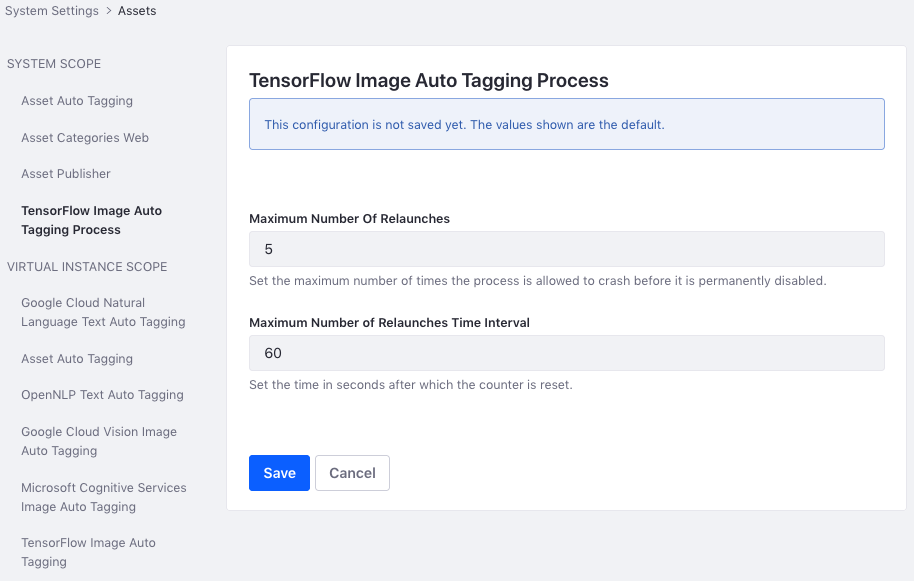
Under SYSTEM SCOPE, click TensorFlow Image Auto-Tagging Process.
Fill out the form.
Click Save to apply the settings.
The form asks for this information:
Maximum Number of Relaunches: The maximum number of times the process is allowed to crash before it is permanently disabled.
Maximum Number of Relaunches Time Interval: The time in seconds after which the counter is reset.
The TensorFlow provider has been configured.
Configuring Google Cloud Vision
Open the Global Menu and click System Settings under Control Panel.
Click Assets.
Under VIRTUAL INSTANCE SCOPE, click Google Cloud Vision Image Auto-Tagging.
Enter your Google Cloud Vision API Key. For more information, see Google’s documentation on API keys.
Check the Enabled box to enable Google Cloud Vision.
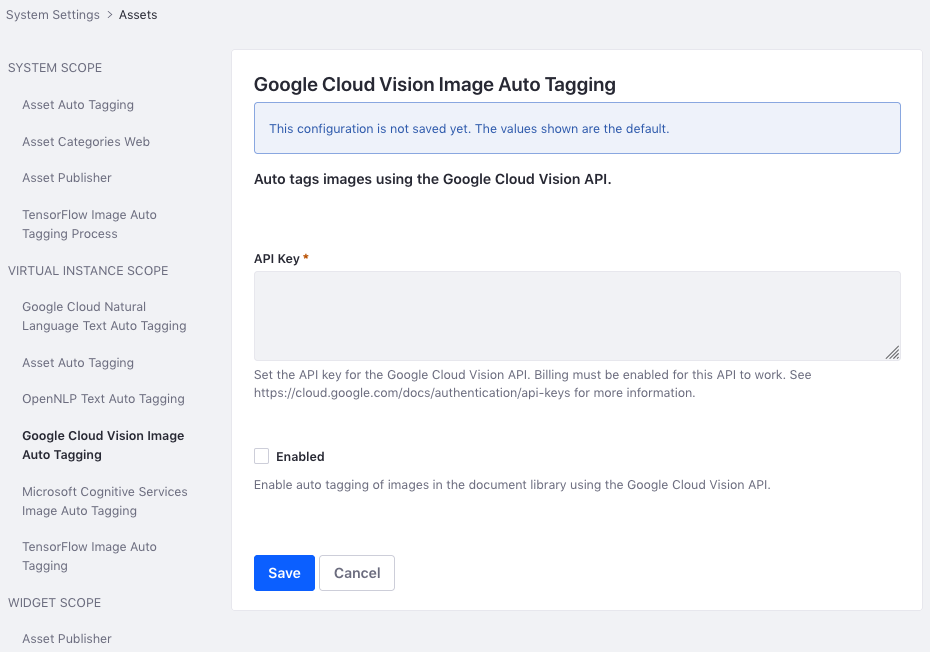
Click Save when finished.
Configuring Microsoft Cognitive Services
Open the Global Menu and click System Settings under Control Panel.
Click Assets
Under VIRTUAL INSTANCE SCOPE, click Microsoft Cognitive Services Image Auto-Tagging.
Fill out the form.
Check the Enabled box.
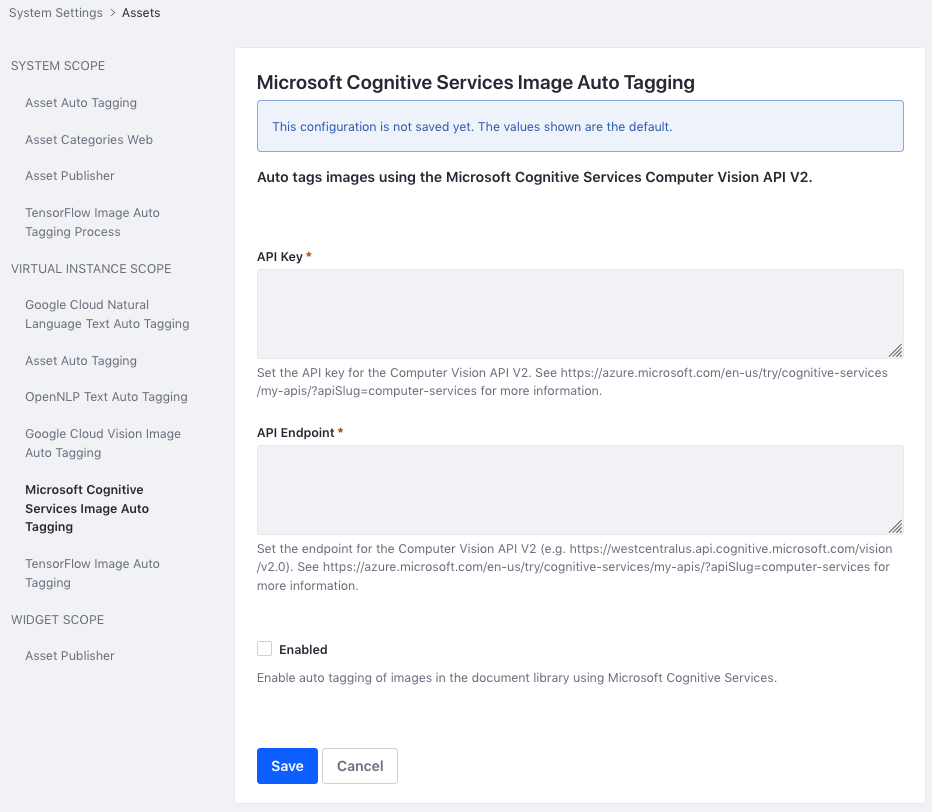
Click Save when finished.
The form asks for this information:
API Key: Your API key for the Computer Vision API V2.
API Endpoint: The endpoint for the Computer Vision API v2.0.
The Microsoft Cognitive Services provider has been configured. For more information, see the Microsoft Cognitive Services documentation.
If you have more than one virtual instance, you can configure each instance individually. Navigate to the Control Panel → Instance Settings. Click Assets then configure the provider there.