Using Fragments to Build Forms
Liferay 7.4 2023.Q3+/GA92+
Liferay includes form fragments for building object forms in content pages. To build a form, add a form container to a content page or page template and map it to a published object. The container automatically populates fragments mapped to each object field. You can organize, remove, or add fragments manually. Once published, end users can create object entries using the form.
You can also create forms with multiple steps by adding form fragments to different sections and using navigation buttons to guide users through each step. See Using Fragments to Build Multi-Step Forms.
To build forms in content pages,
- Place form fragments only in a mapped form container.
- Map every form fragment in the form to an object field to prevent data loss.
- Include fragments in the form container for all mandatory object fields.
- Make mandatory form fragments visible.
- Include a visible submit button in the form container.
When mapping an object to a Form Container fragment, a submit button is generated. You can map its text using mapping settings.
To create a button with link settings for redirection, add type="button" to the button fragment.
By default, Liferay includes the Form Components fragment set, but you can create your own. See Creating Form Fragments for more information.
In addition, form fragments can only be used with custom objects. Therefore, Liferay hides the Form Components fragment set until you have at least one published object. Once published, users with access to the object can view and use the Form Components fragments.
Creating a Form
-
Begin editing a content page or page template.
Display page templates do not support form fragments.
-
(Optional) Design a layout using fragments. See Building Responsive Layouts with Fragments for more information.
-
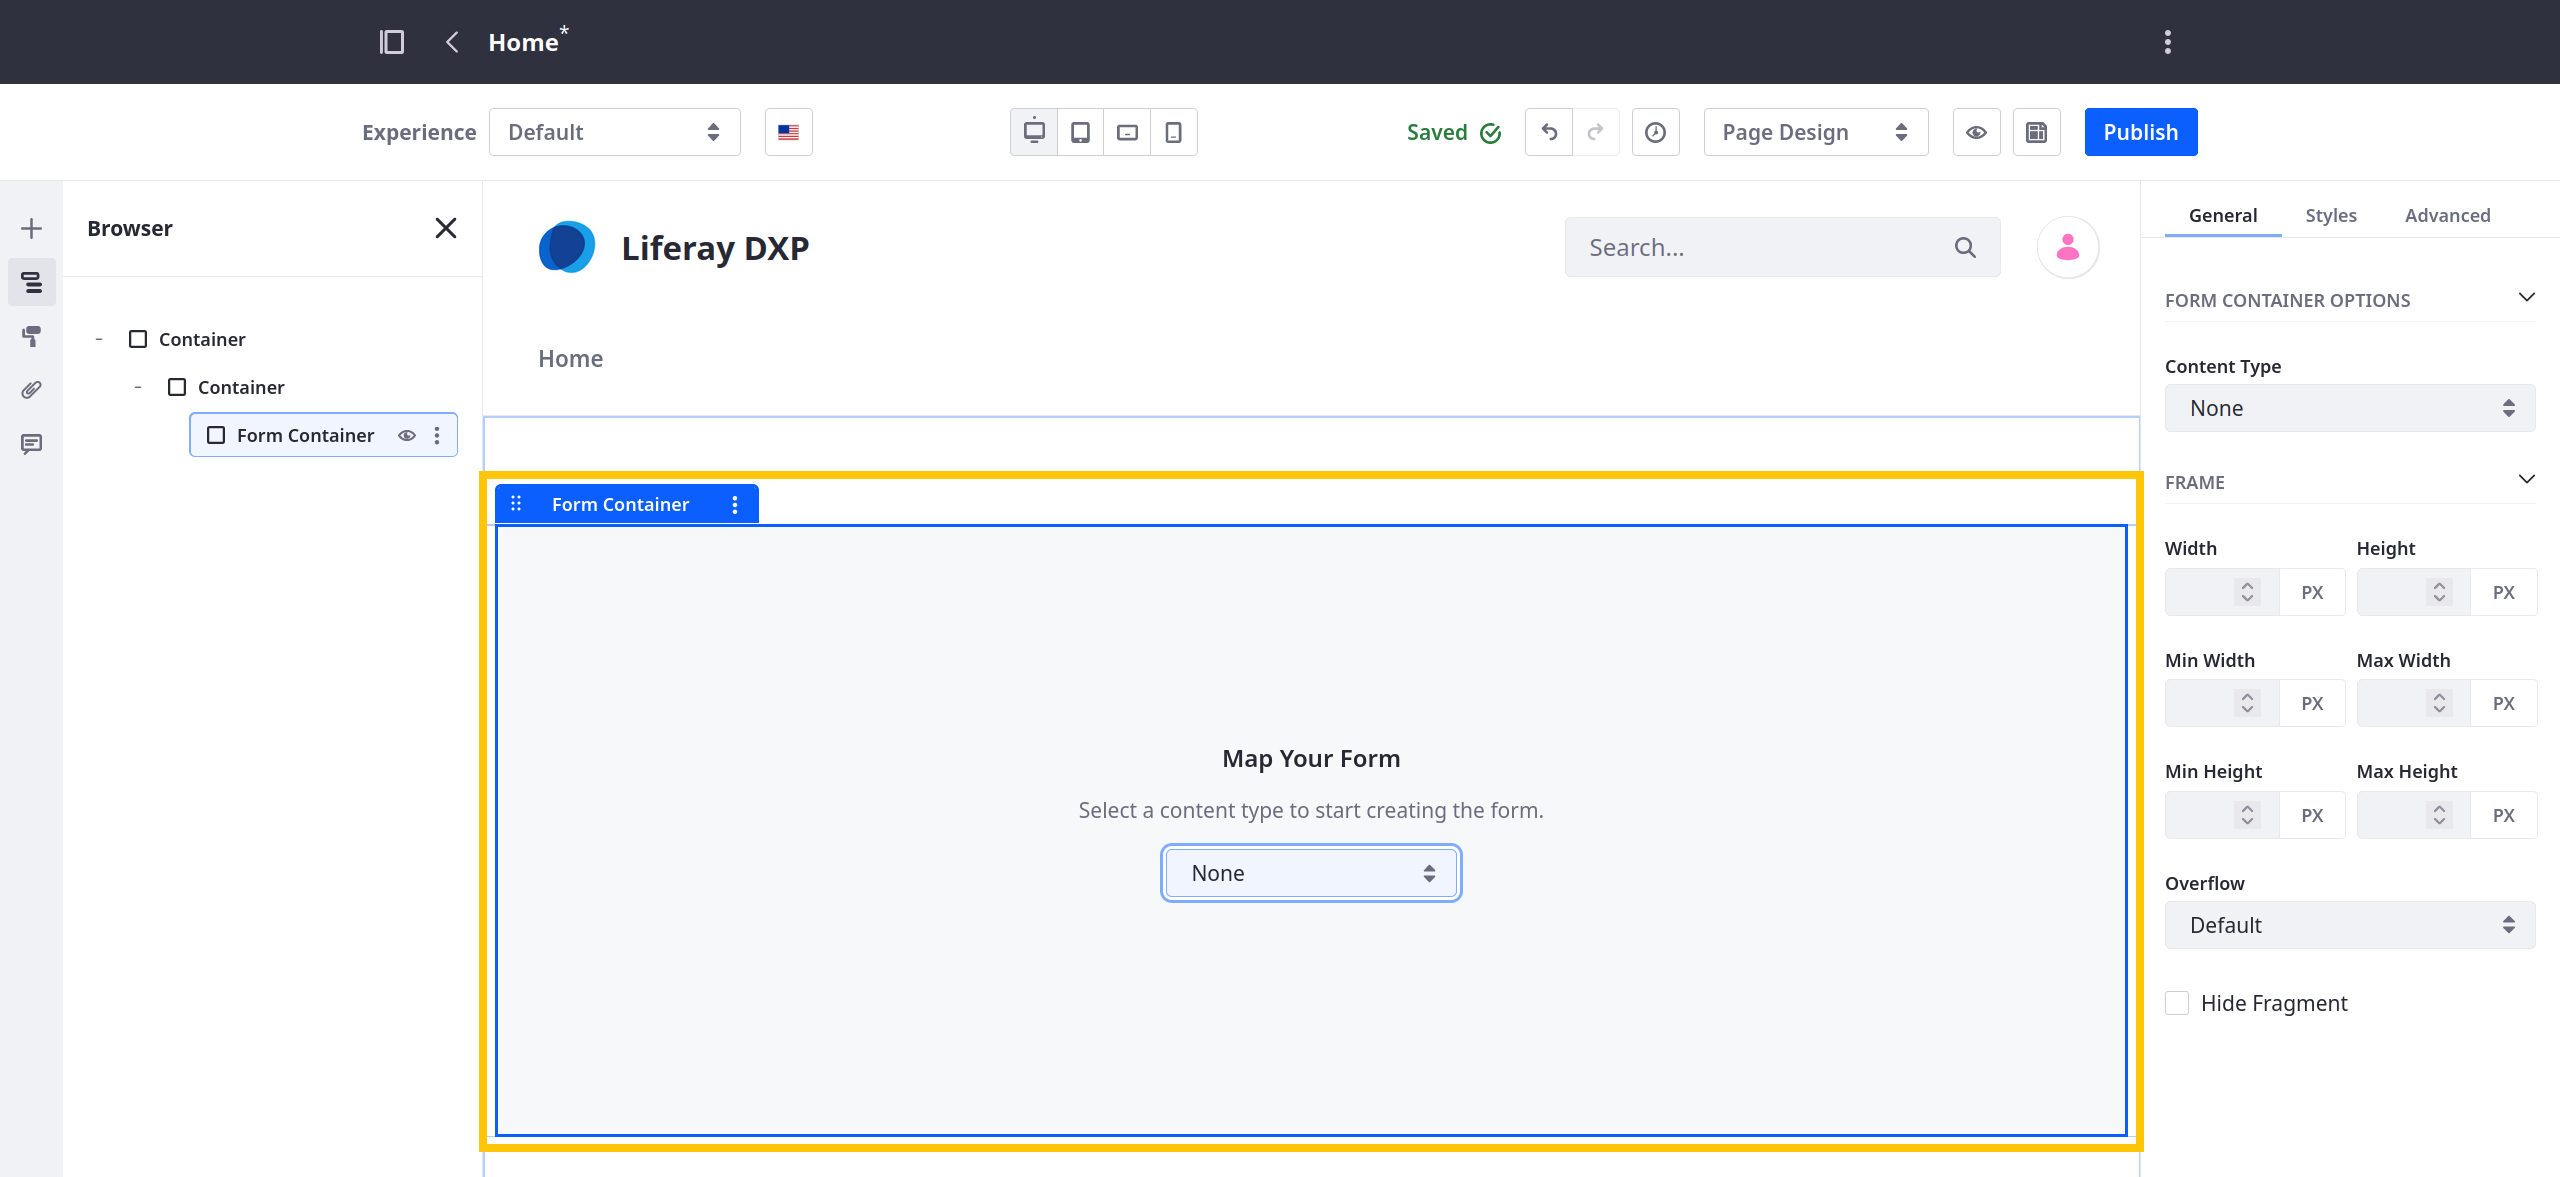
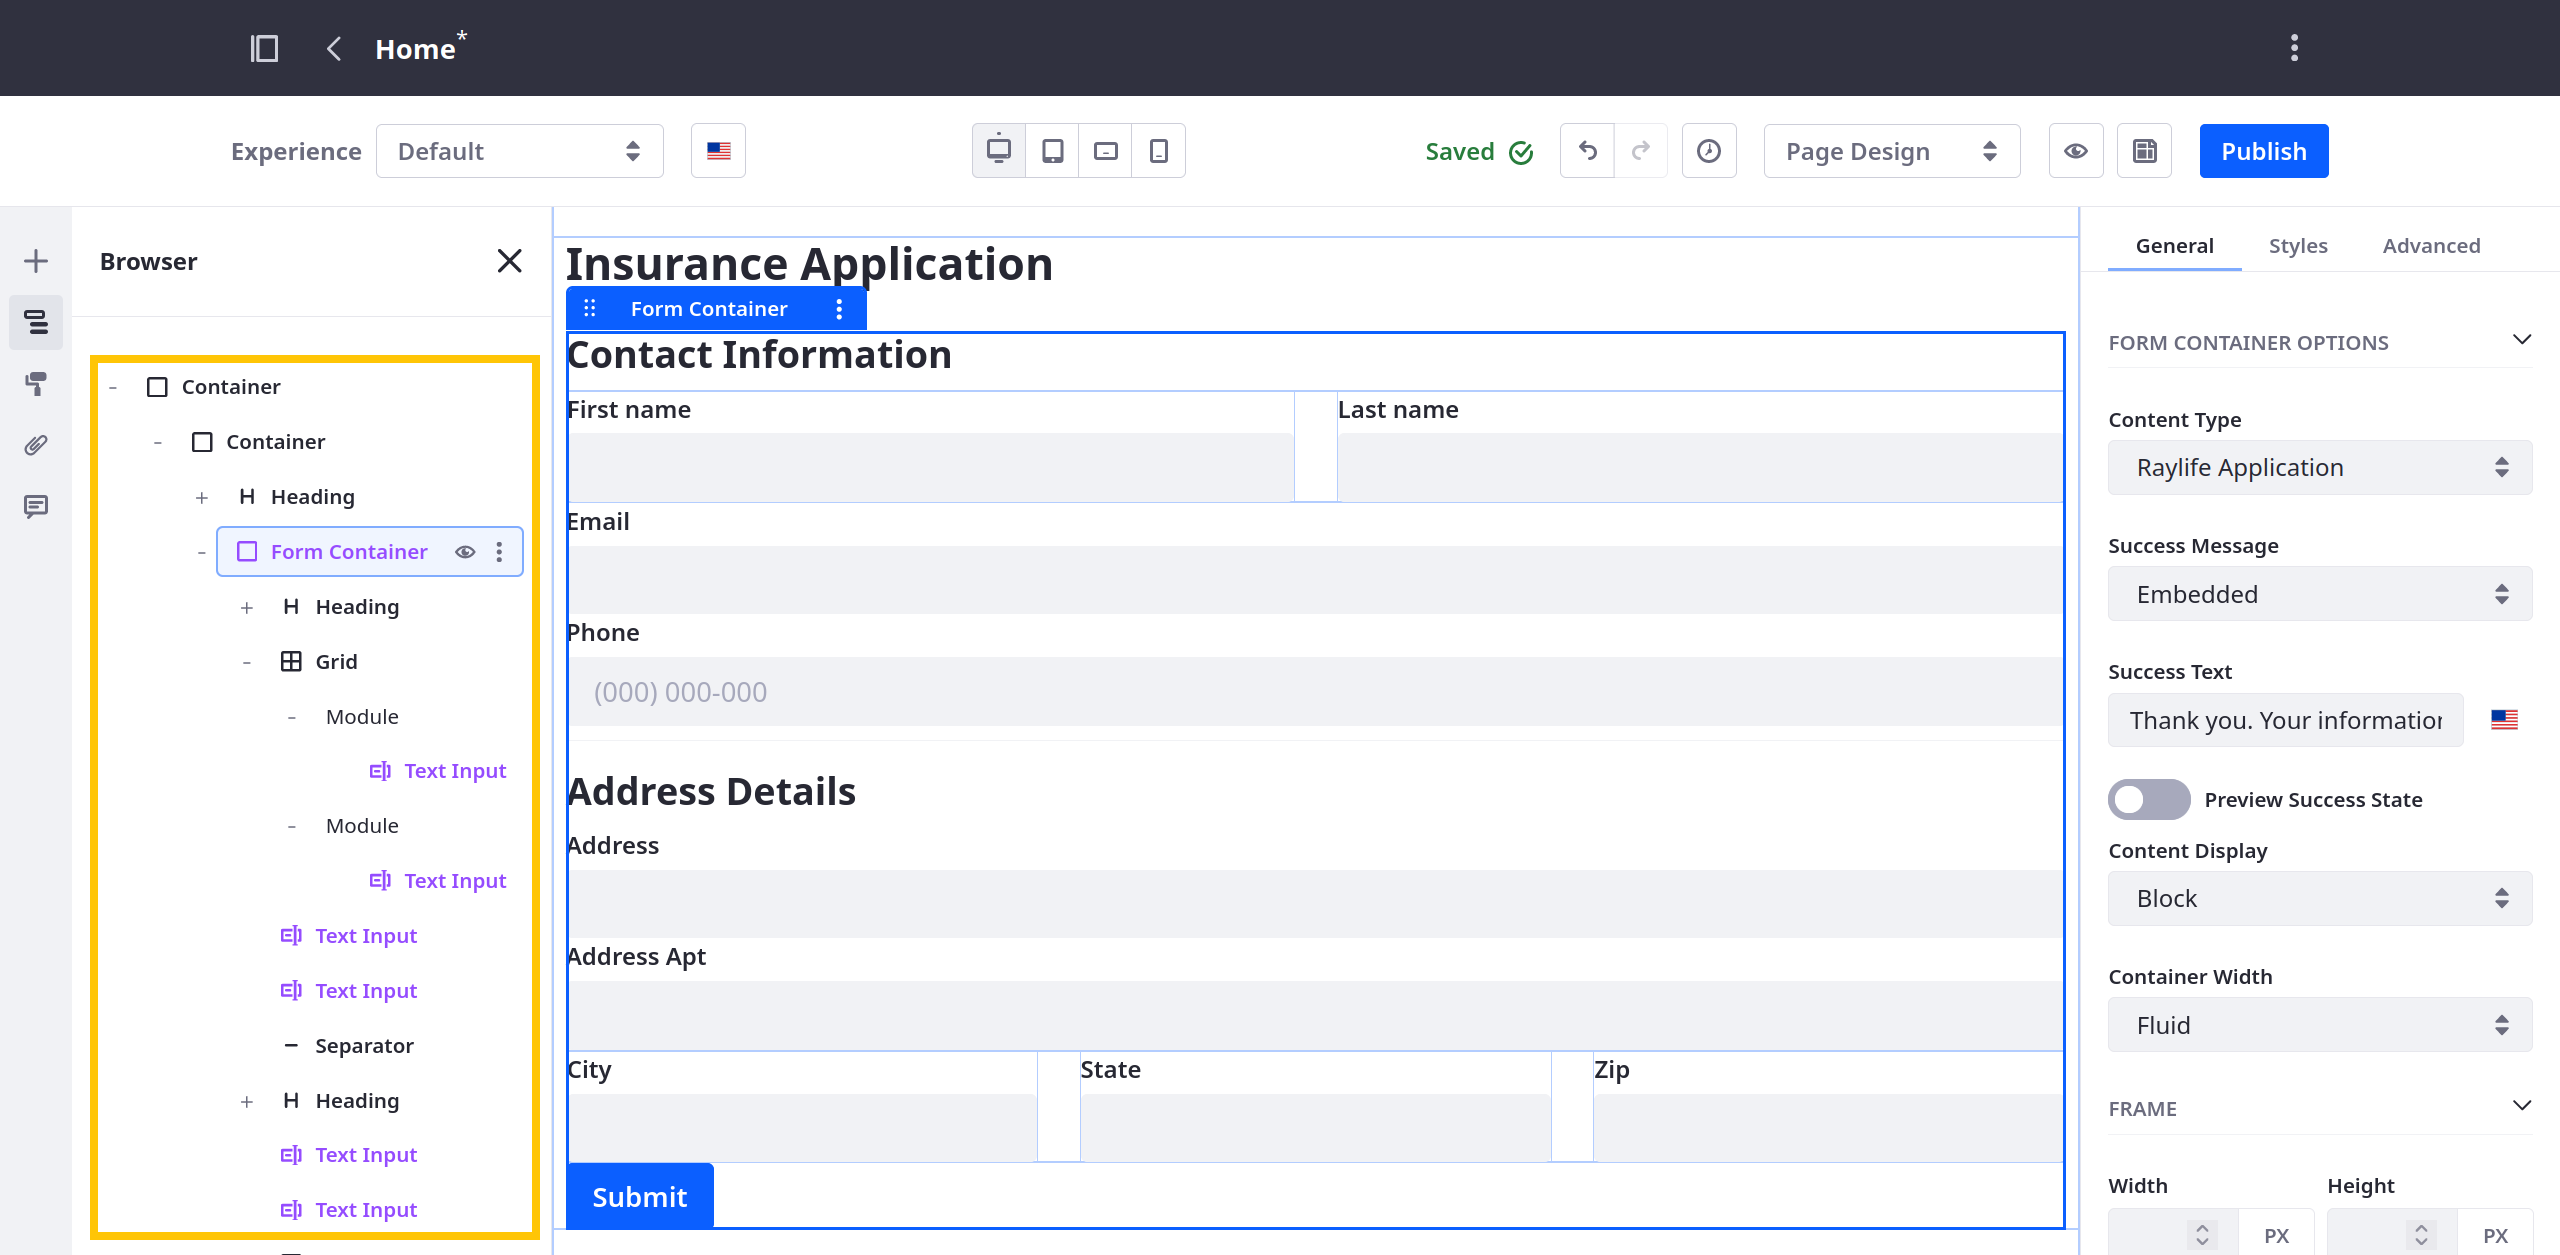
Add the Form Container fragment to the page and map it to an object.
The container automatically generates a Submit button and fragments for all object fields. They appear in alphabetical order. Mandatory fields are marked accordingly.
Liferay DXP 2024.Q3+/Portal 7.4 GA125+ In the modal window that opens, select the fields and related fields to display in the form. See Handling Object Relationships Within Form Container Fragments to learn more about managing related fields in form fragments.
-
Remove non-mandatory fields that you don’t want in the form.
Liferay DXP 2024.Q3+/Portal 7.4 GA125+ To manage available and related fields, click the Form Container fragment and use the Manage Form Fields button located in the General tab on the right under Content Type.
-
Drag and drop form fragments to reorganize them. By default, form elements are organized alphabetically.
-
(Optional) Add basic fragments to the form container. You can use basic components (e.g., grids, separators, paragraphs, images) to provide structure and style to your form container.
-
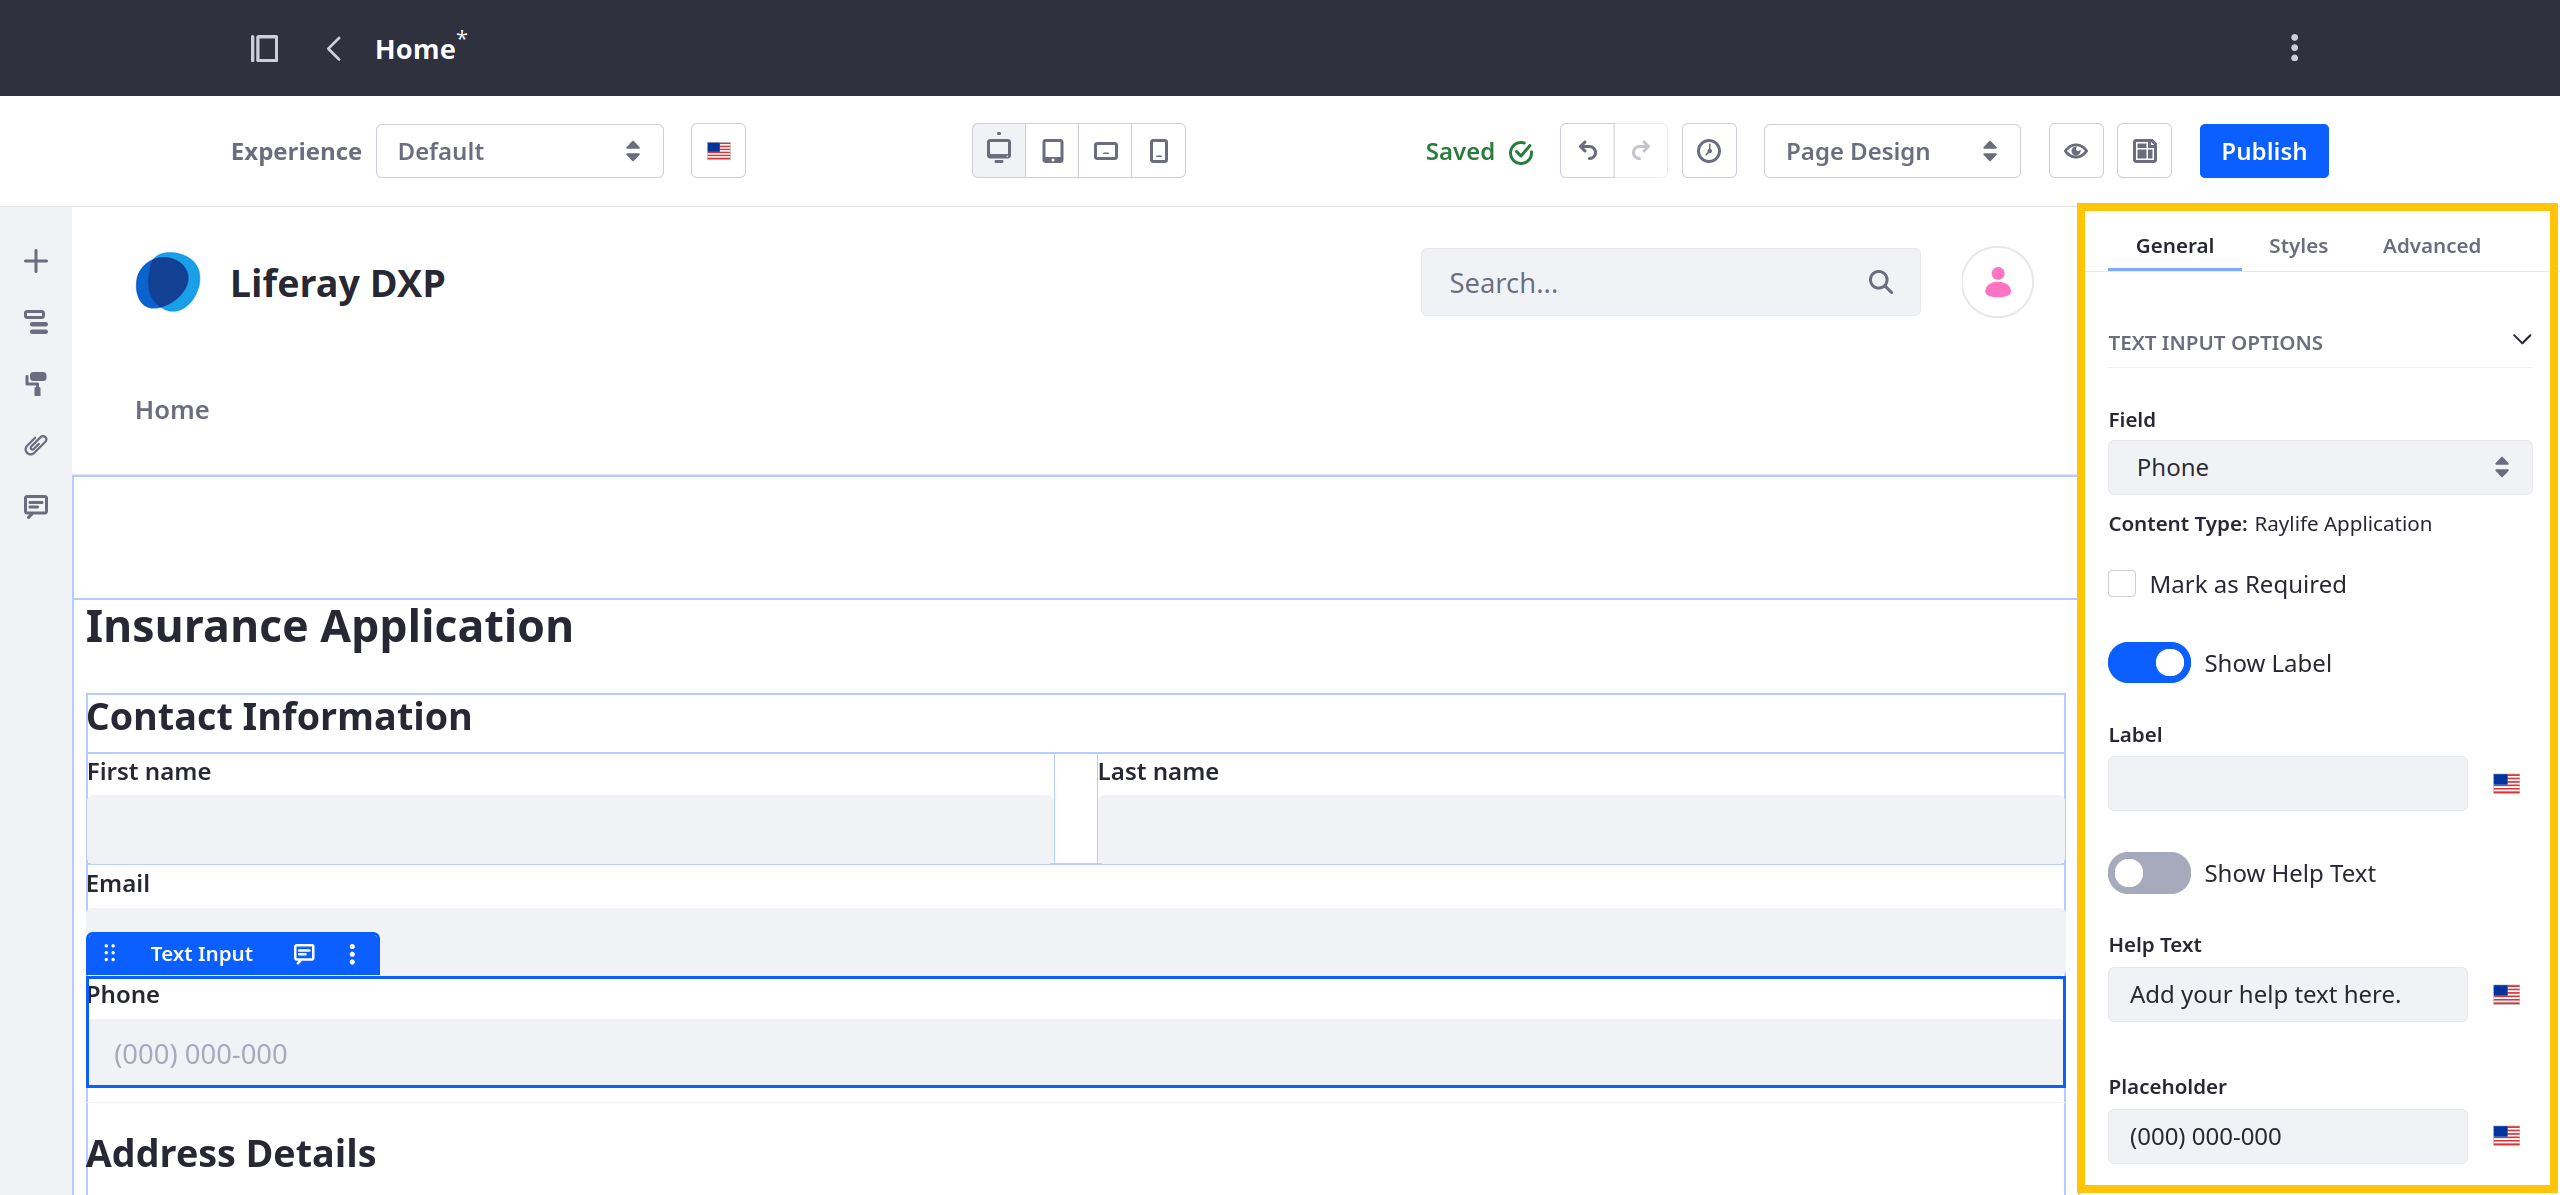
Configure the fragments. Form fragments include both standard and unique configuration options.
NoteForm fragment configuration options become available after mapping the fragment to an object field.
-
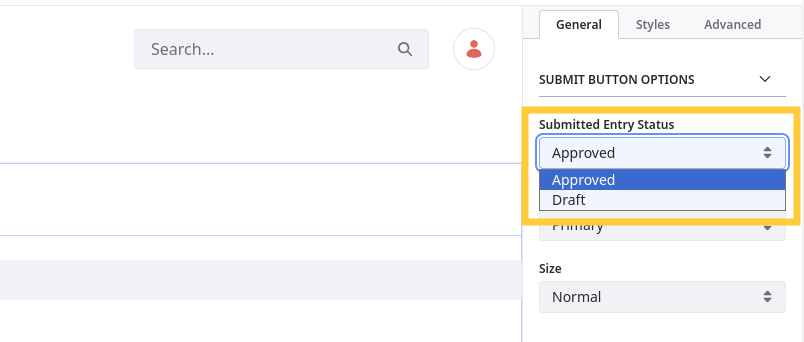
Beta Feature (Optional) If draft mode is enabled for the object, configure the Submitted Entry Status for the form’s submit button: Approved or Draft.
ImportantWhen using form fragments to update entries in a display page, you cannot change an entry’s status from approved to draft.

-
Click Publish when finished.
Supported Field Types for Form Components
Each form fragment can support one or more object field types. The default form components support these fields.
| Form Fragment | Object Field Types |
|---|---|
| CAPTCHA | N/A |
| Checkbox | Boolean |
| Date | Date |
| File Upload | Attachment |
| Multiselect List | Multiple Picklist |
| Numeric Input | Integer, Long Integer, Decimal, Precision Decimal |
| Rich Text | Rich Text |
| Select from List | Relationship, Picklist |
| Submit Button | N/A |
| Text Input | Text, Long Text |
| Textarea | Text, Long Text |
If categorization is enabled for the object, you can use the Tags and Categories form fragments to add metadata to object entries.
Handling Object Relationships Within Form Container Fragments
Liferay DXP 2024.Q3+/Portal 7.4 GA125+
Currently, this feature is behind a release feature flag (LPD-20213). Read Release Feature Flags for more information.
Manage relationships between objects and handle related data directly from Form Container fragments in content pages or display page templates.
To manage object relationships within form fragments,
-
Create a content page or a display page template.
-
Once you select an object in a Form Container fragment, a window opens displaying available fields, including related fields, as selectable options. Select one or more fields and click Save to populate the form.
In this example, the Employee Profile and Car objects have a one-to-many relationship, where each employee can be associated with multiple cars. When generating the form, you can select and combine fields from both objects to capture all the necessary information.
 Tip
TipYou can also create multi-step applications where users can navigate through different steps, such as entering employee details, assigning a car, and confirming the entries.
-
After selecting the fields, manage them by clicking the Form Container fragment and using the Manage Form Fields button located in the General tab on the right under Content Type.
-
Alternatively, select a text or picklist field and set the Source and Field options on the right to manage those fields manually.
