Organizing Objects with Folders
By default, object definitions are grouped in the Uncategorized folder, but you can add object folders to organize data models and manage access to definitions.
Creating Folders
Open the Global Menu (
 ), go to the Control Panel tab, and click Objects.
Click Add Folder (
 ).
).Enter a Label and Name.
Label: Identifies the relationship in the Objects UI and can be localized after the relationship is created.
Name: Determines the relationship’s name in the backend and uses camel case. Once the relationship is published, this value cannot be changed.
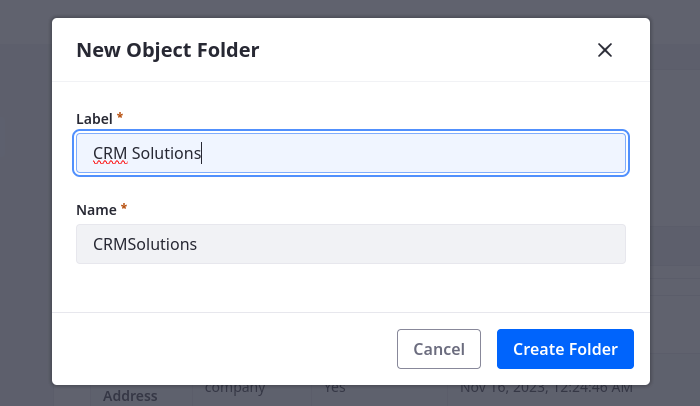
Click Create Folder.
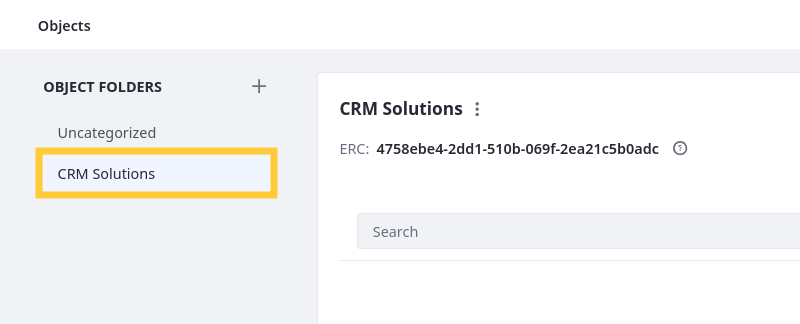
This creates an empty folder with an autogenerated ERC. If desired, you can update the ERC by clicking Actions (![]() ) for the folder and selecting Edit Label and ERC.
) for the folder and selecting Edit Label and ERC.
Adding Definitions to Folders
While in a folder, you can click Add (![]() ) to create object definitions in it. To move existing definitions to the folder,
) to create object definitions in it. To move existing definitions to the folder,
Go to the desired destination folder.
Click View in Model Builder.
Click Actions (
 ) for an object from another folder in the left sidebar.
Select Move to Current Folder.

This moves the definition to the current folder. Moving an object definition does not affect its relationships and is only for improving organization and object management.
Deleting Folders
Go to the desired folder.
Click Actions (
) and select Delete.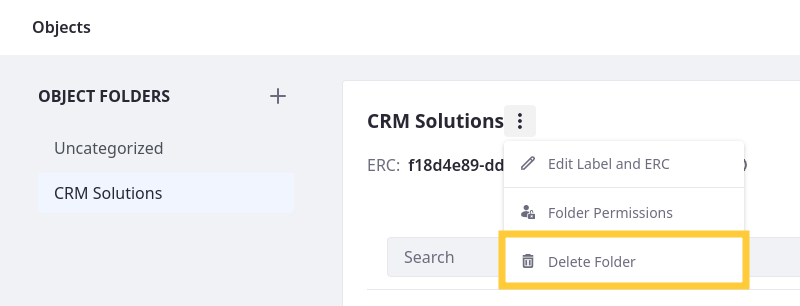
Enter the folder’s name to confirm and click Delete.
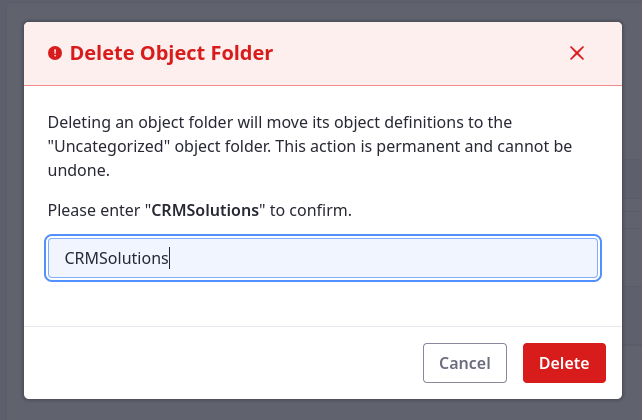
Once deleted, all objects in the folder are relocated to the default Uncategorized folder. This action cannot be undone.