Enabling Automated Live Chat Systems
Liferay 7.4+
Liferay now offers integration with several live support chat platforms. Enabling this integration adds a chat window to sites on your Liferay instance and can be used to enable improved support and site experience for your users.
Enabling Click To Chat
-
Go to the Global Menu (
 ) → Control Panel → Instance Settings.
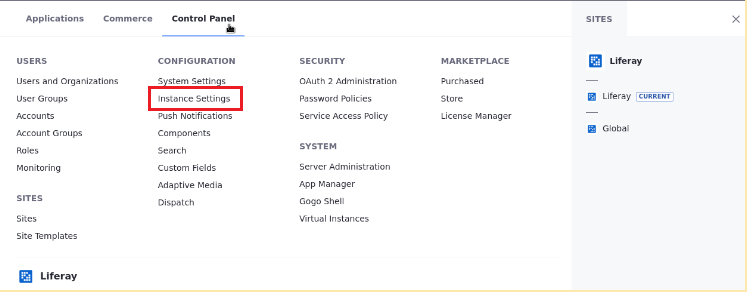
-
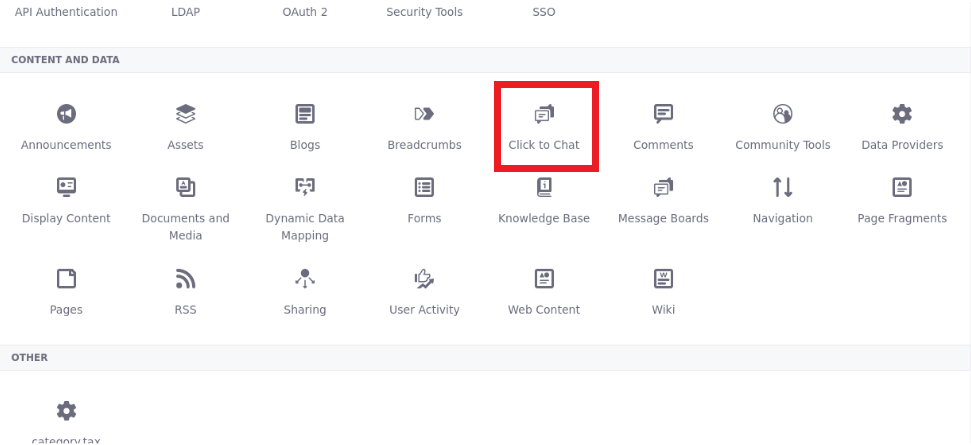
Under the Content and Data section, click Click To Chat.
-
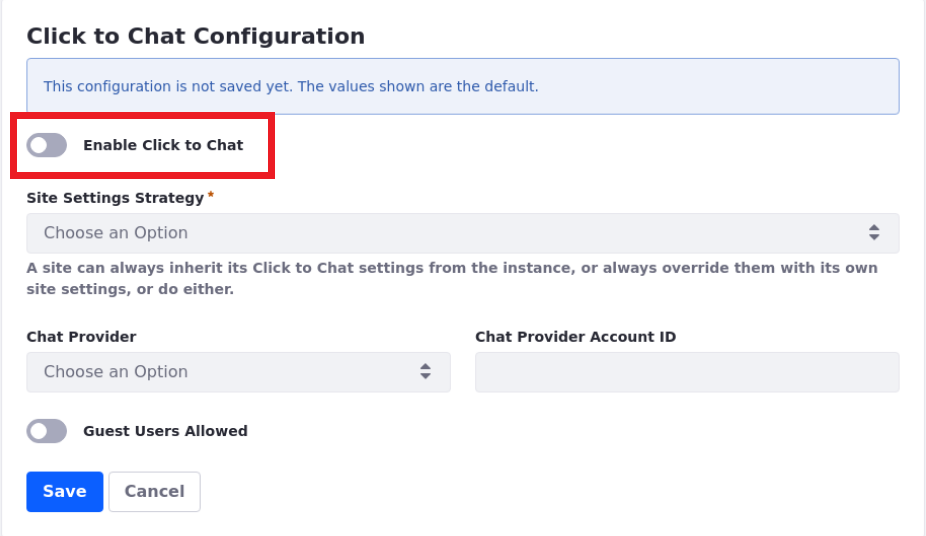
To enable Click to Chat for your instance, switch the Enable Click to Chat toggle.
-
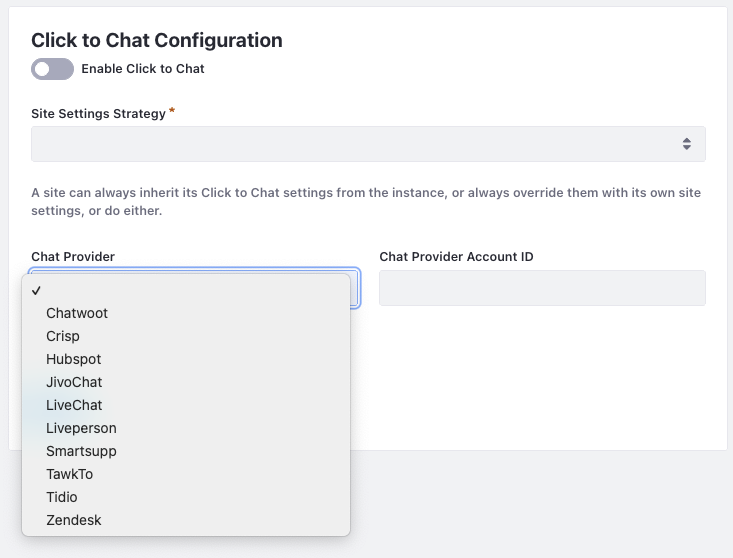
Once enabled, you must select a Site Settings Strategy. Your Site Settings strategy determines how Click to Chat is enabled across sites that exist on a given Liferay instance.
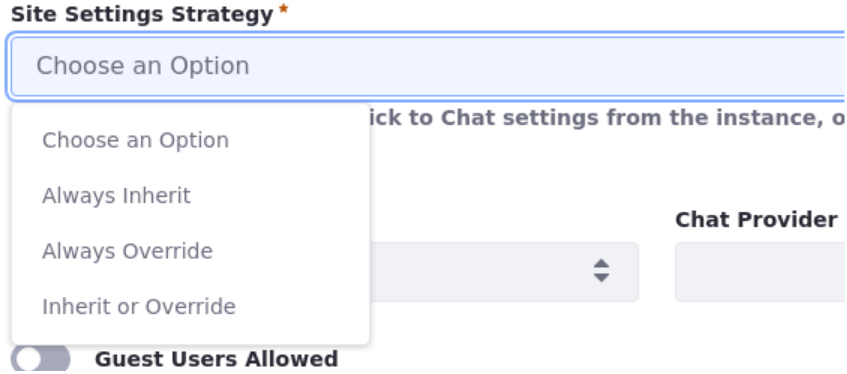
Always Inherit: Click To Chat is enabled for all sites on the instance and ignores configurations made in Site Settings.
Always Override: Configuration for Click to Chat configured in Site Settings always takes priority over configurations made in Instance Settings.
Inherit or Override: Sites inherit configuration from Instance Settings, unless configured otherwise in the site’s Site Settings.
-
Select your chat provider and enter the Account ID or token given to you by your Chat Provider.
-
(Optional) Click the Guest Users Allowed toggle to enable guest users (unauthenticated users) to have access to the Click to Chat feature for your sites.
-
Click Save.
Click To Chat integration with your live chat provider is now configured.
Getting The Chat Provider Account ID or Token
Each provider requires a two step process to enable the feature:
-
Find your Account ID.
-
Copy and paste it into the Chat Provider Account ID field.
NoteUnlike Zendesk Web Widgets Classic, Zendesk Web Widgets requires an Key ID and a Secret Key.
You can grab keys from these supported providers:
-
Chatwoot, under Create a contact.
-
Crisp, under How to find the WebsiteID?.
-
Hubspot, under Locate your NetSuite Account ID, Access Token ID and Access Token Secret.
-
Intercom shows your account ID in the URL between
/appsand/home. If the URL ishttps://app.intercom.com/a/apps/abcdefg1/home, after/appsthe sequence of letters and numbers is your ID. In this example, Intercom’s Account ID isabcdefg1. -
Jivochat, under How to find the HTML code to install on your website.
-
LivePerson, under Find your account number.
-
Smartsupp, under Configuration.
-
Tawk.to, under Here’s how to find the Direct Chat Link:.
-
Tidio, under Installation.
-
Zendesk Web Widgets Classic, under Adding the Web Widget (Classic) on your web page. The Account ID is the portion of the snippet after
...snippet.js?key=. -
Zendesk Web Widgets is the same as in the Classic version. You can find the Key ID and Secret key under Generating a signing key.