Overview of the Liferay Cloud Deployment Workflow
Liferay PaaS provides a robust framework for achieving a highly efficient CI/CD strategy. With Git and Jenkins integrations, you can automatically trigger CI builds that you can then deploy to project environments. Alternatively, you can skip the CI service’s build process altogether and directly deploy local changes to project environments using the Command Line Interface (CLI) tool.
Although there are multiple paths for deployment, workflows generally follow these three stages:
Develop and Configure
All workflows begin with making changes to your project’s Git repository (i.e., GitHub, Bitbucket, or GitLab). This repository serves as the basis for any custom additions to your project, including the Liferay service instance itself. This Git repository provides shared version control for configuration and customization of project services, a single source of truth for project deployments, and a shared workspace for building Liferay modules, themes, and extensions.
Configure a service’s LCP.json file, or make environment-specific and project-wide changes to a service via its configs/ folder. To learn more about each service’s configuration options, see their respective documentation:
- Liferay Service
- Backup Service
- Continuous Integration Service (Jenkins)
- Database Service (MySQL)
- Search Service (Elasticsearch)
- Web Server Service (Nginx)
Build and Test
Depending on the configuration of your project’s Git repository, you can trigger automatic CI builds by merging commits into your project’s central repository or opening a new pull request with your changes. While this process is automatic, you can modify the CI service in the infra environment to include additional pipeline steps, including testing. See Continuous Integration for more information.
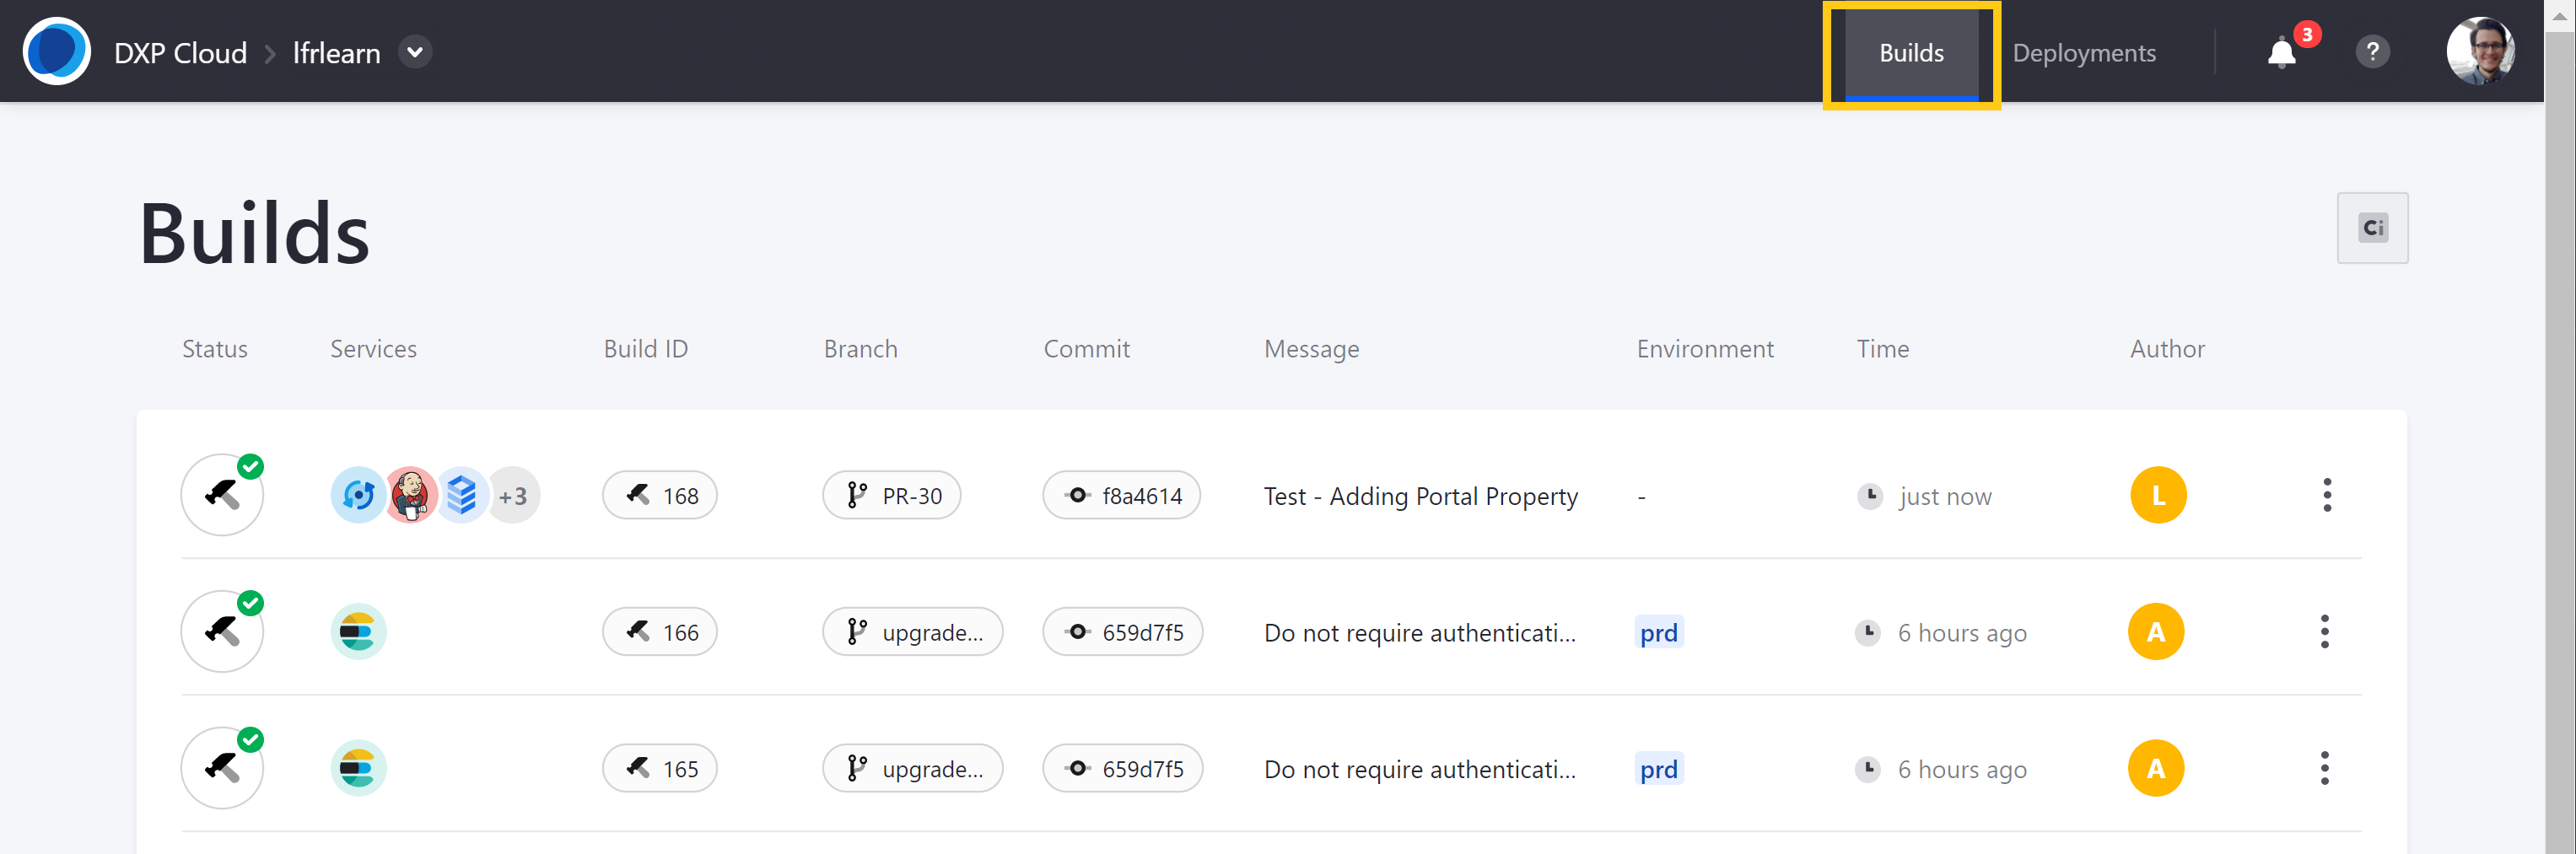
To access a full history of builds across all project environments, navigate to the Builds page in the Liferay Cloud console. Here you can view all builds initiated by either the CI service or CLI tool, along with their general information and status (i.e., pending, passed, or failed).
Deploy
With Liferay PaaS, there are three ways to deploy services: deploying via the CLI tool (manually), deploying via the Liferay Cloud Management Console (manually), or configuring certain CI builds to deploy automatically.
Option 1: Deploying Through the Command Line Interface
Using the CLI tool is the quickest way to deploy local changes to a service. With it, you can deploy from your terminal and skip pushing your changes to a remote repository or triggering a Jenkins build altogether. Unlike other deployment methods, the CLI tool can also deploy local changes for one service at a time.
To do this, log in to the CLI tool in your terminal, and navigate to the folder for the service you want to deploy (the folder must contain the service’s LCP.json file). Then, initiate the deployment process by running lcp deploy, and select which project and environment to deploy to (e.g., dev, uat, prd). Always deploy to a dev or uat environment to verify any changes before deploying to a production environment.
For the deployment to be successful, you must have permissions to deploy to the chosen environment. See Deploying Changes via the CLI Tool for a walk through of this deployment workflow.
While you can directly deploy backup, CI, database, search, and webserver services, you must first create a gradle build of the Liferay service before running the lcp deploy command. See Deploying to the Liferay Service for more information.
When you deploy with the CLI tool, you can either deploy all services at once (by running the command from the root directory of your project), or deploy only a single service (by running the command from the directory containing the service’s LCP.json file). The liferay service in particular requires extra steps to deploy, so it can build and prepare the files from your project workspace.
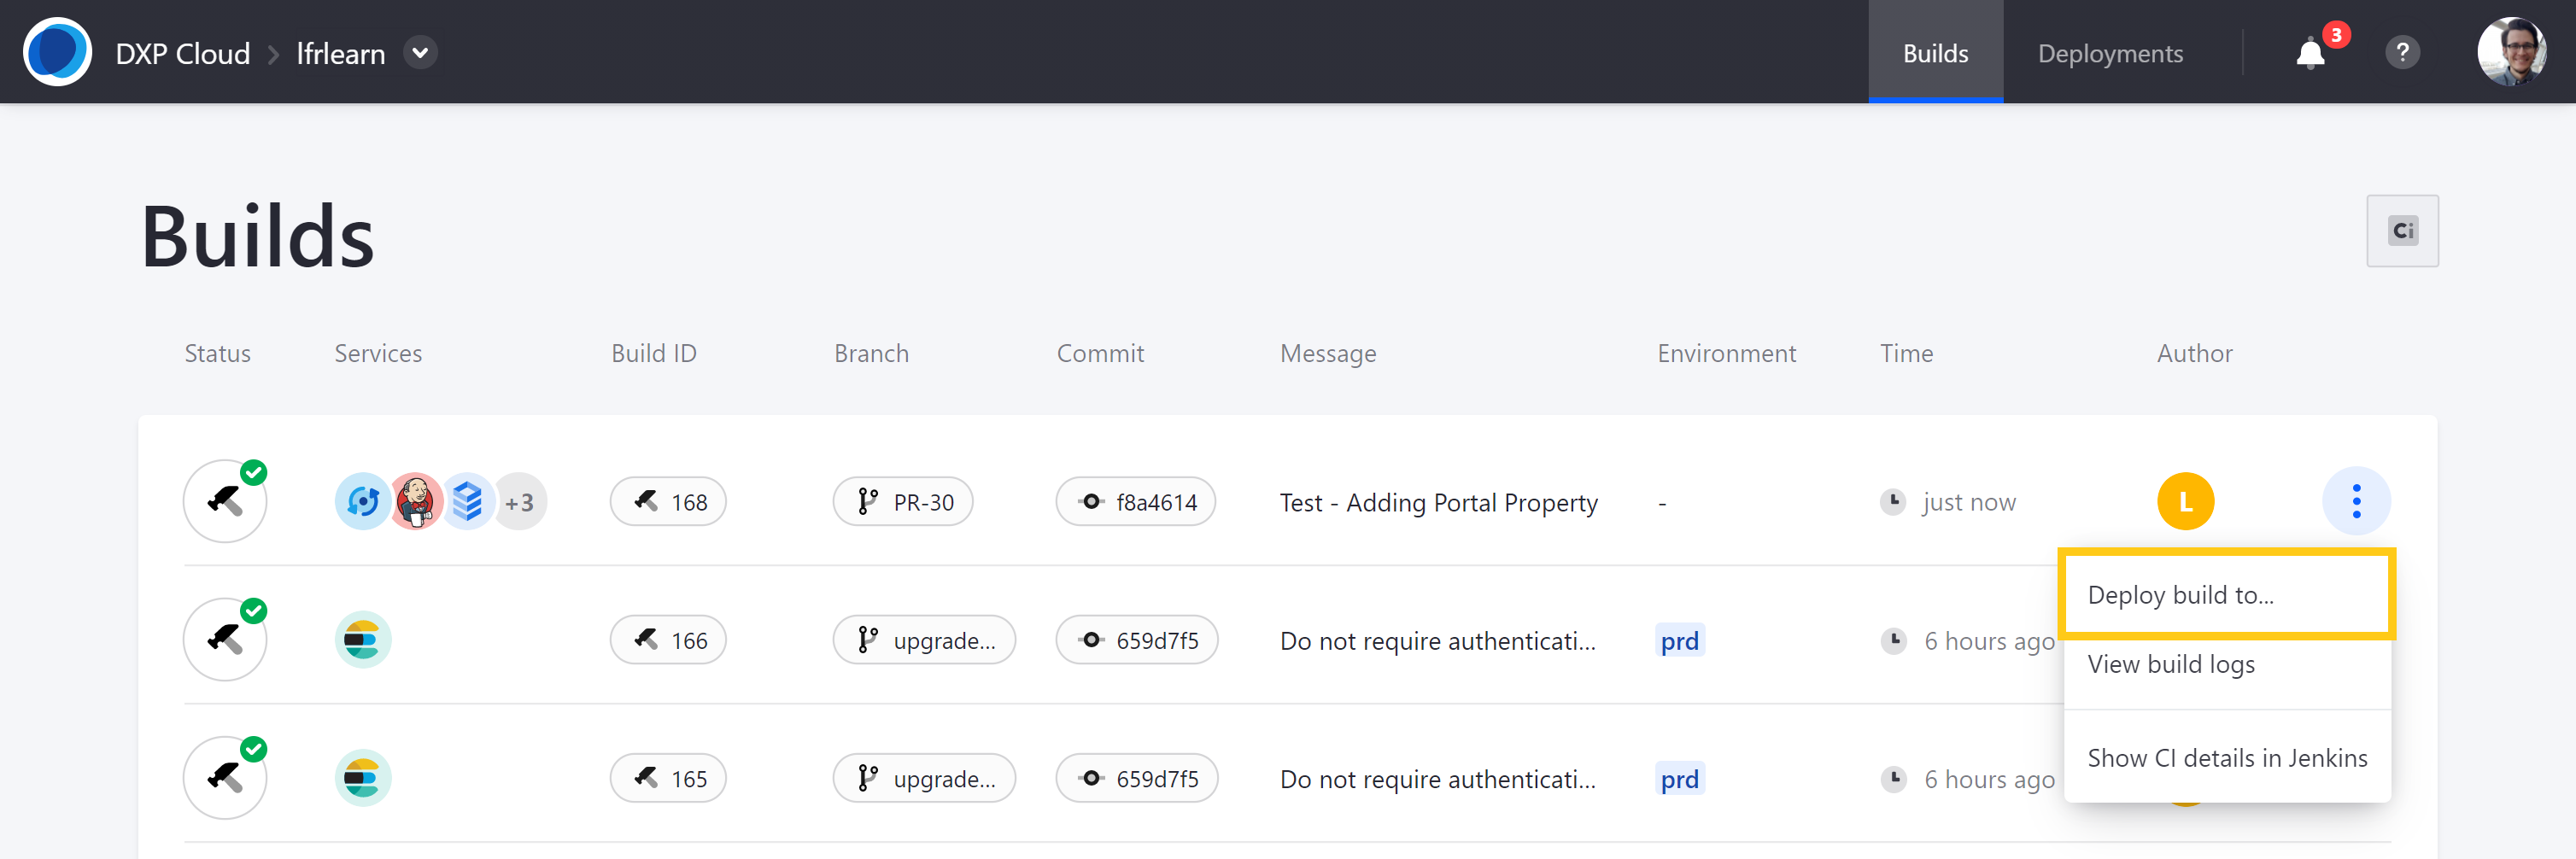
Option 2: Deploying From the Liferay Cloud Console
The Liferay Cloud console is the primary way for deploying changes to your project. With it, you can view and select from successful builds and deploy them to the environments of your choice. These include builds generated by both the CI service and CLI tool and can be accessed via the Builds page in the Liferay Cloud console. Always choose a dev or uat environment to verify any changes before deploying to a production environment.
See Deploying Changes via the Liferay Cloud Console for a walk through of the deployment workflow.
Option 3: Automatically Deploying Builds to dev Environment
If desired, you can set up your CI service to automatically deploy builds to your project’s dev environment. Add an environment variable to the CI service that initiates automatic deployments for builds made from your specified branch. See Setting Up Automatic Deployment for more information.
Related Topics
- Understanding Deployment Types
- Understanding Deployment Strategies
- Deploying Changes via the Liferay Cloud Console
- Deploying Changes via the CLI Tool