Introduction
As a general best practice, integrating Liferay DXP with other Identity Providers (IdPs) provides enhanced security and streamlines authentication management.
This recipe guides you through the basic steps needed to integrate Azure AD, your Identity Provider (IdP), with your Liferay environment using Security Assertion Markup Language (SAML).
Prerequisites
Liferay DXP environment
A user with administrative access to SAML Admin in Liferay's Control Panel
A Microsoft Azure account with permissions to administer Azure AD
At least one user created in your Azure AD account
Steps
From the Azure portal, go to Enterprise Applications.
Click New application to create a new application.
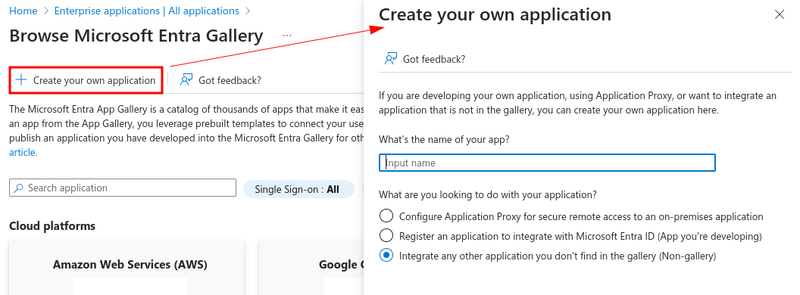
Click Create your own application.
Name your application as desired and select Integrate any other application you don't find in the gallery (Non-gallery).
Once your application is created, go to Users and groups on the left sidebar menu and assign your users to the application.
Go to Single sign-on on the left sidebar menu and select SAML.
This redirects you to the SAML SSO configuration page.
Under Basic SAML Configuration, click Edit, enter these values, and click Save:
Field Value Identifier (Entity ID) https://[your_web_server]/samlReply URL https://[your_web_server]/c/portal/saml/acsEdit the Attributes & Claims section and ensure that
user.mailis set as the Unique User Identifier (Name ID).Under Additional claims, ensure it has suitable values for the user's given name (first name), surname (last name), and email address.
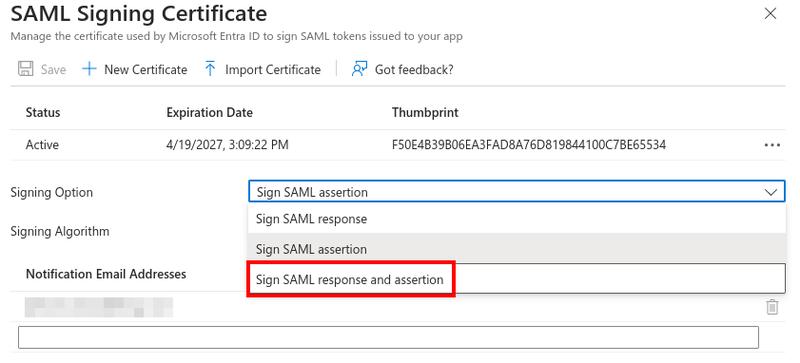
Back in the SSO setup page, edit the SAML Certificates section and ensure the Signing Option is set to Sign SAML response and assertion.
This is necessary for Liferay DXP to trust Azure as its Identity Provider.
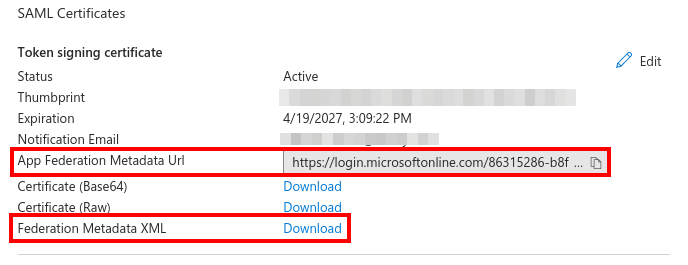
Copy the App Federation Metadata Url and download the Federation Metadata XML.
You'll use these in a later step to configure Liferay.
On your Liferay DXP instance, open the Global Menu and go to Control Panel → Security → SAML Admin.
Under the General tab, set these values and click Save:
Field Value SAML Role Service Provider Entity ID https://[your_web_server]/samlCreate a Certificate and Private Key. An Encryption Certificate is not needed.
Go to the Service Provider tab, ensure these settings are checked, and click Save:
-
Require Assertion Signature?
-
Sign Authn Requests?
-
Sign Metadata?
-
SSL Required
-
Allow showing the login portlet.
-
Go to the Identity Provider Connections tab.
Click Add Identity Provider and configure these settings:
Field Value Name Azure ADEntity ID Enter the entityIDfound in the Federation Metadata XML file you downloaded from AzureEnabled Checked Upload Metadata XML Checked Metadata XML Upload the Federation Metadata XML file Name Identifier Format Email Address Under Attribute Mapping, add these Basic User Fields:
User Field Expression SAML Attribute emailAddress mail firstName givenname lastName surname Click Save.
Go back to the General tab, check
Enabled, and click Save.You can now use Azure with SAML to authenticate in your Liferay instance.
Log out of your current user.
Click Sign In.
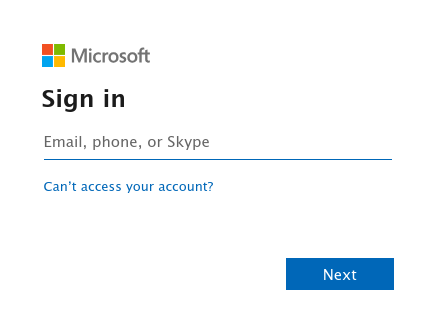
This redirects you to Microsoft's login page.
Enter the email address and password for your user.
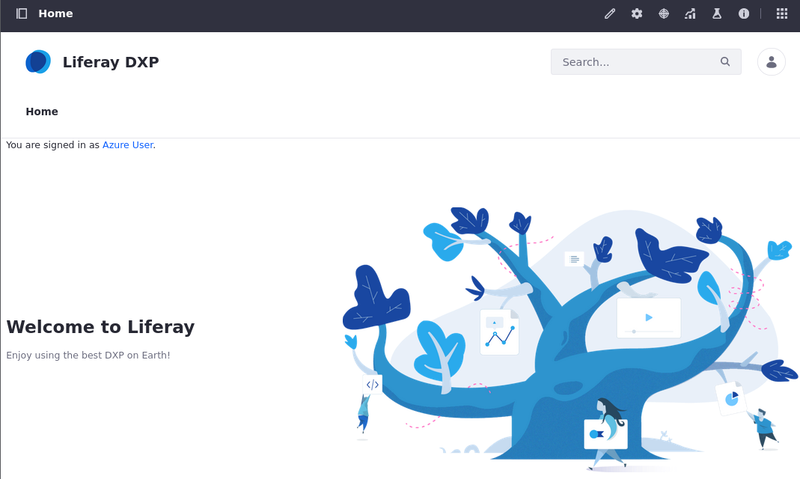
Once you've successfully logged in, your Azure user should be registered in Liferay.
Sign back in as your Liferay admin user.
Open the Global Menu and go to Control Panel → Users and Organizations. Verify that your Azure user displays on the list.


You can add, update, or delete any of the Additional Claims. However, Liferay requires specific values (first name, last name, and email address) to successfully add a user to the instance.

Do not enable SAML until you have finished configuring all settings.



Conclusion
Congratulations! Users may now authenticate to your Liferay environment by using Azure AD via SAML.
Tips
Identifier Not Found In The Directory
Ensure the configuration in Azure AD and Liferay DXP matches, particularly the Entity IDs and reply URLs.
Unable To Process SAML Request
If you see an error message indicating that Liferay DXP was unable to parse the SAML request, ensure the SAML Certificates in Azure AD are set to sign the SAML response and assertion.