Creating a New Job Scheduler Task Executor
Liferay Self-Hosted Liferay PaaS
Each Job Scheduler Task is created by implementing the DispatchTaskExecutor interface and can execute any logic. While Liferay DXP provides multiple out-of-the-box executors, you can create your own. Once created and deployed, you can add Job Scheduler Tasks to a Liferay instance.
Follow these steps to create your own implementation of the DispatchTaskExecutor interface:
-
OSGI Component: Declare the module a Component within the OSGi framework using the
@Componentannotation. -
Service: Identify the module as a
DispatchTaskExecutor.classservice within the@Componentannotation. -
OSGi Properties: Add the following properties to the
@Componentannotation.-
dispatch.task.executor.name: defines the string used for the executor’s name in the Job Scheduler UI.NoteIf you want your Job Scheduler Task to use localized names, add a language key value for the
dispatch.task.executor.nameproperty to the module’sresources/content/Language.propertiesfile. -
dispatch.task.executor.type: defines a uniquetypevalue to match the right Job Scheduler Task Executor and Job Scheduler Trigger.NoteValues must be unique to ensure the correct executor matches. If a value is not unique, the log displays an error on startup indicating which executors have the same property value.
-
-
DispatchTaskExecutor: Implement theDispatchTaskExecutorinterface or extend an implementation of it (e.g.,BaseDispatchTaskExecutor).ImportantImplementations of the
DispatchTaskExecutorinterface must handle status logs for Job Scheduler tasks, because the framework depends on those logs to control the concurrent execution of tasks.For your convenience, Liferay provides the
BaseDispatchTaskExecutorabstract class that logs the Job Scheduler task’s status asIN PROGRESS,SUCCESSFUL, orFAILED. -
Methods: If you’re implementing the
DispatchTaskExecutorinterface directly, override itsexecute()method to implement custom logic. If instead you’re extending theBaseDispatchTaskExecutorabstract class, override itsdoExecute()method.NoteThe
getName()method is deprecated and replaced by thedispatch.task.executor.nameproperty.TipYou can use the
dispatchTrigger.getDispatchTaskSettings()method to fetch properties set in the Job Scheduler Task’s Settings editor.
The following sample module demonstrates how to create and deploy a custom Job Scheduler Task Executor to a Liferay instance.
Deploying the Sample Job Scheduler Task Executor
Start a new Liferay instance by running
docker run -it -m 8g -p 8080:8080 liferay/portal:7.4.3.132-ga132
Sign in to Liferay at http://localhost:8080. Use the email address test@liferay.com and the password test. When prompted, change the password to learn.
Then, follow these steps to download, build, and deploy the sample Job Scheduler Task Executor to the new Docker container:
-
Download and unzip the example module.
curl https://resources.learn.liferay.com/examples/liferay-s7a3.zip -Ounzip liferay-s7a3.zip -
Run this
gradlewcommand to build the JAR file and deploy it to your new Docker container:cd liferay-s7a3./gradlew deploy -Ddeploy.docker.container.id=$(docker ps -lq)The JAR is generated in the
build/libsfolder (i.e.,s7a3-impl/build/libs/com.acme.s7a3.impl-1.0.0). -
Confirm the module was successfully deployed and started via the container console.
Processing com.acme.s7a3.impl-1.0.0.jar STARTED com.acme.s7a3.impl-1.0.0 [1656] -
Verify the module is working by using it to add a new Job Scheduler Task to your Liferay instance.
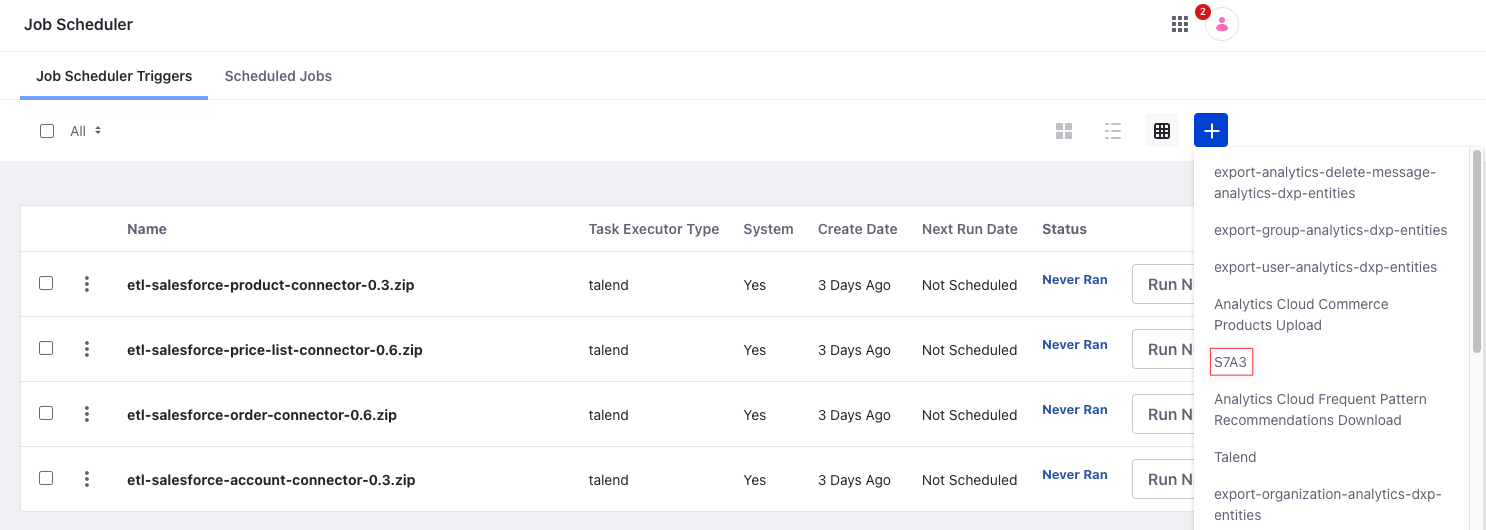
Once you’ve created the task, click on Run Now.
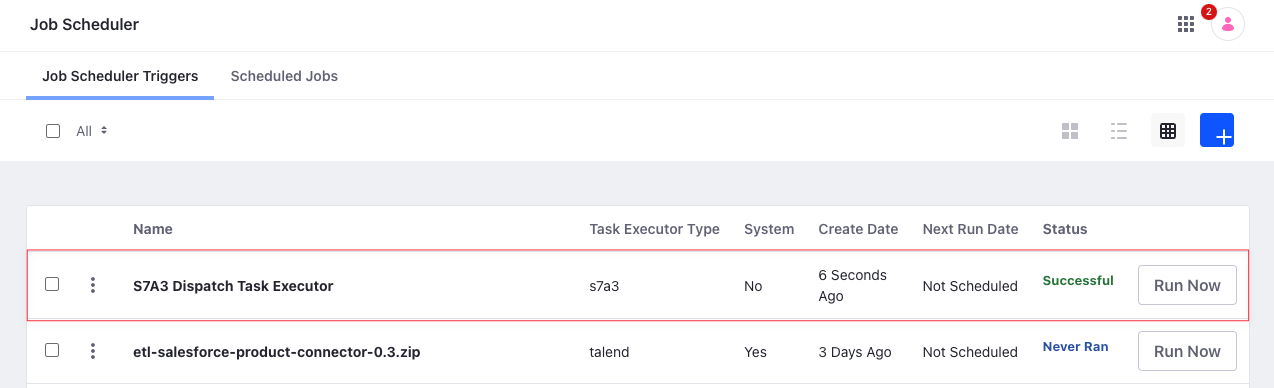
If successful, it should print the following message to the console when executed.
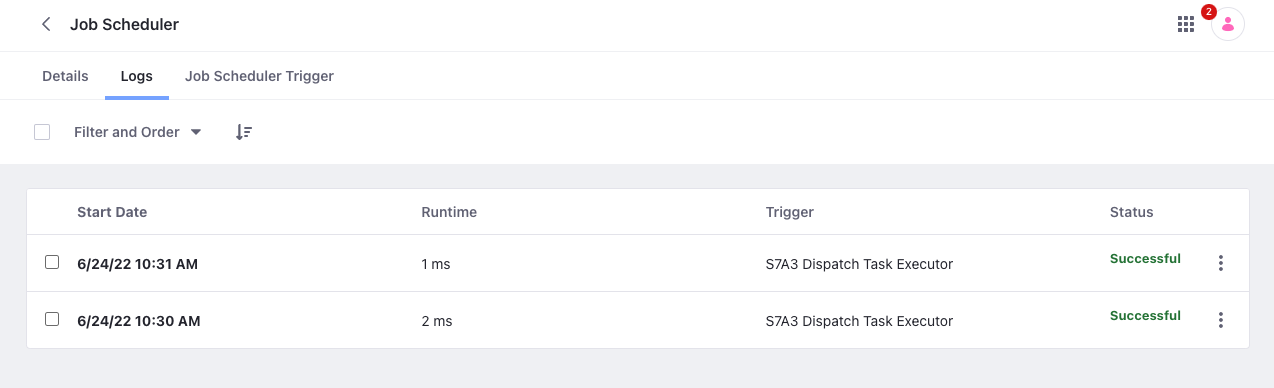
INFO [liferay/dispatch/executor-2][S7A3DispatchTaskExecutor:30] Invoking #doExecute(DispatchTrigger, DispatchTaskExecutorOutput)You can also click the task and go to the Logs tab to see a list of all previous runs.
Code for the Sample Job Scheduler Task Executor
@Component(
	property = {
		"dispatch.task.executor.name=s7a3", "dispatch.task.executor.type=s7a3"
	},
	service = DispatchTaskExecutor.class
)
public class S7A3DispatchTaskExecutor extends BaseDispatchTaskExecutor {

	@Override
	public void doExecute(
			DispatchTrigger dispatchTrigger,
			DispatchTaskExecutorOutput dispatchTaskExecutorOutput)
		throws IOException, PortalException {

		if (_log.isInfoEnabled()) {
			_log.info(
				"Invoking #doExecute(DispatchTrigger, " +
					"DispatchTaskExecutorOutput)");
		}
	}

	@Override
	public String getName() {
		return "s7a3";
	}

	private static final Log _log = LogFactoryUtil.getLog(
		S7A3DispatchTaskExecutor.class);

}
The module is declared an OSGi @Component and defines two properties: dispatch.task.executor.name and dispatch.task.executor.type. It then identifies the module as a DispatchTaskExecutor.class service.
Following the @Component annotation, the module extends the BaseDispatchTaskExecutor abstract class and overrides the doExecute method. This method uses the LogFactoryUtil to display an INFO message in the console’s logs.