Introduction
This recipe guides you through the basic steps to build a multi-step form.
Prerequisites
Liferay DXP environment
An object definition with fields
A user who has access and control to create and manage objects, display pages, and the ability to edit pages
Steps
Open the Global Menu, go to Control Panel tab, and click Objects.
Select your object.
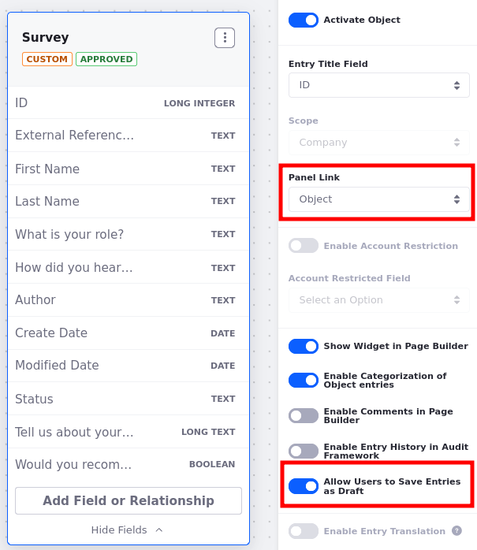
In your object's details menu, enable the Allow Users to Save Entries as Draft toggle button.
(Optional) In your object's details menu, select Object for the Panel Link.
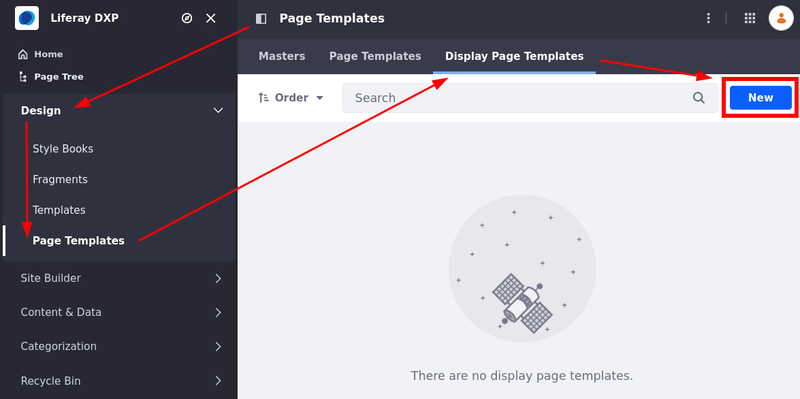
Open the Site Menu, expand Design, and click Page Templates.
Go to the Display Page Templates tab to create the display page templates.
Click New to create a new display page template.
Select the desired master page.
Name it Success Page - Feedback Survey and under Content Type select Survey.
Click Save.
Click Publish.
Click New to create a new display page template.
Select the desired master page.
Name it Step 2 - Feedback Survey and under Content Type select Survey.
Click Save.
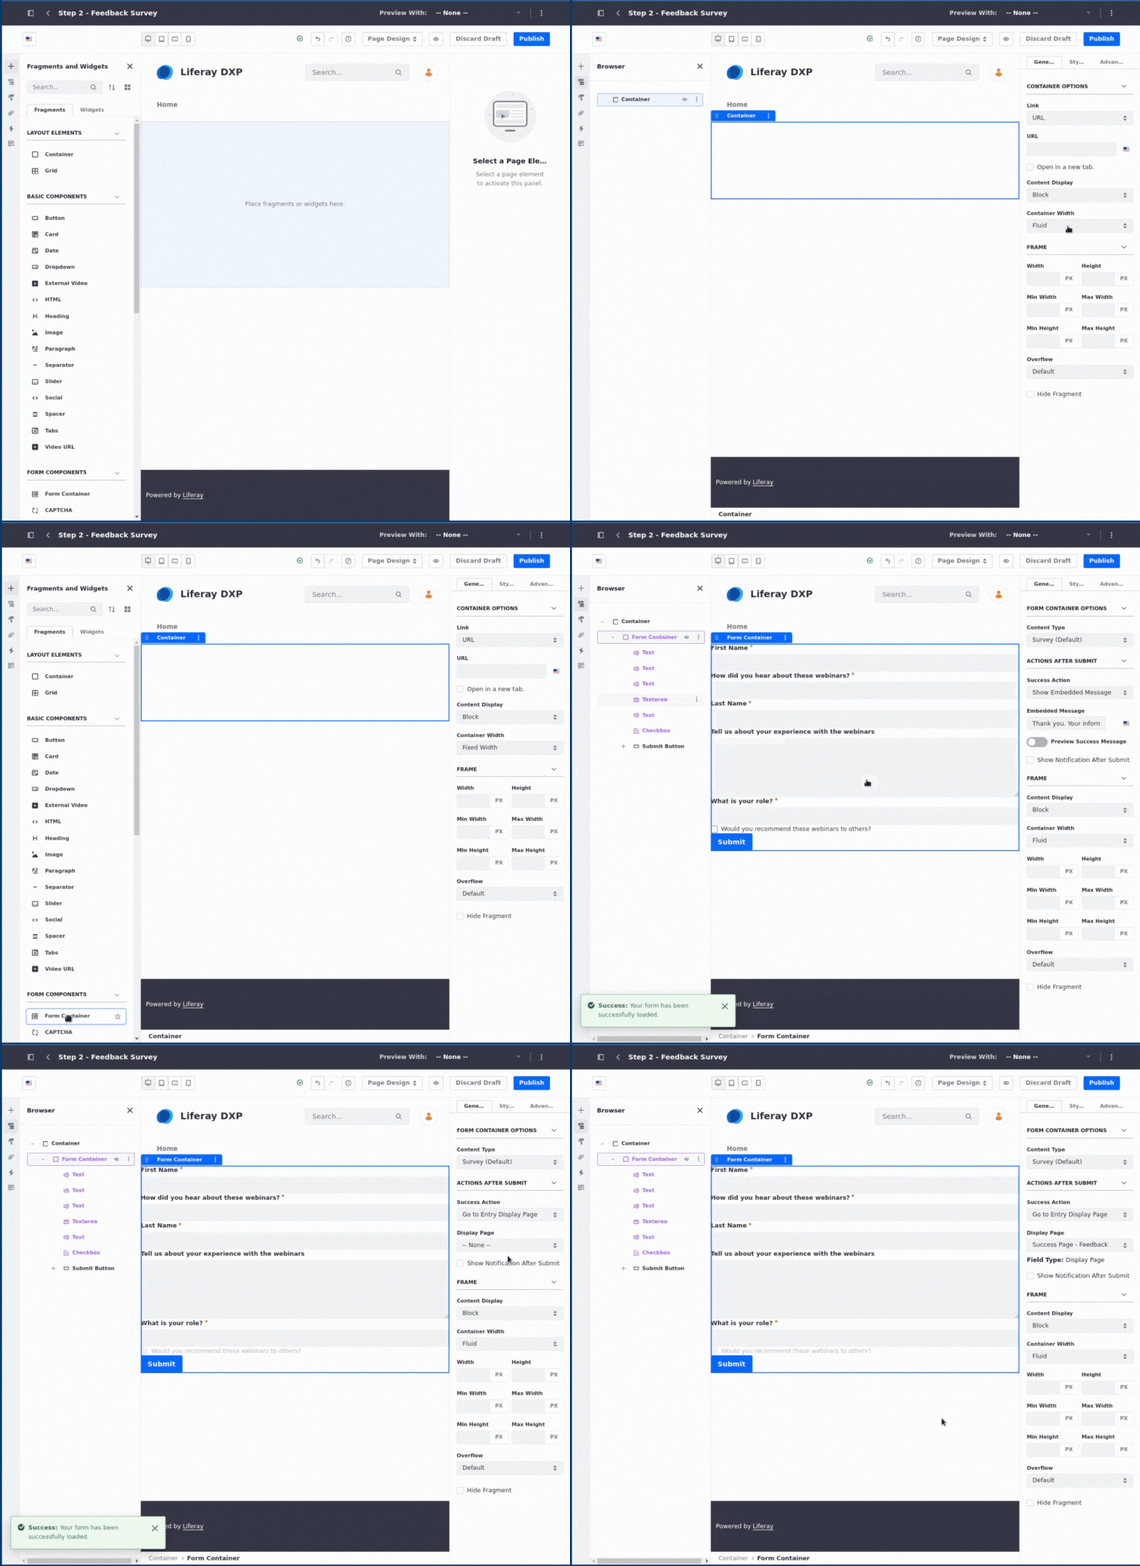
Drag and drop a container element onto the new page.
Change the container width in the right panel to Fixed Width.
Drag a form container inside the first container, and map it to the Survey object.
Go to the form container's General tab on the right panel.
Under Success Action dropdown select Go to Entry Display Page and under Display Page select Success Page - Feedback Survey.
It will populate with all object fields. Delete the following fields: `First Name`, `Last Name`, and `What is your role?`.
Select the Submit button, open the Styles tab, and set the top margin to 1rem.
Click Publish.
A warning message will appear. Click Publish again to proceed.
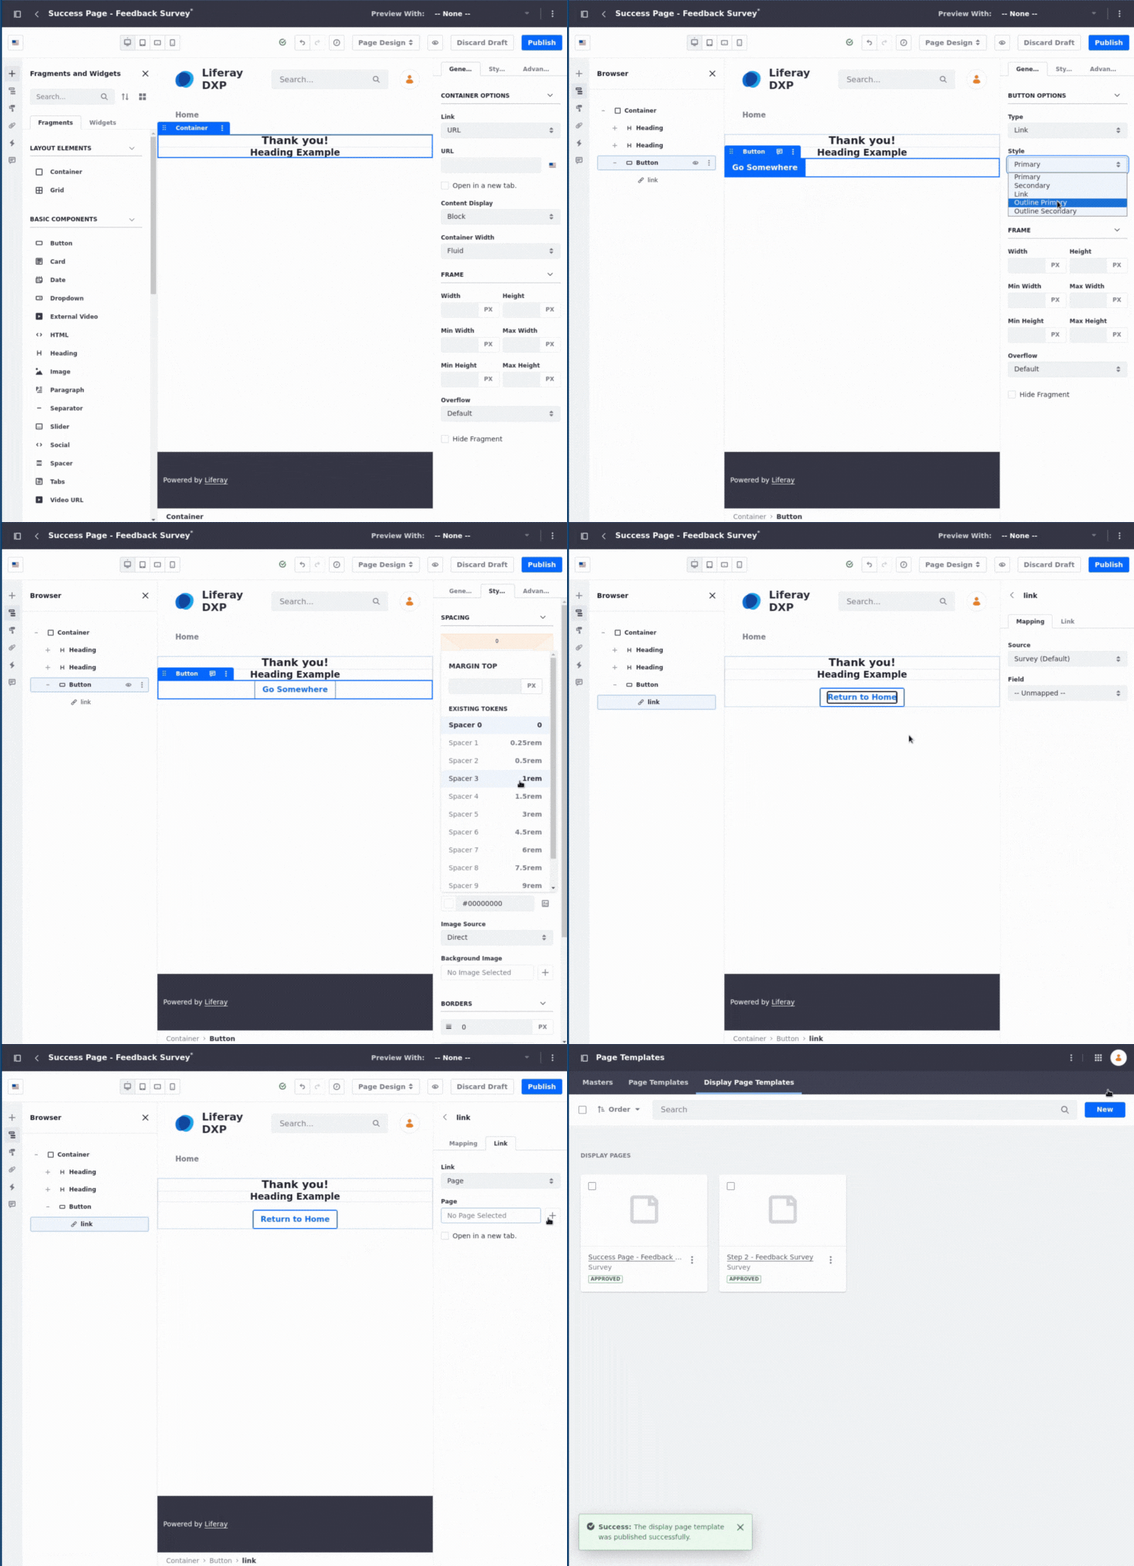
Click the Success Page - Feedback Survey template draft to begin editing it.
Drag and drop a container element onto the new page.
Change the container width in the right panel to Fixed Width.
Drag and drop a heading element into the container, and change the Heading Level to H2.
Navigate to the Styles tab on the right panel and select the Align Center option to center the text.
To modify the heading, double-click the Heading Example text and replace it with `Thank you!`.
Drag and drop a new heading element below the existing heading within the container. Adjust the Heading Level to H3.
Navigate to the Styles tab on the right panel and select the Align Center option to center the text.
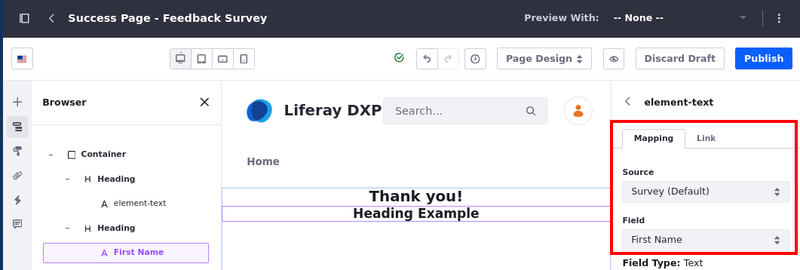
Click the heading's element-text, and map the field to Survey → First Name.
Drag and drop a button element below the second header and apply the Outline Primary option style.
Navigate to the Styles tab on the right panel and select the Align Center option to center the text.
Apply a margin-top of 1rem to the button.
Double-click the Submit button to edit its text, then replace the existing text with Return to Home.
In the Link tab, select Page as the link type and choose the Home page as the destination.
Click Publish.
Now that you have all display page templates created, go to the page where you want to host the form.
Click the Edit icon on the top right corner of your screen.
Drag and drop a container element onto the desired page.
In the right panel, change the container width to Fixed Width.
Drag and drop a form container inside the first container, and map it to the Survey object.
Go to the form container's General tab on the right panel.
Under Success Action dropdown choose Go to Entry Display Page and select Step 2 - Feedback Survey as the Display Page.
It will populate with all object fields. Delete the following fields: `How did you hear about these webinars?`, `Tell us about your experience with the webinars`, and `Would you recommend these webinars to others?`.
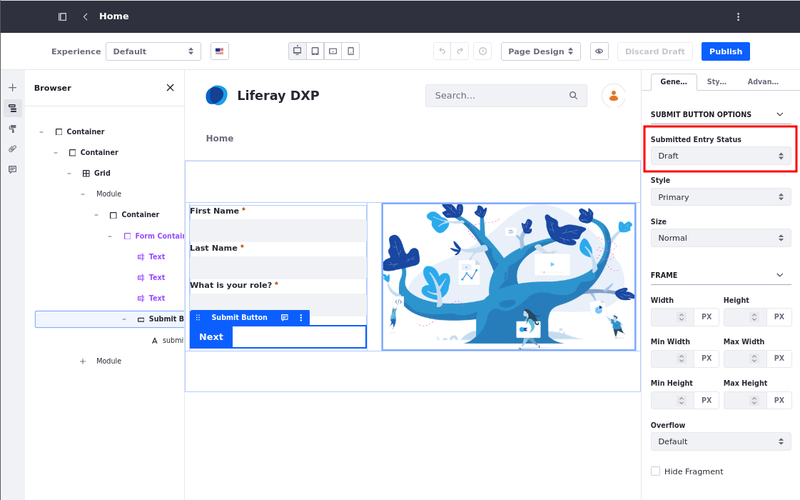
Select the Submit button and change the Submitted Entry Status to Draft.
In the Styles tab apply a margin-top of 1rem to the button.
Double-click the Submit button and rename it to `Next`.
Click Publish.
A warning message will appear. Click Publish again to proceed.
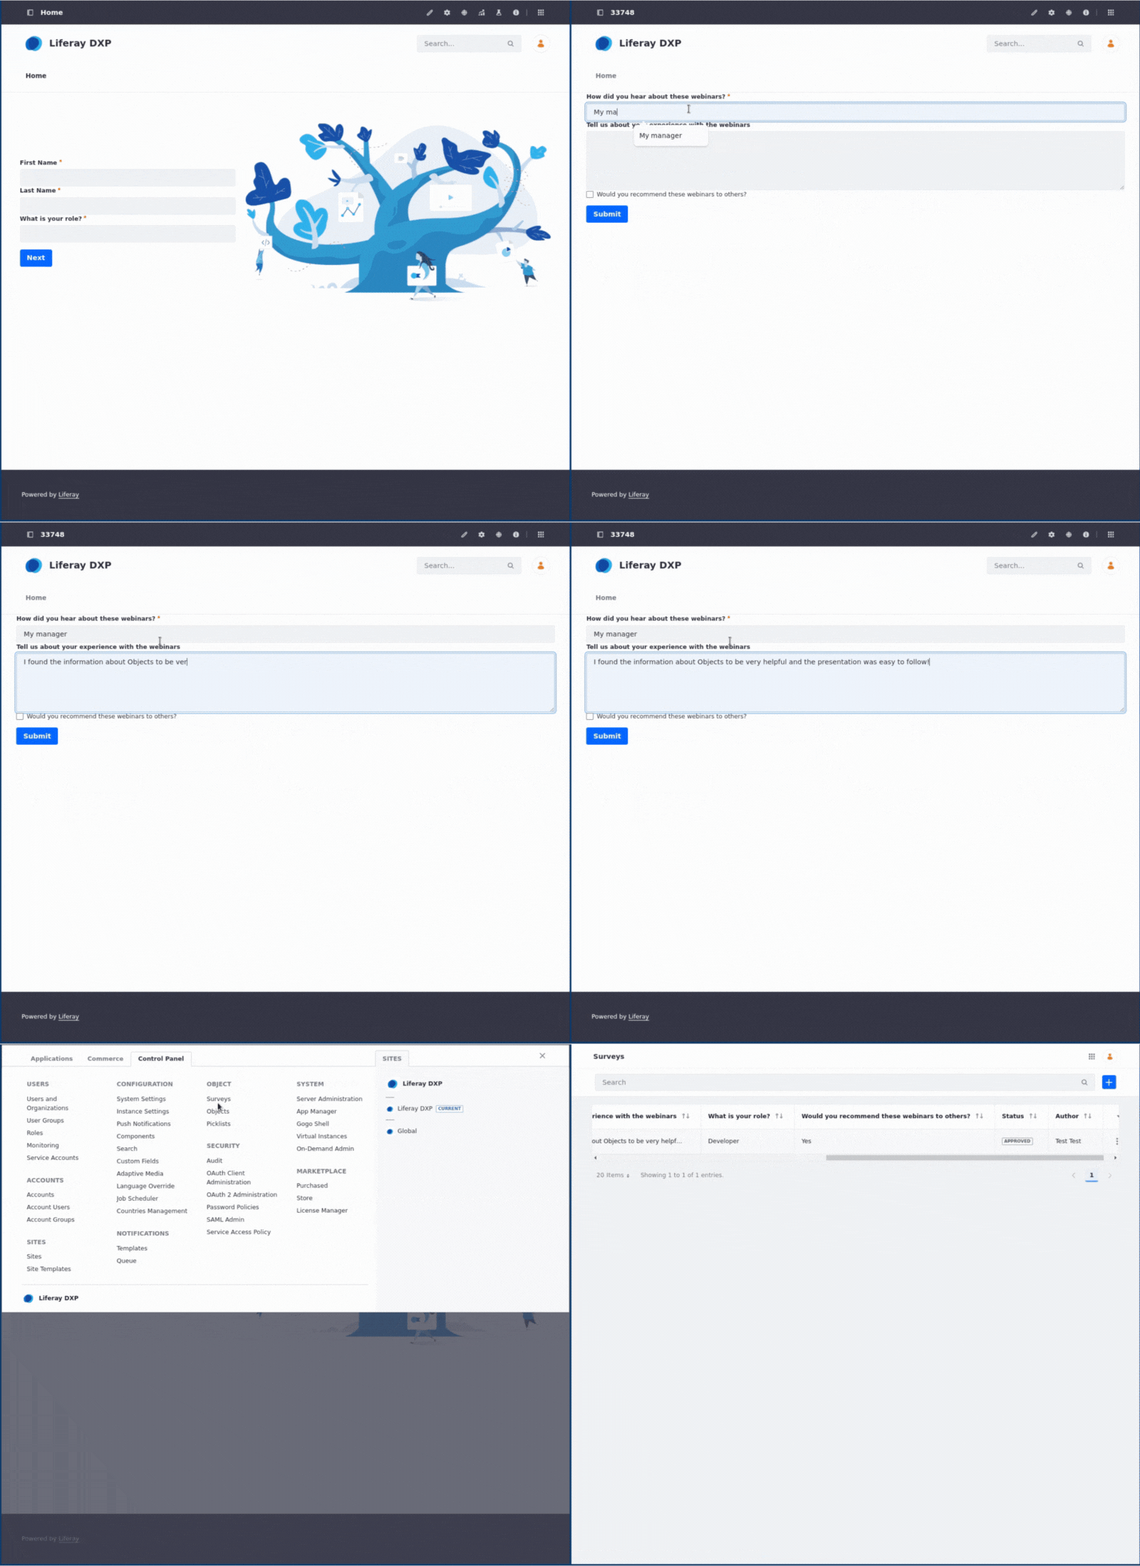
To test the form, navigate to the page where it was created and complete the initial fields.
Click Next to proceed.
Once you're redirected to the second page, fill out the fields and click Publish.
On the Success Page, the first name typed previously should be under the "Thank You!" message.
Open the Global Menu, go to Control Panel tab, and click Survey to see all feedback survey responses.
Deleting required fields generates a warning. All required fields must be present within the multi-step form for a submission to be valid.
Conclusion
Congratulations! You have successfully completed this recipe on building multi-step business forms.
Tips
If you encounter the "Thank you. Your information was successfully received." message, review the form container settings. Ensure the Success Action is set to "Go to Entry Display Page" and the designated Display Page is correctly specified.