アセットの自動タグ付け
掲示板、ブログ、ドキュメント、画像、Webコンテンツ記事などのほとんどのアセットに手動でタグを付けることができます。 ただし、特定のアセットには、作成時に自動的にタグを付けることができます。 自動的に適用されるタグは英語のみです。
自動タグ付けは、テキストベースのドキュメント、テキストベースのWebコンテンツ、ブログエントリー、および 画像に対してのみ有効です。
テキストの自動タグ付けはデフォルトで無効になっています。 DXPで自動タグ付けを有効にしてから、テキストの自動タグ付けプロバイダーを有効にする必要があります。 最後に、自動タグ付けするアセットを選択する必要があります。 DXPで使用できるテキスト自動タグ付けプロバイダーは2つあります。
-
Google Cloud Natural Language Text Auto Tagging : Google Cloud Natural Language API を使用して、コンテンツを分析し、自動的にタグ付けします。
-
OpenNLP Text Auto Tagging : オープンソースの Apache OpenNLP ライブラリを使用して、ポータルコンテンツを分析し、自動的にタグ付けします。 位置名ファインダー、組織ファインダー、人物名ファインダーの3つのモデルが使用されます。
精度が制限される可能性があるため、このプロバイダーの使用には注意が必要です。
Google Cloud Natural Language Text Auto Taggingの設定
-
[グローバルメニュー] → [コントロールパネル] をクリックします。
-
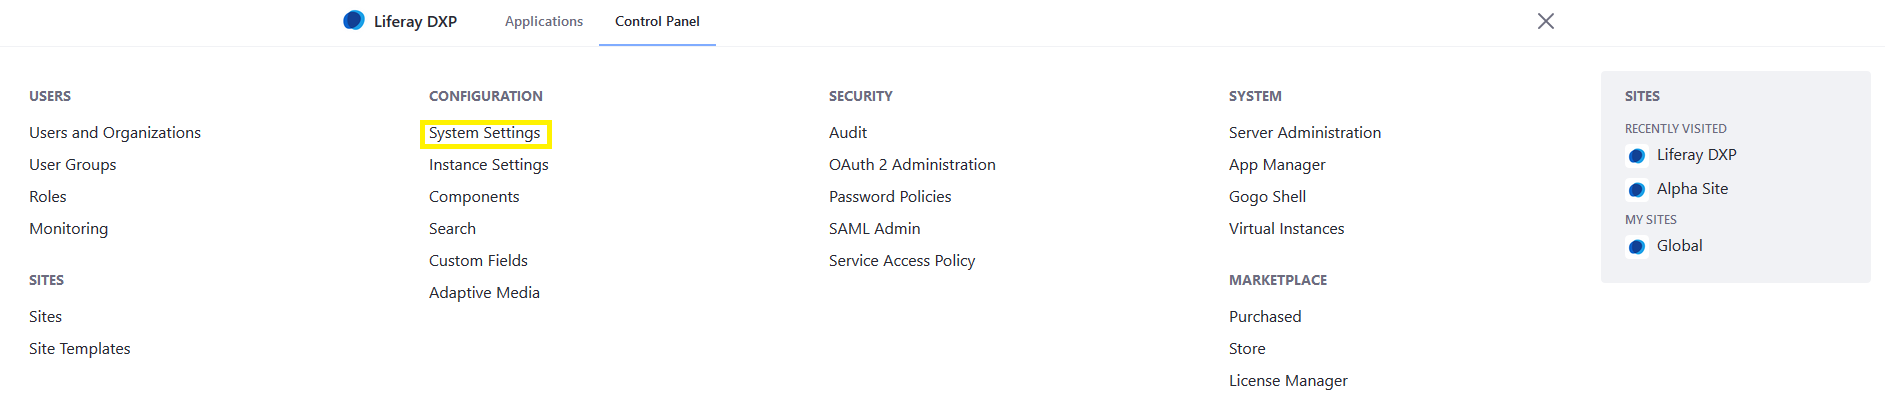
[システム設定] をクリックします。
-
[コンテンツとデータ] の [アセット] をクリックします。
![[アセット]をクリックします。](https://resources.learn.liferay.com/images/dxp/latest/en/content-authoring-and-management/tags-and-categories/auto-tagging/auto-tagging-assets/images/02.png)
-
[仮想インスタンススコープ] の下で、 [Google Cloud Natural Language Text Auto Tagging] をクリックします。
-
フォームに入力します。
-
完了したら、 [保存] をクリックします。
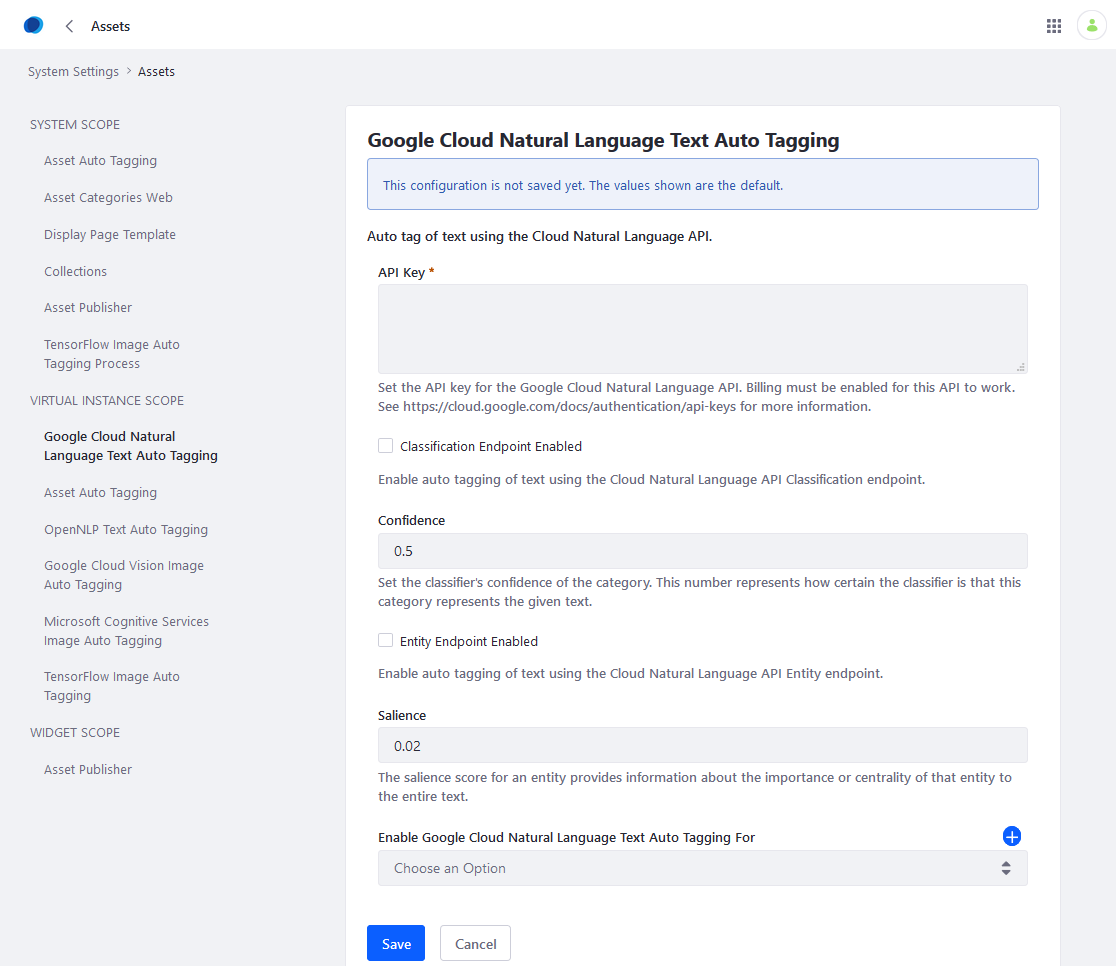
フォームには次の情報が必要です。
APIキー: Google Cloud Natural Language APIに使用するAPIキー。 詳細は、 GoogleのAPIキーに関するドキュメンテーション を参照してください。
分類エンドポイントを有効: Google Cloud Natural LanguageAPI分類エンドポイントを使用してテキストの自動タグ付けを有効にするかどうか。
信頼度: カテゴリの分類子の信頼度を設定します。 この数値は、このカテゴリが特定のテキストを表すことを分類子がどの程度確信しているかを表します。
エンティティエンドポイントを有効: Google Cloud Natural LanguageAPIエンティティエンドポイントを使用してテキストの自動タグ付けを有効にするかどうか。
顕著性: あるエンティティの顕著性スコアは、該当テキストエンティティ全体の重要度や集中度についての情報を提供します。
次に対してGoogle Cloud Natural Languageによるドキュメントの自動タグ付けを有効にする: 自動タグ付けするアセットタイプを選択します。 [ドキュメント] 、 [ブログのエントリ] 、または [Webコンテンツの記事] を選択します。 複数のアセットタイプを追加するには、 追加 アイコン(![]() )をクリックして、メニューからアセットタイプを選択します。 ごみ箱アイコン(
)をクリックして、メニューからアセットタイプを選択します。 ごみ箱アイコン(![]() )をクリックすると、追加のアセットタイプを削除できます。
)をクリックすると、追加のアセットタイプを削除できます。
Google Cloud Natural Languageプロバイダーが設定されました。
サーバー上に複数の仮想インスタンスがある場合は、 [コントロールパネル] → [Instance Settings] → [アセット] から、インスタンスごとにこれらの設定を上書きできます。
OpenNLP Text Auto Taggingの設定
- [グローバルメニュー] → [コントロールパネル] をクリックします。
- [システム設定] をクリックします。
- [コンテンツとデータ] の [アセット] をクリックします。
- [仮想インスタンススコープ] の下で、 [OpenNLP Text Auto Tagging] をクリックします。
- フォームに入力します。
- 完了したら、[保存]をクリックします。
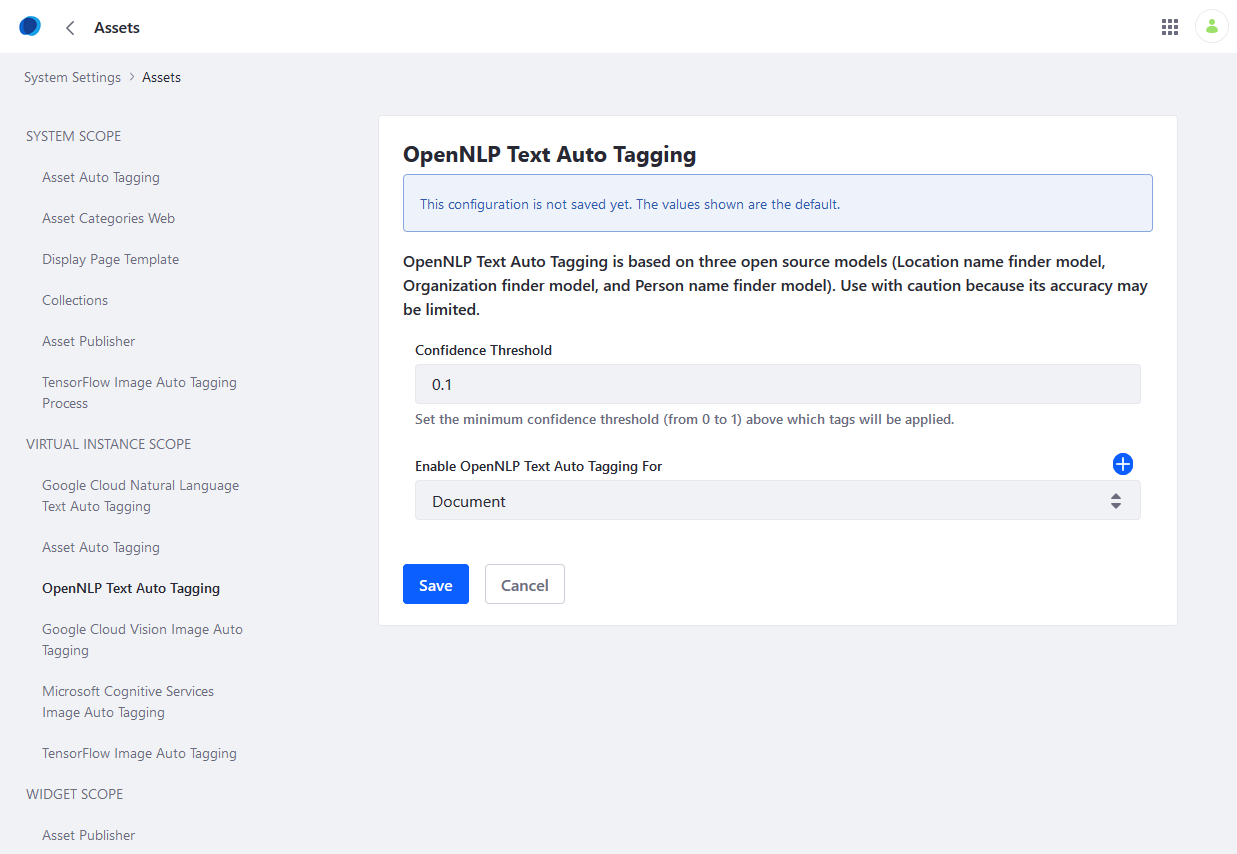
フォームには次の情報が必要です。
信頼度閾値: 最小信頼度閾値を設定します(0から1まで。1が最高の信頼度)。 プロバイダーはタグを適用する前により多くの信頼度を必要とするため、値が高いほどタグは少なくなります。 値が小さいほど、タグが多くなります。
次に対してOpenNLPによるテキストの自動タグ付けを有効にする: 自動タグ付けするアセットタイプを選択します。 メニューを使用して、 [ドキュメント] 、 [ブログのエントリ] 、または [Webコンテンツの記事] を選択します。 複数のアセットタイプを追加するには、 追加 アイコン(![]() )をクリックして、メニューからアセットタイプを選択します。 ごみ箱アイコン(
)をクリックして、メニューからアセットタイプを選択します。 ごみ箱アイコン(![]() )をクリックすると、追加のアセットタイプを削除できます。
)をクリックすると、追加のアセットタイプを削除できます。
OpenNLPプロバイダーが設定されました。
サーバー上に複数の仮想インスタンスがある場合は、 [コントロールパネル] → [Instance Settings] → [アセット] から、インスタンスごとにこれらの設定を上書きできます。