OSGi and Modularity
Modularity makes writing software, especially as a team, fun! Here are some benefits to modular development on Liferay:
- Liferay’s runtime framework is lightweight, fast, and secure.
- The framework uses the OSGi standard. If you have experience using OSGi with other projects, you can apply your existing knowledge.
- Modules publish services to and consume services from a service registry. Service contracts are loosely coupled from service providers and consumers, and the registry manages the contracts automatically.
- Modules’ dependencies are managed automatically by the container, dynamically (no restart required).
- The container manages module life cycles dynamically. Modules can be installed, started, updated, stopped, and uninstalled while Liferay is running, making deployment a snap.
- Only a module’s classes whose packages are explicitly exported are publicly visible; OSGi hides all other classes by default.
- Modules and packages are semantically versioned and declare dependencies on specific versions of other packages. This allows two applications that depend on different versions of the same packages to each depend on their own versions of the packages.
- Team members can develop, test, and improve modules in parallel.
- You can use your existing developer tools and environment to develop modules.
There are many benefits to modular software development with OSGi, and we can only scratch the surface here. Once you start developing modules, you might find it hard to go back to developing any other way.
Liferay commonly uses three kinds of modules:
API modules define interfaces.
Implementation modules provide concrete classes that implement interfaces.
Client modules consume the APIs.
You’ll learn how to create each one by developing a simple command in Gogo Shell to greet users when they enter their names.
It’s time to see what module projects look like and see Liferay’s modular development features in action.
Deploy the Gogo Shell Command Example
Start a new Liferay instance by running
docker run -it -m 8g -p 8080:8080 liferay/portal:7.4.3.112-ga112
Sign in to Liferay at http://localhost:8080. Use the email address test@liferay.com and the password test. When prompted, change the password to learn.
Then, follow these steps to deploy the example:
Download and unzip
liferay-r9u2.zip.curl https://resources.learn.liferay.com/dxp/latest/en/liferay-internals/architecture/liferay-r9u2.zip -Ounzip liferay-r9u2.zipDeploy the example modules.
cd liferay-r9u2.zip./gradlew deploy -Ddeploy.docker.container.id=$(docker ps -lq)Confirm the deployments in the Docker container console.
STARTED com.acme.r9u2.api_1.0.0
STARTED com.acme.r9u2.impl_1.0.0
STARTED com.acme.r9u2.osgi.commands_1.0.0
Open the Gogo Shell.
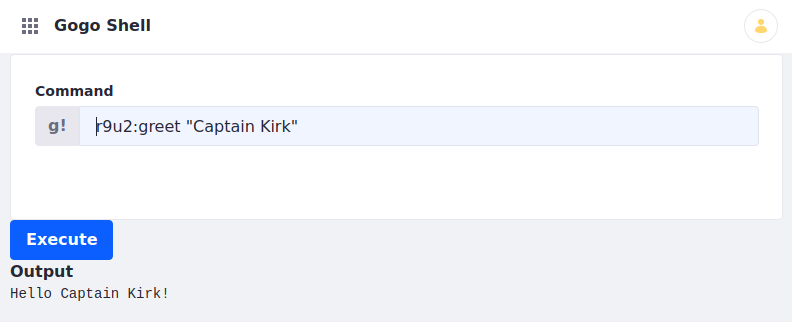
In the Gogo Shell command field, enter a
r9u2:greetcommand to generate a greeting.r9u2:greet "Captain Kirk"Confirm the output.
Hello Captain Kirk!
The example’s client module leverages API and implementation modules to produce the content returned from the r9u2:greet Gogo Shell command. Examine each module next.
API
The API module is first. It defines the contract that a provider implements and a consumer uses. Here is its structure:
[project root]
 └── r9u2-api
 │   ├── bnd.bnd
 │   ├── build.gradle
 │   └── src
 │       └── main
 │           └── java
 │               └── com/acme/r9u2
 │                   └── Greeter.java
 │
 └── [Gradle files]
The r9u2-api module folder contains a bnd.bnd metadata file, a build.gradle script, and Java code.
Very simple, right? Beyond the Java source file, there are only two other files: a Gradle build script (though you can use any build system you want), and a configuration file called bnd.bnd. The bnd.bnd file describes and configures the module:
Bundle-Name: Acme R9U2 API
Bundle-SymbolicName: com.acme.r9u2.api
Bundle-Version: 1.0.0
Export-Package: com.acme.r9u2
The build.gradle file specifies the module’s dependencies.
dependencies {
	compileOnly group: "com.liferay.portal", name: "release.portal.api"
}
It depends on one artifact: the Liferay release API JAR. It is a large JAR packed with Liferay, Bnd, and OSGi artifacts associated with the Liferay product release.
The module’s name is Acme R9U2 API. Its symbolic name—a name that ensures uniqueness—is com.acme.r9u2.api. Its semantic version is declared next, and its package is exported, which means it’s made available to other modules. This module’s package is just an API other modules can implement.
Finally, there’s the Java class, which in this case is an interface:
@ProviderType
public interface Greeter {

	public void greet(String name);

}
The interface’s @ProviderType annotation tells the service registry that anything implementing the interface is a provider. The interface’s one method asks for a String and doesn’t return anything.
That’s it! As you can see, creating modules is not very different from creating other Java projects.
Implementation
An interface only defines an API; to do something, it must be implemented. This is what the implementation (or provider) module is for. Here’s what an implementation module for the Greeter API looks like:
[project root]
 └── r9u2-impl
 │   ├── bnd.bnd
 │   ├── build.gradle
 │   └── src
 │       └── main
 │           └── java
 │               └── com/acme/r9u2/internal
 │                   └── R9U2Greeter.java
 │
 └── [Gradle files]
It has the same structure as the API module: a build script, a bnd.bnd configuration file, and an implementation class. The only differences are the file contents. The bnd.bnd file is a little different:
Bundle-Name: Acme R9U2 Implementation
Bundle-SymbolicName: com.acme.r9u2.impl
Bundle-Version: 1.0.0
The bundle name, symbolic name, and version are all set similarly to the API.
Finally, there’s no Export-Package declaration. A client (which is the project’s third module) just wants to use the API: it doesn’t care how its implementation works as long as the API returns what it’s supposed to return. The client, then, only needs to declare a dependency on the API; the service registry injects the appropriate implementation at run time.
Pretty cool, eh?
All that’s left, then, is the class that provides the implementation:
@Component(service = Greeter.class)
public class R9U2Greeter implements Greeter {

	@Override
	public void greet(String name) {
		System.out.println("Hello " + name + "!");
	}

}
The example greet method prints an enthusiastic greeting using the given name.
Here is the implementation module build.gradle file.
dependencies {
	compileOnly group: "com.liferay.portal", name: "release.portal.api"
	compileOnly project(":r9u2-api")
}
It includes a compile-time dependency on the r9u2-api module project because it requires the module’s Greeter class.
That’s all there is to an implementation module.
Client
The consumer or client uses the API that the API module defines and the implementation module implements. Liferay has many different kinds of consumer modules. Portlets are the most common consumer module type, but since they are a topic all by themselves, this example stays simple by creating an command for the Apache Felix Gogo shell. Note that consumers can, of course, consume many different APIs to provide functionality.
A consumer module has the same structure as the other module types:
[project root]
 └── r9u2-osgi-commands
 │   ├── bnd.bnd
 │   ├── build.gradle
 │   └── src
 │       └── main
 │           └── java
 │               └── com/acme/r9u2/internal/osgi/commands
 │                   └── R9U2OSGiCommands.java
 │
 └── [Gradle files]
Again, you have a build script, a bnd.bnd file, and a Java class. This module’s bnd.bnd file is almost the same as the provider’s:
Bundle-Name: Acme R9U2 OSGi Commands
Bundle-SymbolicName: com.acme.r9u2.osgi.commands
Bundle-Version: 1.0.0
There’s nothing new here: you declare the same things you declared for the provider.
The client module depends on the API module and the release.portal.api artifact. Here’s the r9u2-osgi-commands module’s build.gradle file:
dependencies {
	compileOnly group: "com.liferay.portal", name: "release.portal.api"
	compileOnly project(":r9u2-api")
}
Your Java class has a little bit more going on:
@Component(
	property = {"osgi.command.function=greet", "osgi.command.scope=r9u2"},
	service = R9U2OSGiCommands.class
)
public class R9U2OSGiCommands {

	public void greet(String name) {
		_greeter.greet(name);
	}

	@Reference
	private Greeter _greeter;

}
The method above invokes a Greeter’s greet method. com.acme.r9u2.Greeter is the OSGi service type that the implementation module registers. Getting a Greeter service from the registry requires adding an @Reference annotation to the Greeter field _greeter.
The R9U2OSGiCommands class provides an OSGi service of its own type. The two properties define a Gogo shell command with a command function called greet in a scope called r9u2. The deployed R9U2OSGiCommands component provides the Gogo Shell command r9u2:greet that takes a String as input.
This most basic of examples should make it clear that module-based development is easy and straightforward. The API-Provider-Consumer contract fosters loose coupling, making your software easy to manage, enhance, and support.
A Typical Liferay Application
If you look at a typical application from Liferay’s source, you’ll generally find at least four modules:
- API module
- Service (provider) module
- Test module
- Web (consumer) module
This is exactly what you’ll find for some smaller applications, like the Mentions application that lets users mention other users with the @username nomenclature in comments, blogs, or other applications. Larger applications like the Documents and Media library have more modules. In the case of the Documents and Media library, there are separate modules for different document storage backends. In the case of the Wiki, there are separate modules for different Wiki engines.
Encapsulating capability variations as modules facilitates extensibility. If you have a document storage backend that Liferay doesn’t yet support, you can implement Liferay’s document storage API for your solution by developing a module for it and thus extend Liferay’s Documents and Media library. If there’s a Wiki dialect that you like better than what Liferay’s wiki provides, you can write a module for it and extend Liferay’s wiki.
Are you excited yet? Are you ready to start developing? Here are some resources for you to learn more.