Creating and Editing Documents with Microsoft Office 365
Use Office 365™ to create and edit text documents, spreadsheets, or presentations for storage in the Documents and Media library. After completing your Office 365™ editing session, check in the document to save changes in the Documents and Media library.
To begin, connect your DXP installation with Microsoft Office 365™.
Authentication
The first time you create or edit a Documents and Media file via Office 365™, you must authenticate with your Microsoft account, which links OneDrive™ to your DXP account.
If you update your Microsoft account credentials, you must unlink your OneDrive™ account from DXP and re-link it to trigger the login prompt again.
Unlinking the Account
-
Click your User Profile icon → Account Settings.
-
On the General tab, click Apps.
-
Click Revoke next to OneDrive™.
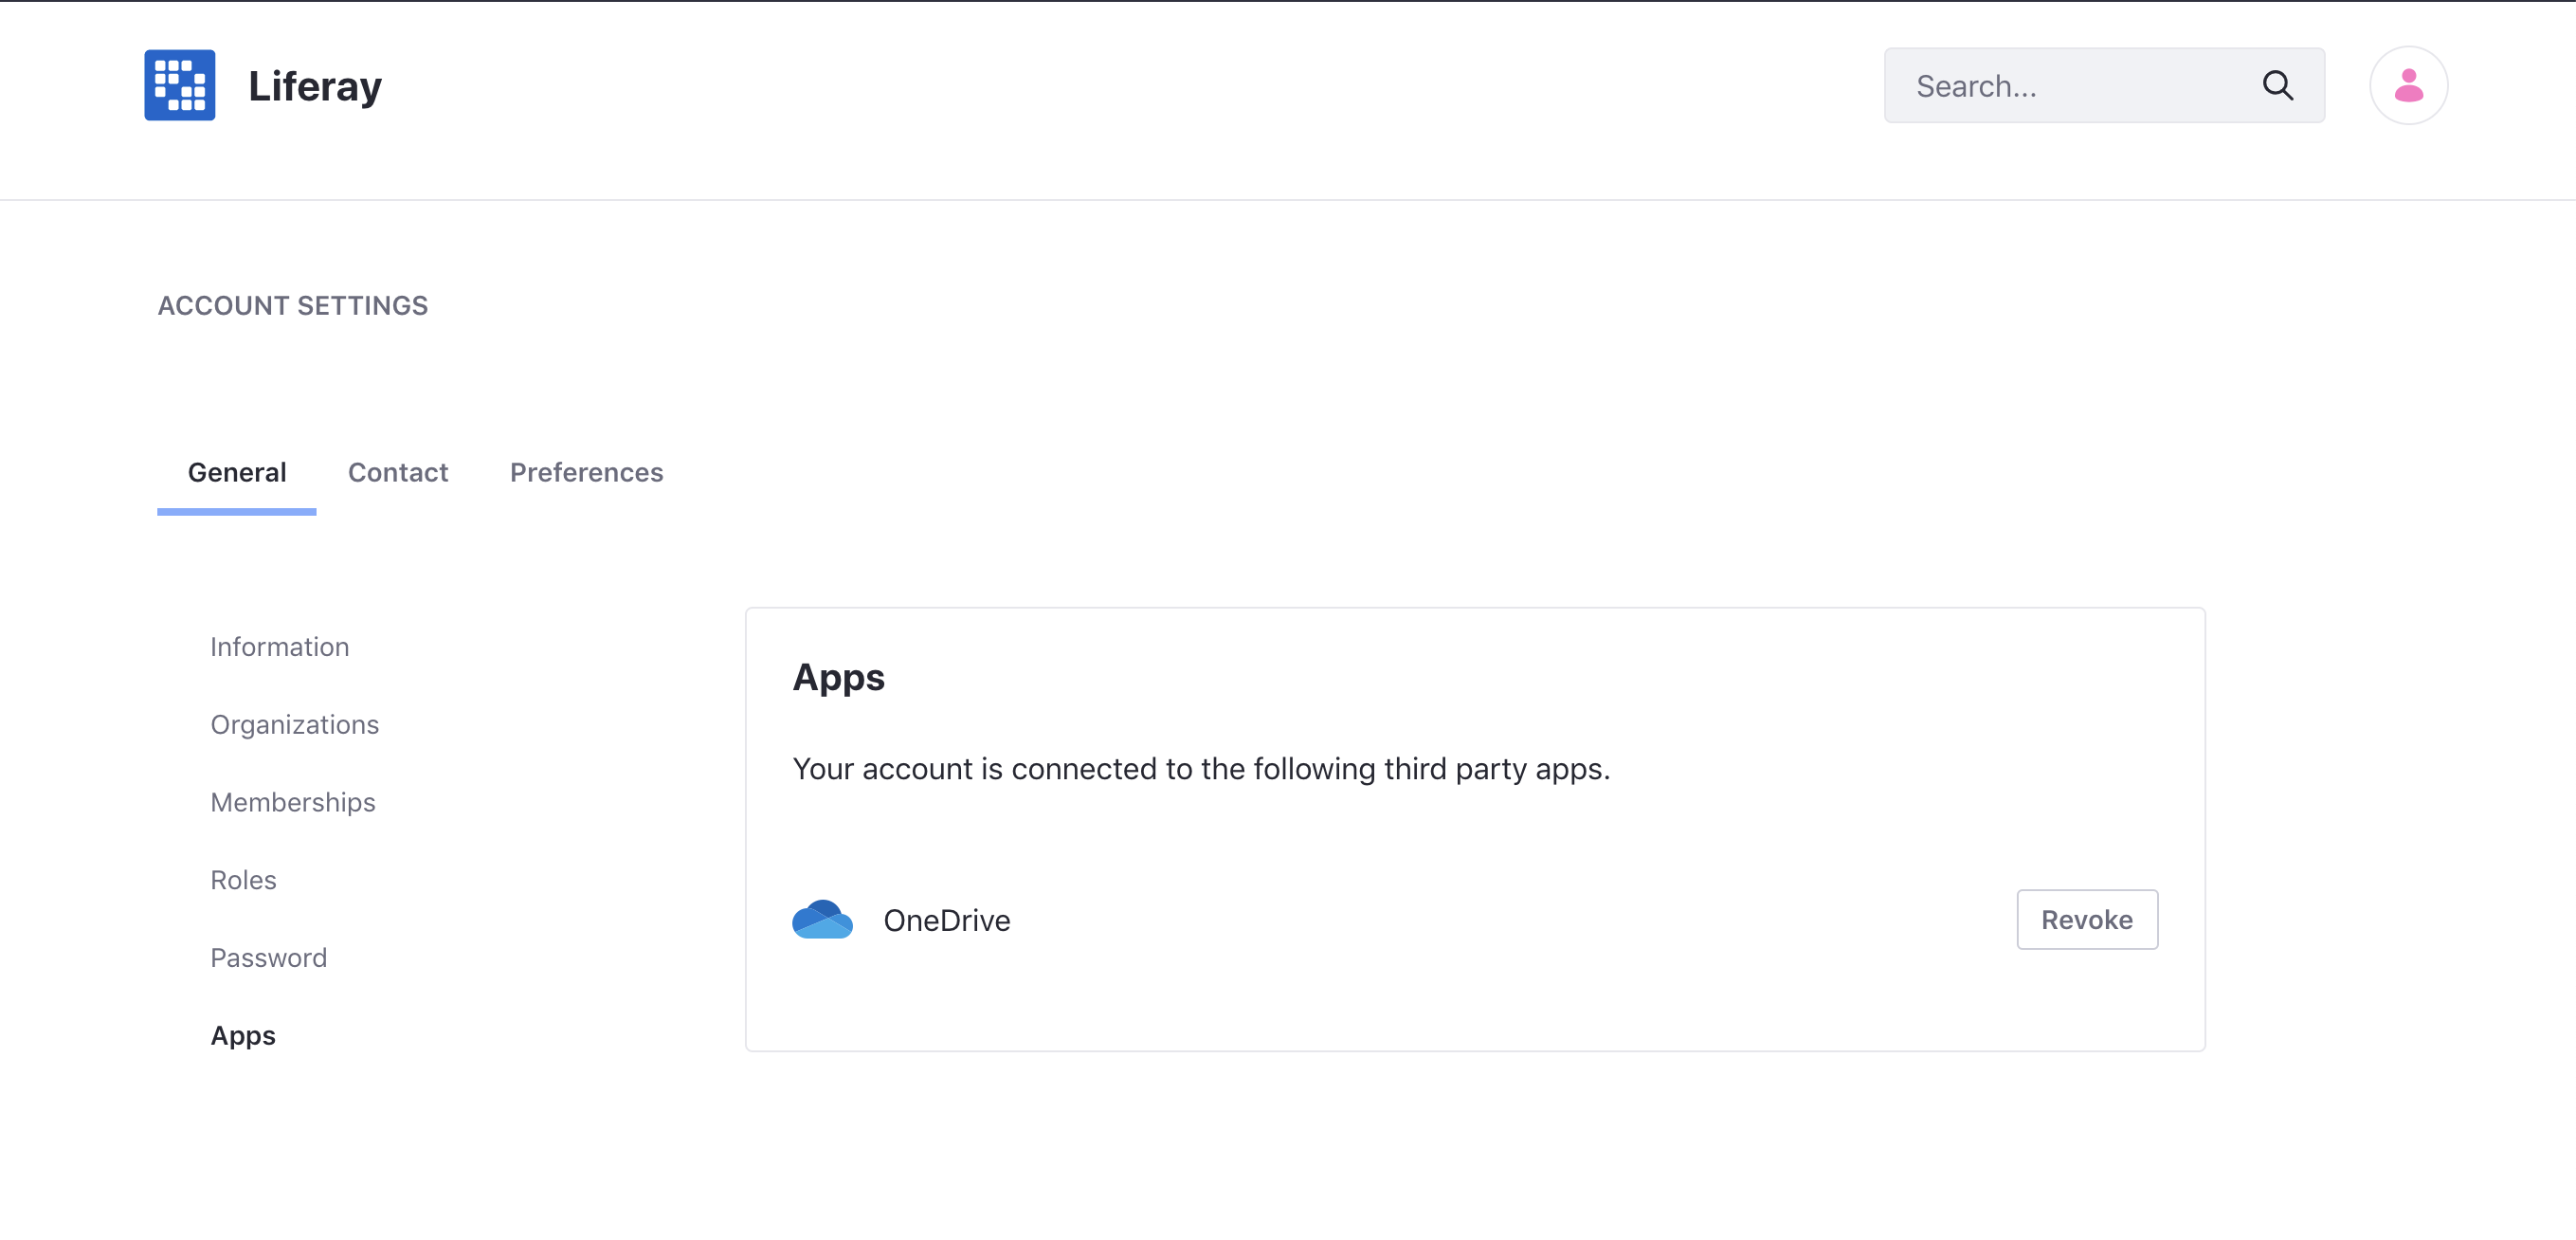
OneDrive™ is unlinked.
Creating Files
-
Open the Site Menu (
 ), click your site’s name, and navigate to Content & Data → Documents and Media.
 -
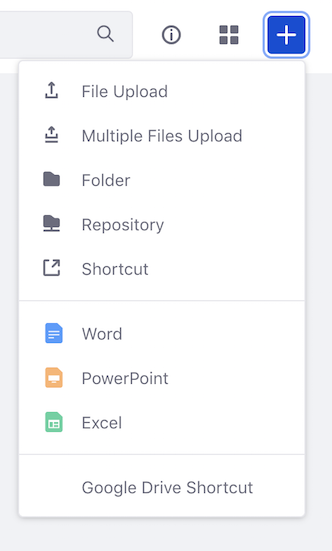
Click Add (
 ) and select the type of Office 365™ document to add to the Document Library:
- Word™
- Excel™
- PowerPoint™
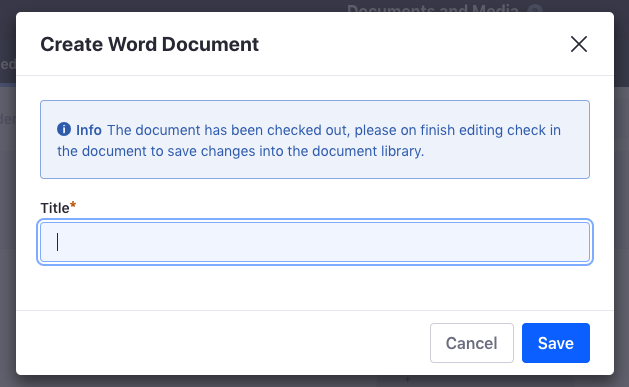
When you select one of these options, a new window opens for you to enter the document’s name.
-
Enter the document’s name in the Title field, and click Save. When you click Save, DXP creates a temporary Documents and Media file and links it to the new Office 365™ file. Your browser then opens a new window with that Office 365™ file so you can create its content.
-
Use the Office 365™ editor to create your document’s content.
-
Save or discard your changes to DXP:
Check in: Saves the Office 365™ file to Documents and Media, then deletes the file from Office 365™. The saved file’s format depends on the document type you selected in step two above.
- Word: Microsoft Word™ (
.docx) - PowerPoint: Microsoft PowerPoint™ (
.pptx) - Excel: Microsoft Excel™ (
.xlsx)
Cancel Checkout: Deletes the Office 365™ file, discarding any changes.
- Word: Microsoft Word™ (
Editing Files
You can use Office 365™ to edit the following types of Documents and Media files:
- Text files (
.doc,.docx,.docm,.dot,.dotx,.dotm,.html,.txt,.rtf,.odt) - Presentation files (
.ppt,.pptx,.pptm,.pps,.ppsx,.ppsm,.pot,.potx,.potm) - Spreadsheet files (
.xls,.xlsx,.xlsm,.xlt,.xltx,.xltm,.ods,.csv,.tsv,.txt,.tab)
To edit documents in Office 365™ within Liferay, ensure your files are in the current Microsoft Office™ formats (.docx, .xlsx, and .pptx). Convert older formats (e.g., .doc, .xls, and .ppt) to these formats for compatibility with Office 365™ editing.
To edit a Documents and Media file in Office 365™,
-
Navigate to the file in the Documents and Media Library.
-
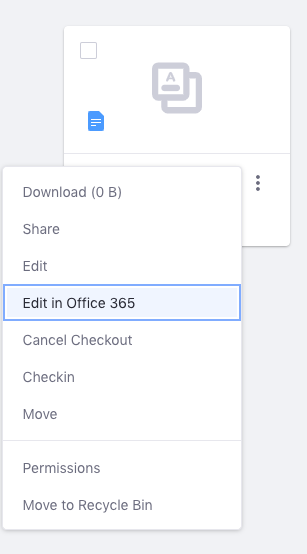
Click Actions (
 ) for the file you want to edit and select Edit in Office 365. This automatically checks out the file, transfers its content to a new Office 365™ file, and redirects you to that file Office 365™.
 -
Edit the file in Office 365™. The editing process is exactly the same as described above for creating files.