Stage 5: Migrating Web Server Configurations
Now that your Liferay configurations and customizations are deployed to Liferay Cloud, the next stage is to migrate your web server configurations. This involves migrating your web server to Nginx (if needed), and deploying all of your Nginx configuration files and customizations (shell scripts and static content) to your Liferay Cloud environments.
Migrate Your Web Server to Nginx
Liferay Cloud only supports Nginx for its web server. If you are not using Nginx already, then migrate your web server and configurations to Nginx first. See the Nginx site for more information.
If you need help with migrating to Nginx, please contact Liferay Cloud Support.
Organize Nginx Configurations
Next, move your Nginx configurations into your repository, where you can deploy them to Liferay Cloud.
Skip this step if you do not have any specific Nginx configurations to organize.
In the project repository you cloned previously, navigate to the webserver/configs/[ENV]/ folders (which correspond to your Liferay Cloud environments), and put all of your Nginx configuration files into the appropriate environment folders, following this pattern:
- Put Nginx configuration (
.conf) files intowebserver/configs/[ENV]/conf.d/ - Put overrides for the
var/www/html/directory intowebserver/configs/[ENV]/public/ - Put any other overrides (for the
/etc/nginx/directory) intowebserver/configs/[ENV]/
Any files put into the webserver/configs/common/ folder applies to all environments when deployed.
See Web Server Service Configurations for more information.
To see what an Nginx configuration file looks like, see the example configuration here.
Organize Web Server Customizations
Skip this step if you do not have these custom shell scripts or static content for your web server.
In your Liferay Cloud project repository, put all of your custom shell scripts into each appropriate webserver/configs/[ENV]/scripts/ environment folder.
Put all of your static content into each appropriate webserver/configs/[ENV]/public/ environment folder.
Once you have all of your custom content organized into your repository, you are ready to deploy the changes to your Liferay Cloud environments.
Create and Deploy a Build
Next, you must create and deploy a build with these changes to apply them to your Liferay Cloud environments.
Create a Jenkins Build with the Change
Run Git commands to submit your changes using any terminal with Git installed.
Add the changed files to Git:
git add .Make a commit with your changes and a message:
git commit -m "Liferay Cloud Migration Stage 5"Push the changes to GitHub:
git push origin master
Since your project is linked to the GitHub repository, pushing the changes automatically creates a build. Wait for the build to complete before proceeding.
Deploy the Build to Your Chosen Environment
Finally, use the Liferay Cloud Console to deploy the completed build to your chosen environment.
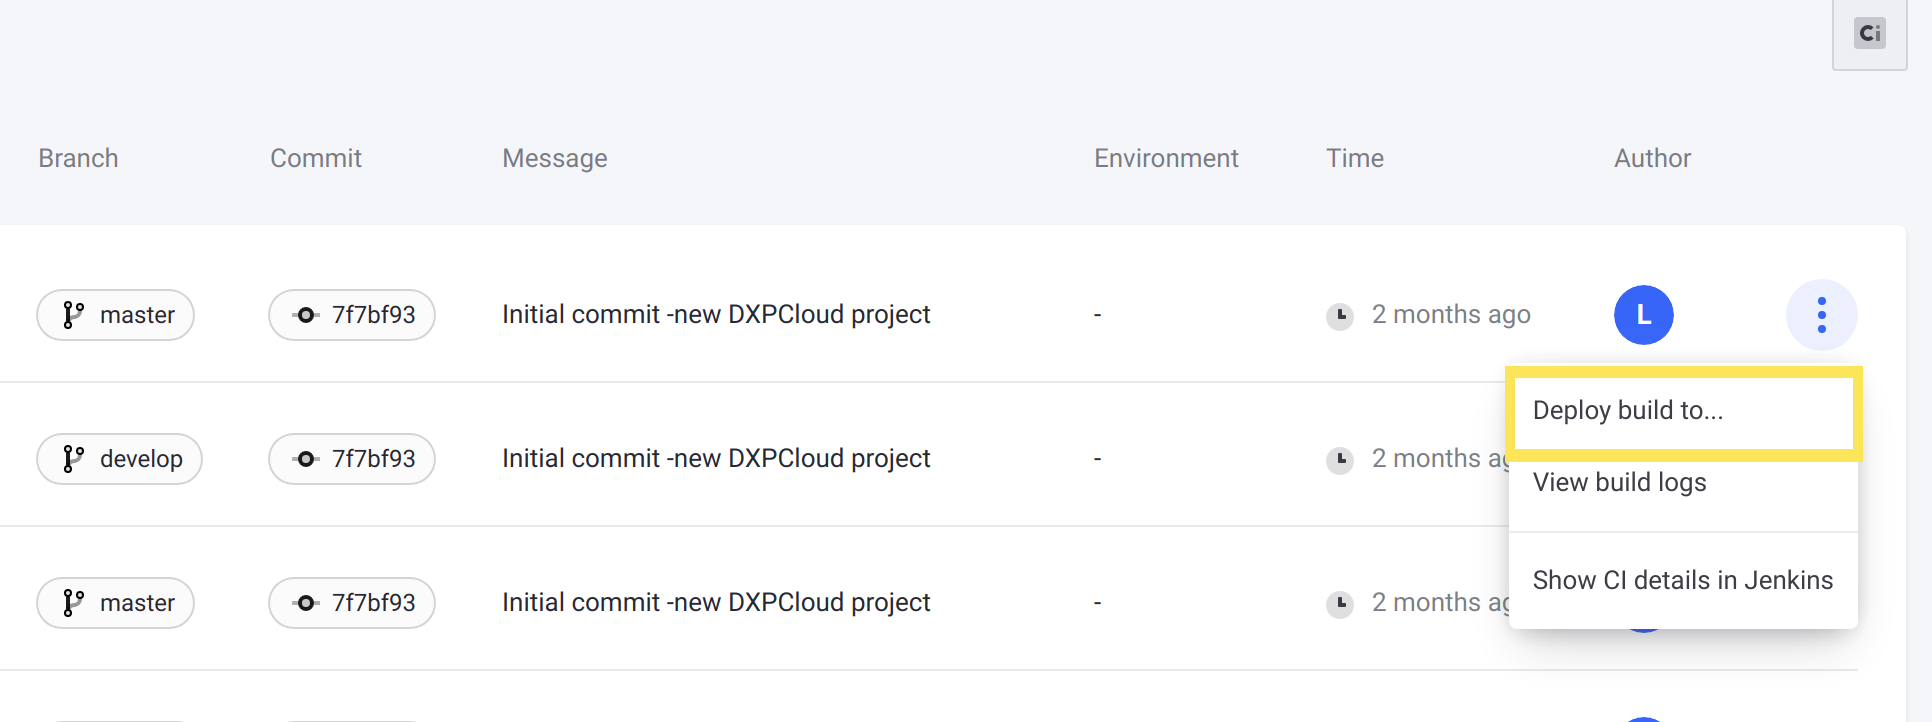
In the Liferay Cloud Console, go to the Builds page (using the link at the top of the page).
Find the build you created previously in the list, and from the Actions menu, click Deploy build to.
Select the environment to deploy the build to (e.g.,
acme-dev).Read the information below and select the confirmation boxes to confirm the results of the deployment.
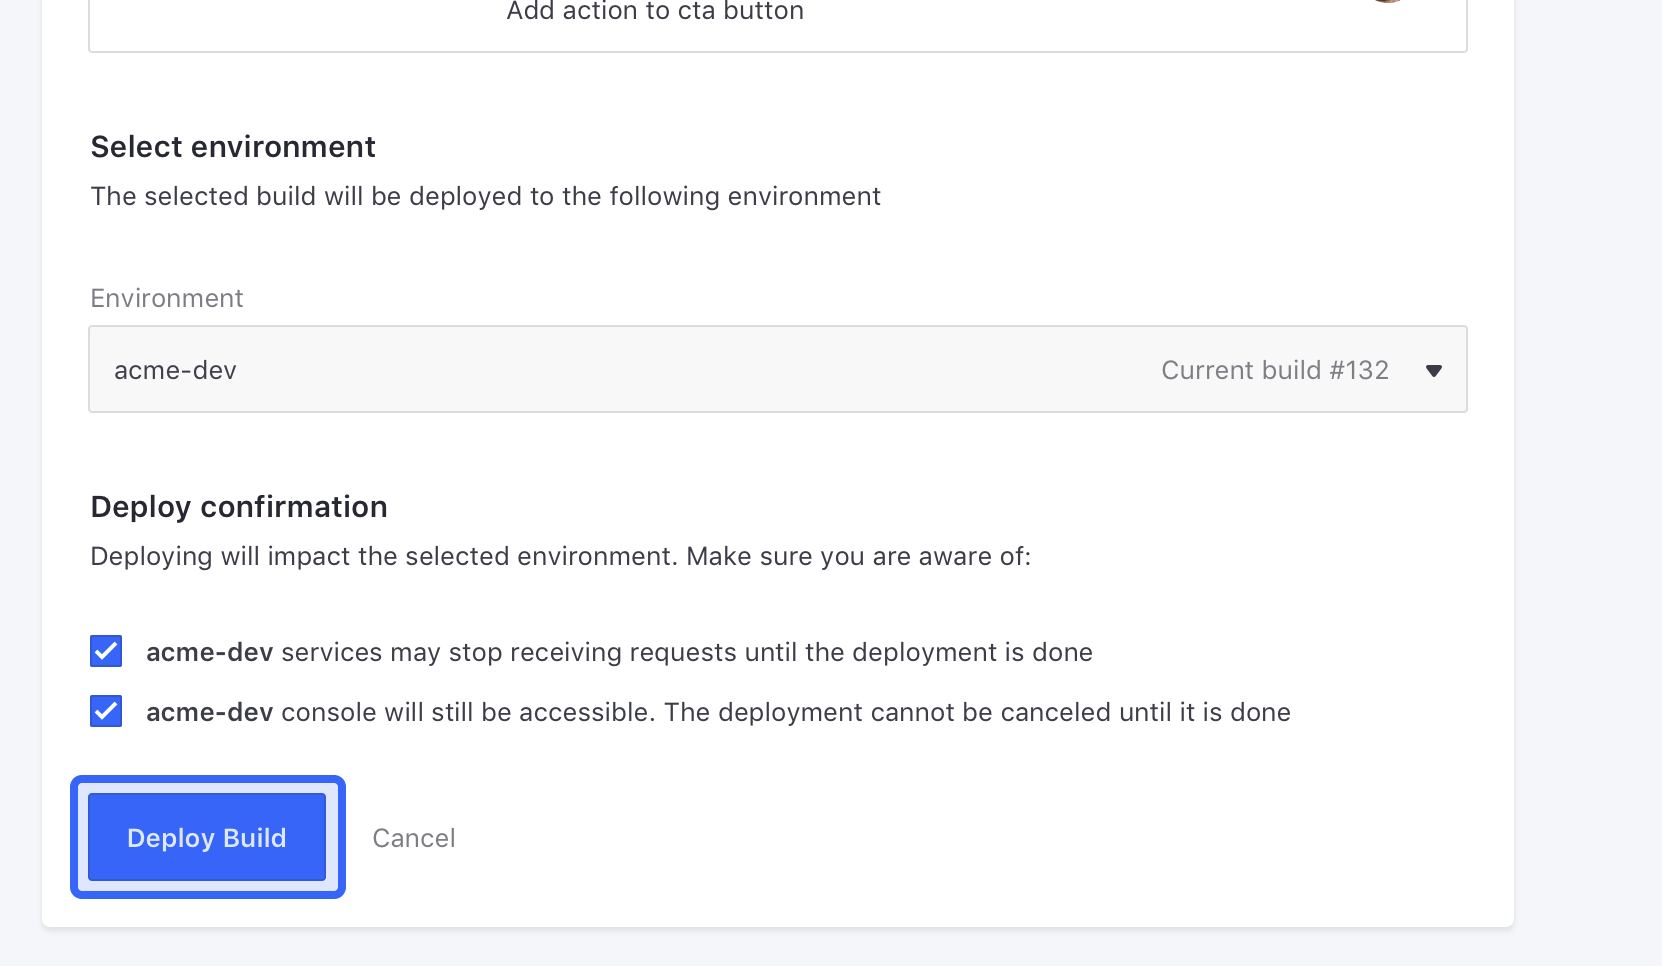
Click Deploy Build.
The build is deployed to your chosen environment, and your Nginx configurations and customizations are applied to the chosen environment once the webserver service restarts.
Next Steps
Now you have finished migrating your web server configurations to your Liferay Cloud environments. Next, you will migrate your Elasticsearch configurations.