Liferay UI Tabs
Tabs create dividers that organize content into individual sections. Content can be embedded or included from another JSP.
To add tabs to your app, use the <liferay-ui:tabs> tag and specify each tab’s name as a comma-separated list for the names attribute. For example, three tabs named tab1, tab2, and tab3, look like this in the JSP:
<liferay-ui:tabs names="tab1,tab2,tab3">

</liferay-ui:tabs>
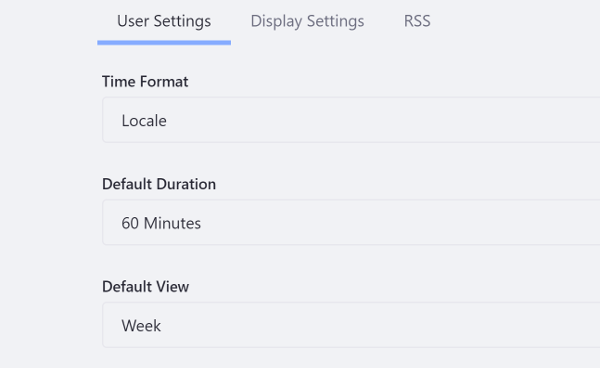
Each tab requires a corresponding section to display content. Nest liferay-ui:section tags for each of the tabs. Within each section, you can add HTML content or add content indirectly by including content from another JSP (via the <%@ includefile="filepath"%> directive). The example snippet below is from the Calendar portlet’s configuration.jsp:
<liferay-ui:tabs
    names='<%= "user-settings,display-settings,rss" %>'
    param="tabs2"
    refresh="<%= false %>"
    type="tabs nav-tabs-default"
>
    <liferay-ui:section>
        <%@ include file="/configuration/user_settings.jspf" %>
    </liferay-ui:section>

    <liferay-ui:section>
        <%@ include file="/configuration/display_settings.jspf" %>
    </liferay-ui:section>

    <liferay-ui:section>
        <%@ include file="/configuration/rss.jspf" %>
    </liferay-ui:section>
</liferay-ui:tabs>
The example above uses some of the tab’s available attributes. See the Tabs taglibdocs for the full list of attributes.