Creating and Managing Publications
Liferay DXP/Portal 7.3+
With Publications, users can create instance-scoped blocks of changes. Because each publication is instance-scoped, they can be accessed anywhere in the Liferay UI and include changes from multiple Sites. By default, users can only view and manage publications they’ve created. However, users can invite each other to collaborate on their publications. See Collaborating on Publications for more information.
Once Publications is enabled, you can create, edit, publish, or remove a publication via the Publications application page or the Publications drop-down menu.
Before upgrading your Liferay version, ensure you’ve published all active publications. After upgrading, active publications are marked as out-of-date and cannot be published, changed, or reverted.
After Liferay DXP 2024.Q2+/Portal 7.4 GA120+, only unreconcilable differences (e.g., schema changes) make publications go out of date. Additionally, you can move changes from out-of-date publications to other publications.
Creating a Publication
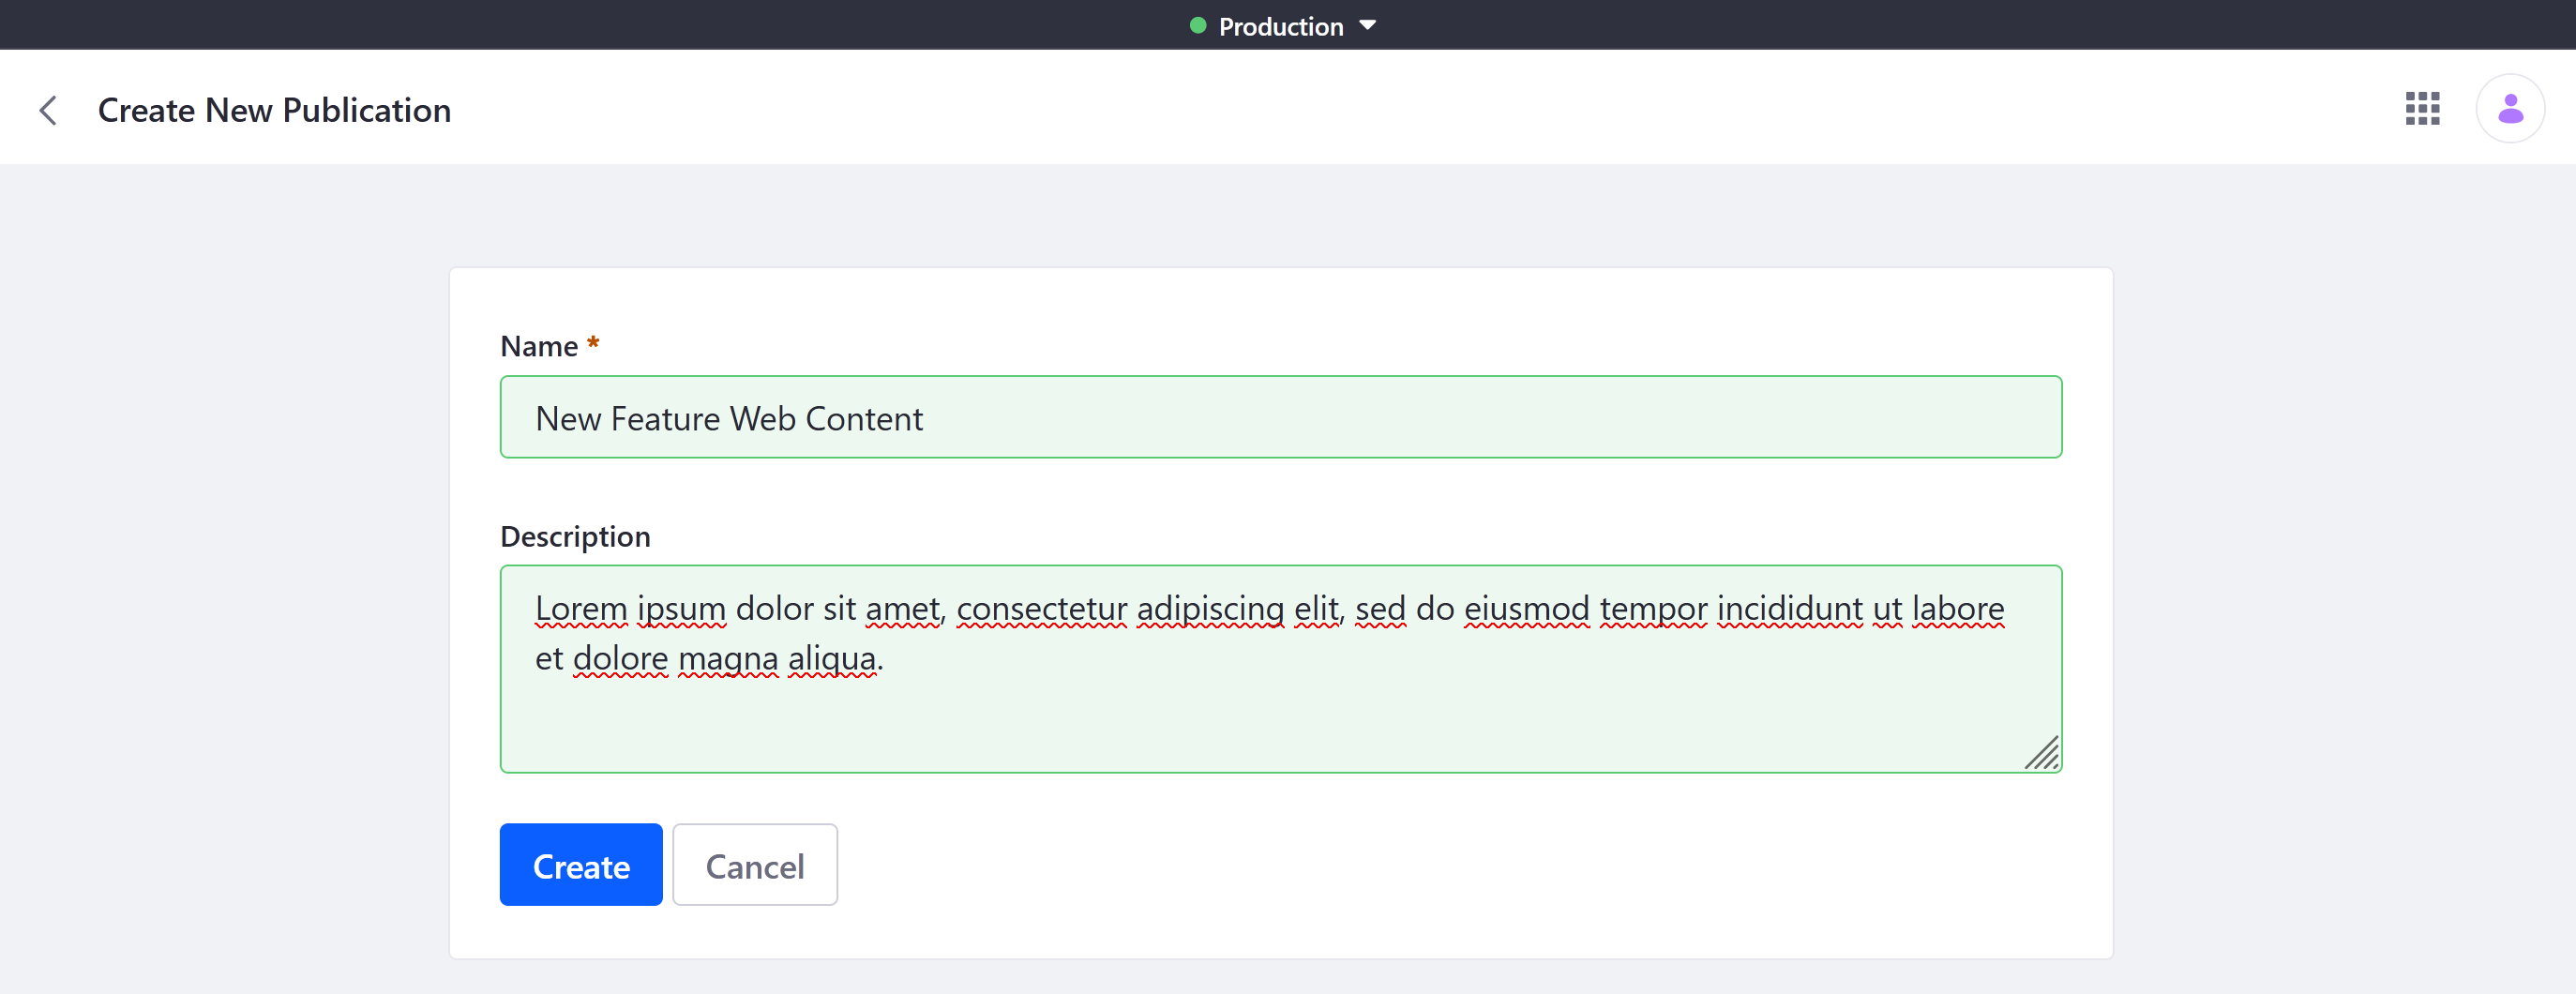
Click the Publications drop-down menu, and select Create New Publication.

Alternatively, open the Publications application and click Add (
 ) in the Ongoing tab.
Enter a name and description for the publication.
Alternatively, select a publication template to auto-populate these fields.
NotePublication names do not need to be unique. However, using unique names is recommended for organization.
Click Create.
Once the publication is created, you can begin adding changes to it. See Making and Publishing Changes to learn more about the editing and publishing process.
After creation, each publication is automatically updated with changes made in production, provided they don’t conflict with any changes made in the publication.
Managing Ongoing Publications
In the Ongoing tab, you can view a table of all active, unpublished publications that you have permission to view. The table is ordered by Modified Date and includes each publication’s name, description, time of last modification, time of creation, and owner.
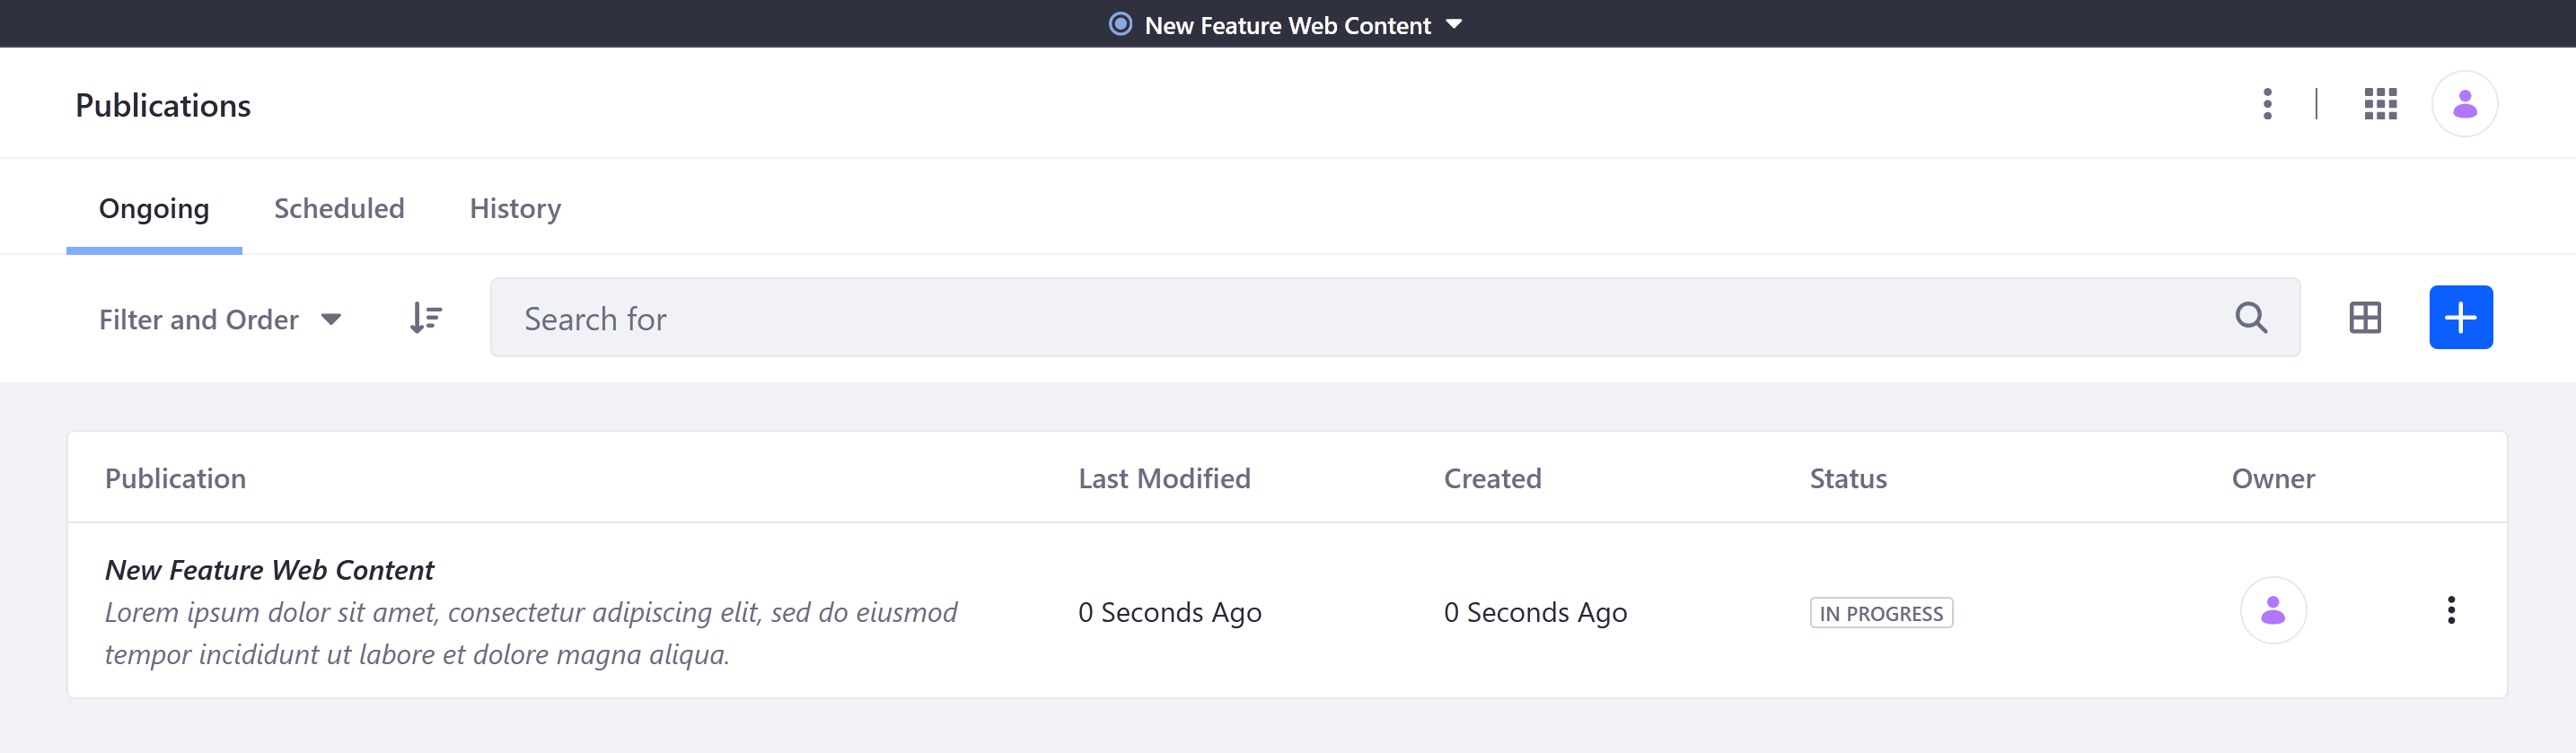
From here, you can click a publication’s Actions button ( ![]() ) to perform the following actions:
) to perform the following actions:
Work on Publication: Select the publication to add changes to it. Once selected, you can easily toggle between the publication and production via the Publications drop-down menu. See Making Changes in a Publication for more information.
Edit: Modify the publication’s name or description.
Review Changes: View all changes included in the publication. See Reviewing Publication Changes for more information.
Invite Users: Invite users to collaborate on the publication. See Collaborating on Publications for more information.
Publish: Begin the publishing process for the publication. This redirects users to the publishing page, where they can resolve conflicts. If there are no conflicts, they can click Publish to make their changes live. See Publishing Changes and Resolving Conflicts for more information.
Schedule: Schedule the publication’s changes to be applied to production. See Publishing Changes for more information.
Permissions: Assign publication-specific permissions to User roles. Permissions configured in this way are scoped to the individual publication.
Delete: Remove the publication from your instance. When selected, you are prompted to confirm your choice.
Deleting a publication permanently removes all of its changes from your database and cannot be undone. Before deleting a publication, ensure you’ve saved any data you want to preserve.
Managing Scheduled Publications
In the Schedule tab, you can view a table of all scheduled publications that you have permission to view. By default, scheduled publications are listed by Name, though you can order them by modified date or when each publication is scheduled for Publishing.
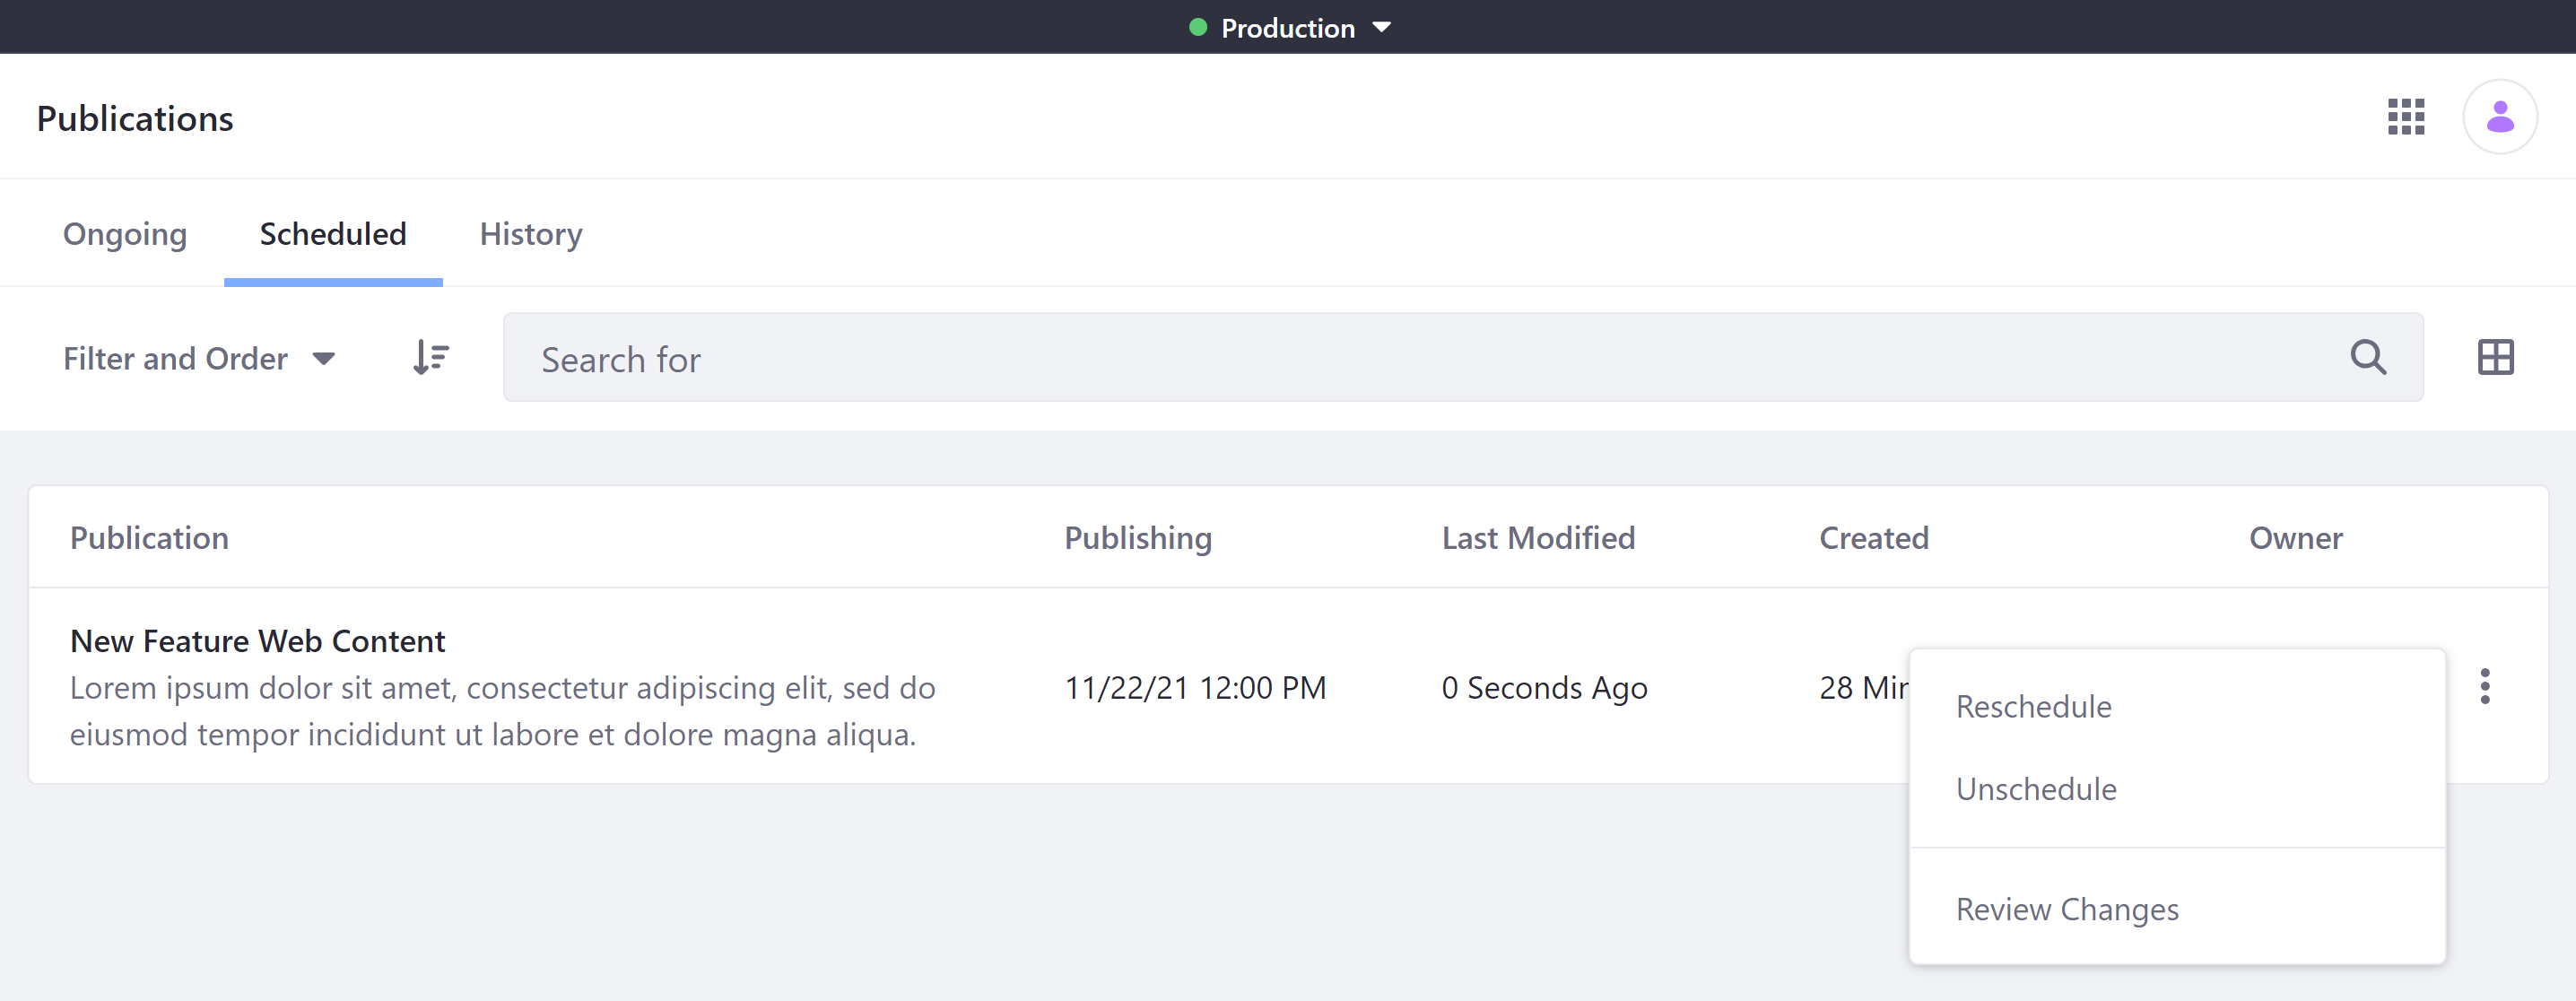
Once scheduled, changes cannot be added to a publication. However, you can click its Actions button (![]() ) to perform the following actions:
) to perform the following actions:
Unschedule: Cancel the scheduled publishing and return the publication to the In Progress status.
Reschedule: Set an alternative date and time for publishing the changes to production.
Review Changes: View all changes included in the publication.
Managing Out-of-date Publications
Liferay DXP 2024.Q2+/Portal 7.4 GA120+ Beta Feature
After an upgrade, publications created on older versions become out of date, serving only as references and no longer being modifiable, revertible, or publishable. However, users can still view, delete, or move compatible changes to another publication.
To manage out-of-date publications,
Open the Global Menu (
 ), navigate to the Applications tab, and click Publications under Publications.
Click Actions (
 ) next to the out-of-date publication you want to manage.
Choose an available action: select Review Changes to view more information about the change and move it to another publication or select Delete to delete your out-of-date publication.
To move changes to a new publication,
Create a new publication or open an existing one to house the new changes.
Click the publication name or Actions (
) next to the out-of-date publication you want to manage and select Review Changes.Click Actions (
) next to the change you want to move and select Move Changes. A page appears displaying the author of the changes along with a summary of the alterations made.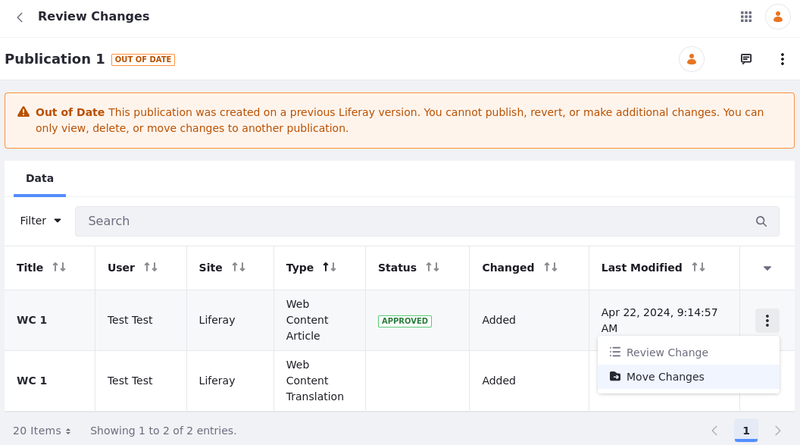
Select the target publication at the bottom of the page and click Move Changes to complete the process.
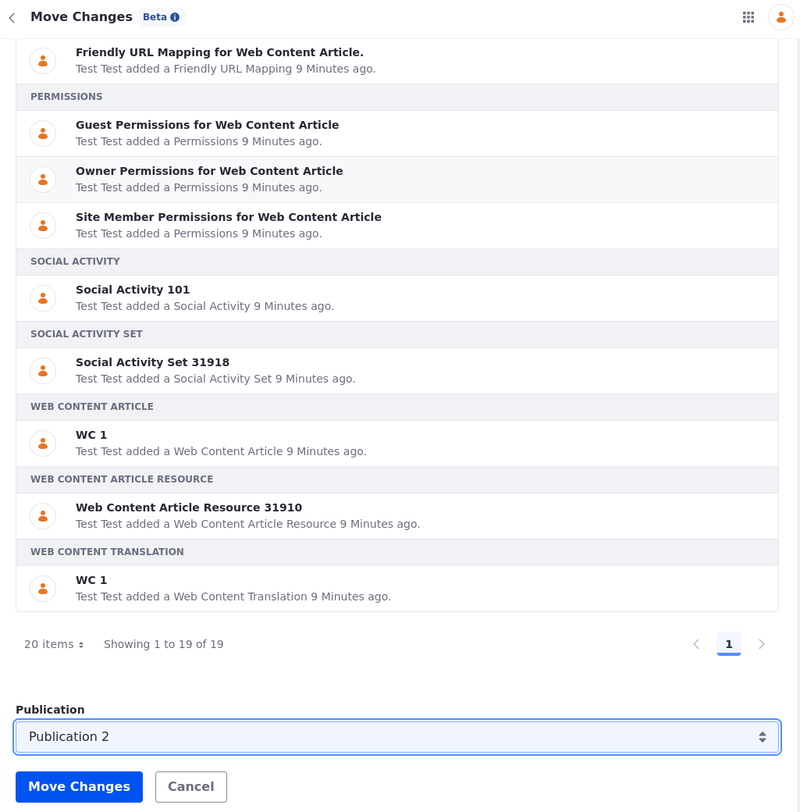
The changes are moved to the target publication, and you can now schedule/publish it.
Managing History of Publications
In the History tab, you can view a table of all published publications for the DXP instance, including those published by other users. By default, publications are ordered by Published Date, though you can order them by name.
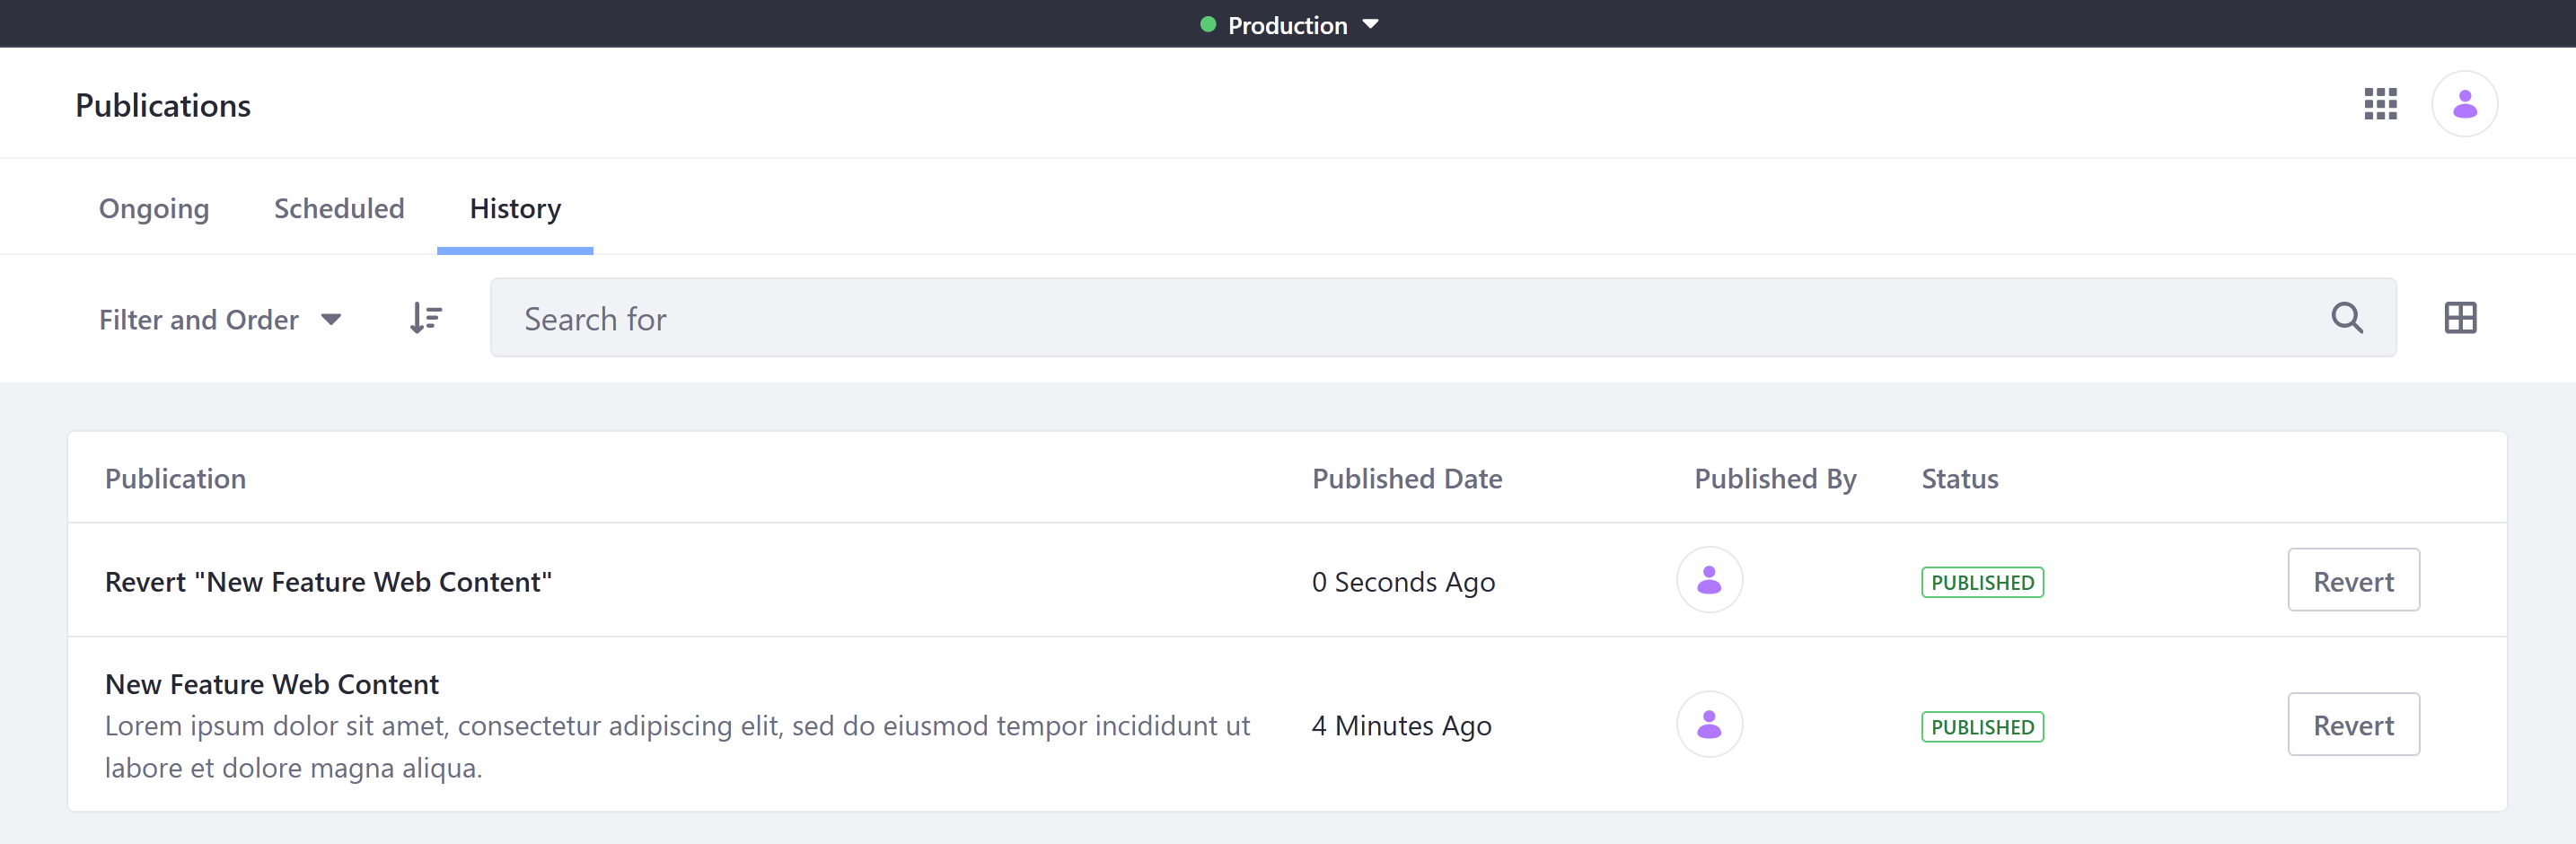
From here, you can click Revert for a publication to automatically create a new publication that reverts its changes. You can also make additional changes to your DXP instance as part of your Revert publication. See Reverting Changes for more information.
While all published publications on an instance are listed in the History tab, only publication owners and collaborators can view the publication’s list of changes or revert it.