Custom Domains
With Liferay Cloud, you can connect custom domains to environment services with a DNS provider.
First, register your custom domain with your environment’s Load Balancer IP address. Then add the domain to the desired service via the Liferay Cloud console or the service’s LCP.json file.
Changes or additions to custom domains can take one or more hours to propagate.
- Registering a Custom Domain with an Environment IP
- Adding a Custom Domain to a Liferay Cloud Service
- Verifying the Status of a Custom Domain
Registering a Custom Domain with an Environment IP
Each project environment has its own Ingress Load Balancer IP address that can be used to connect custom domains to environment services.
This IP appears each environment’s Network page, as well as in each service’s dedicated page under Custom Domains.
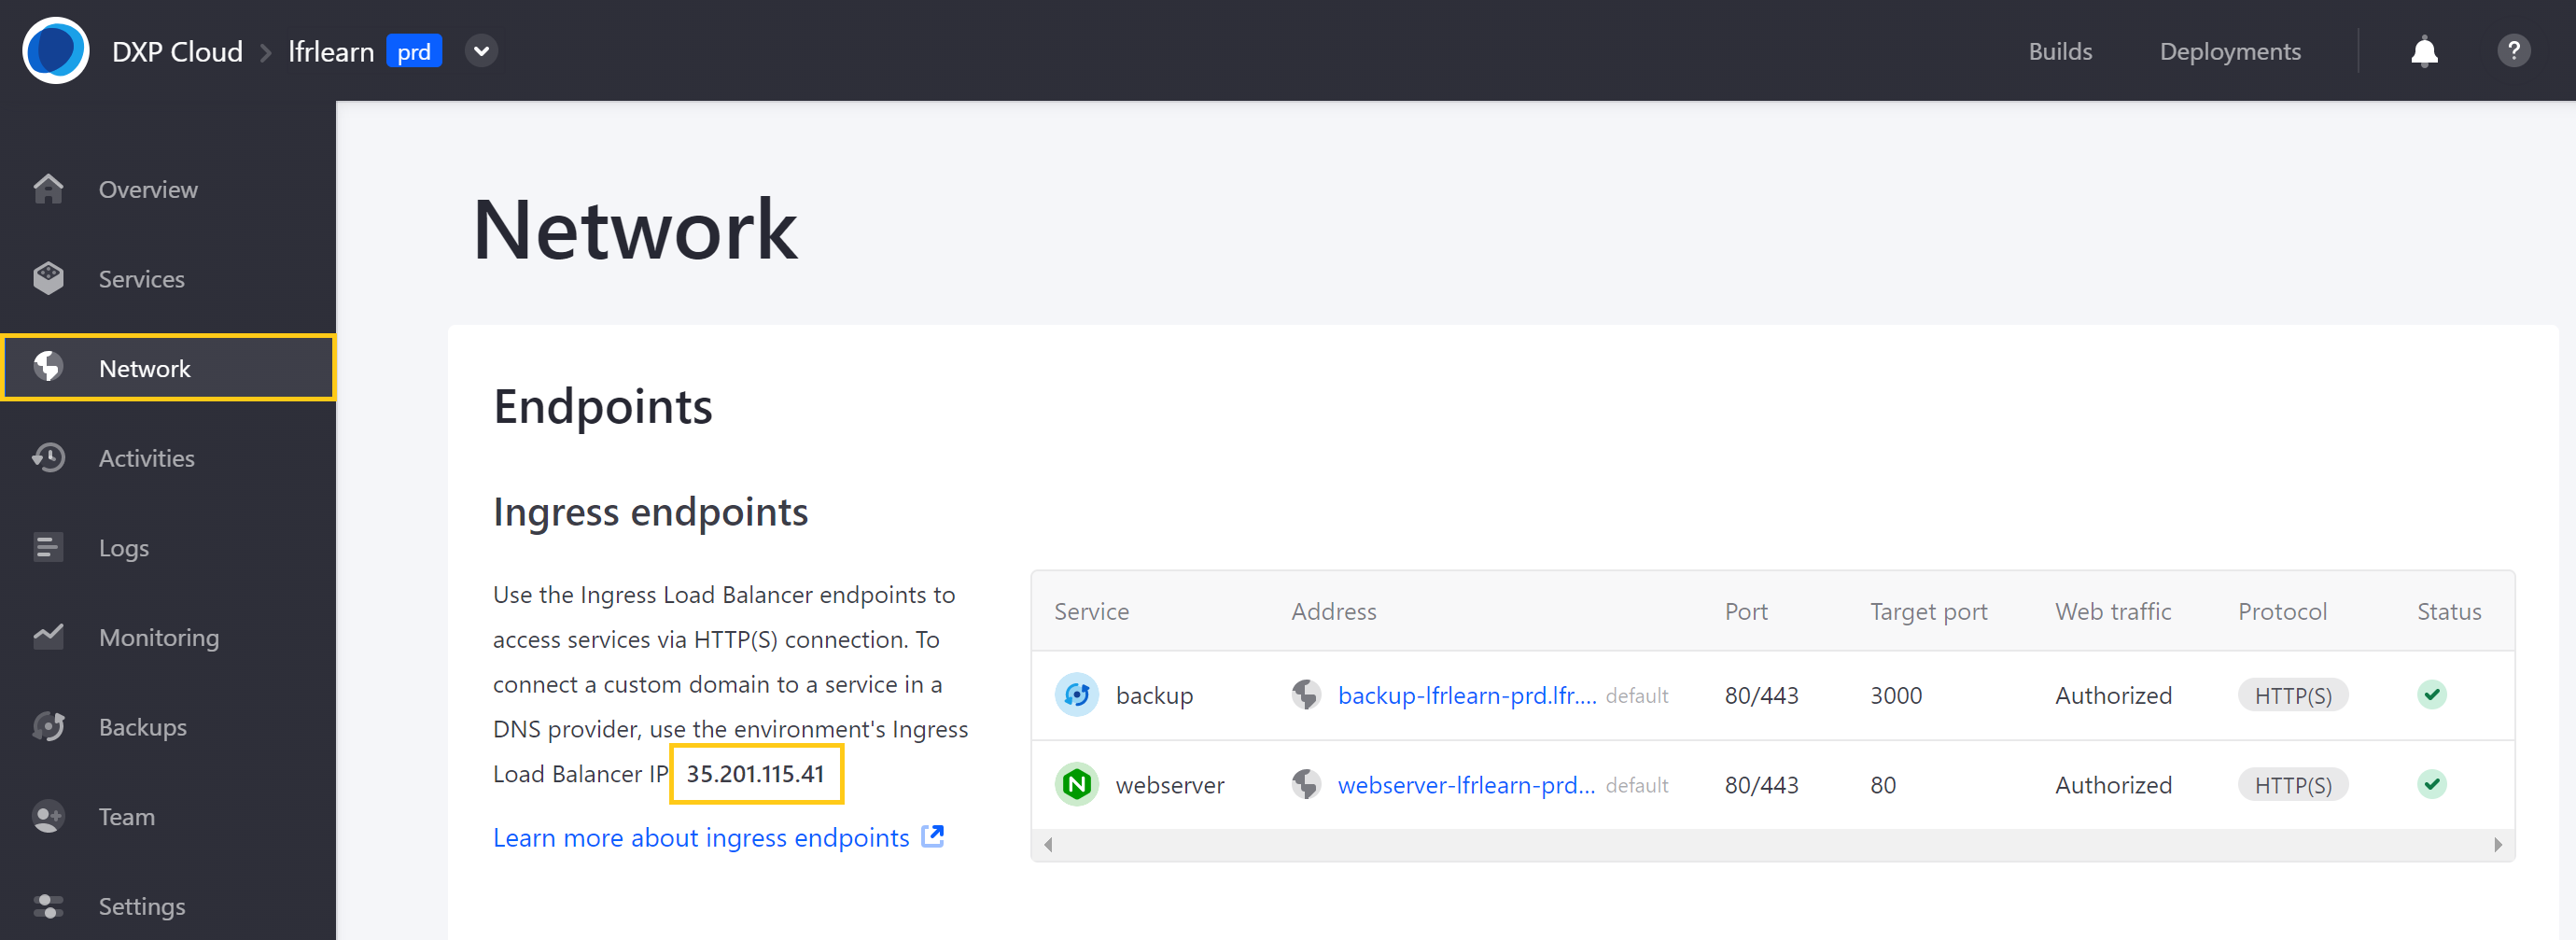
Register a custom domain with the environment’s dedicated IP as a type A record before adding the domain to an environment service. You can do this using the domain name registrar of your choice.
The following example uses Cloudflare to create DNS records.
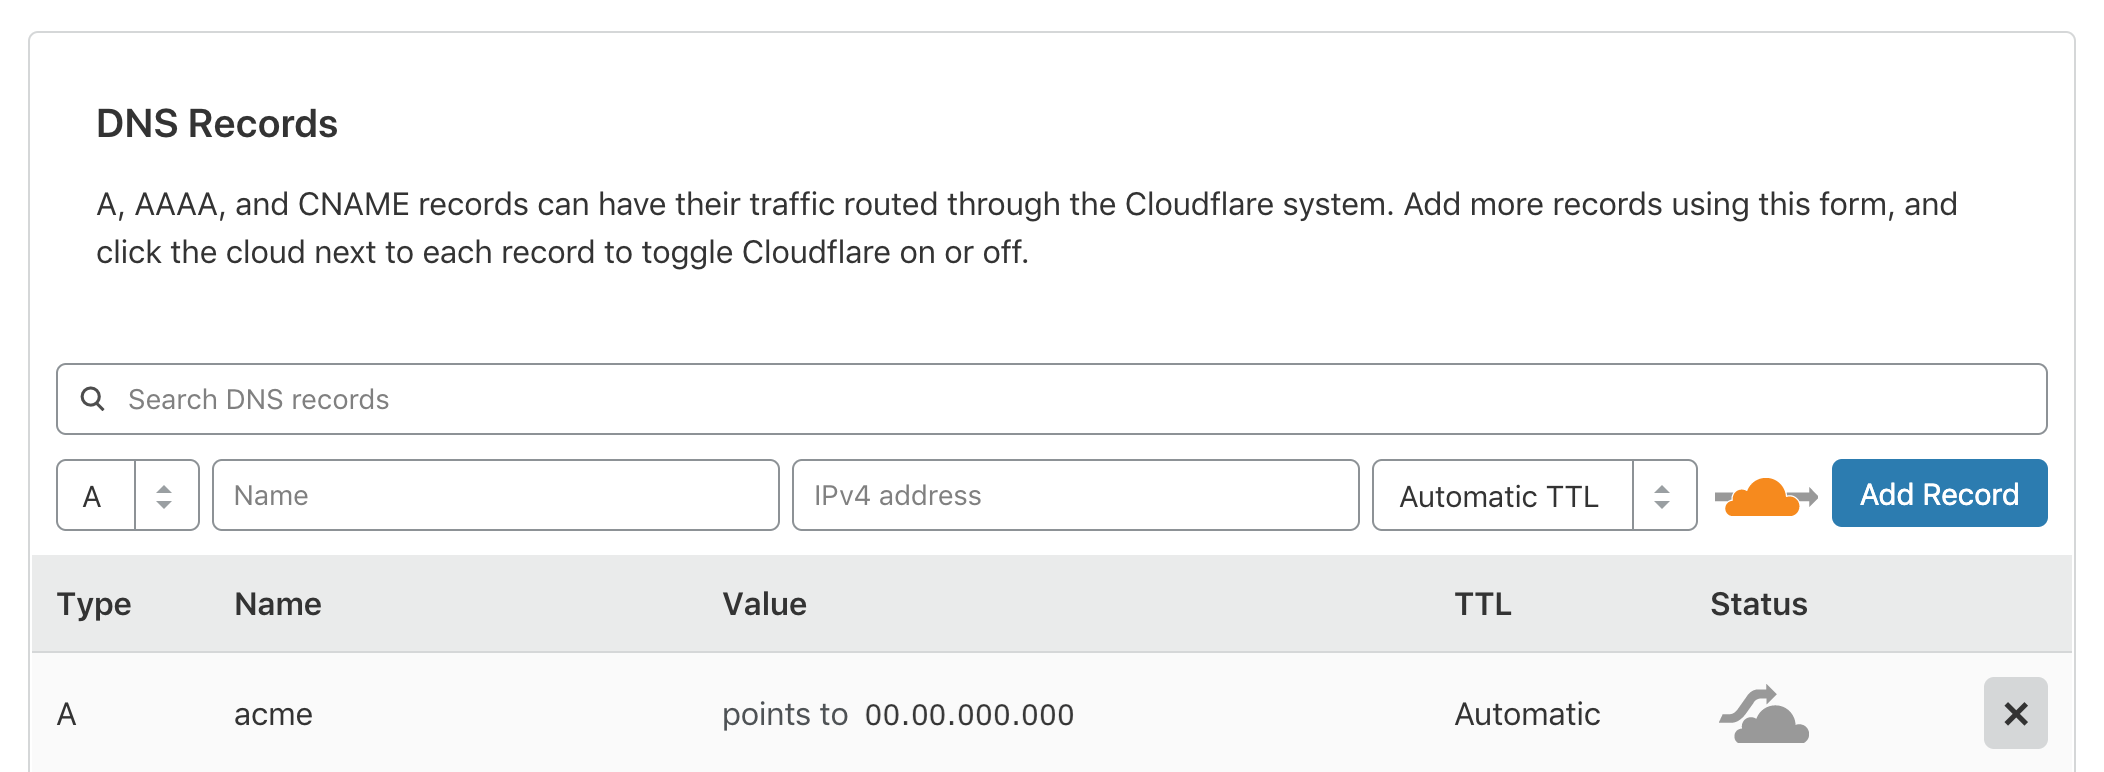
DNS propagation can take up to 24-48 hours to take full effect, but in some cases takes only a few minutes.
During this propagation process, one device may be able to reach the domain at the updated address, while another cannot. This depends on which DNS server a device reaches out to.
When ready, the domain is reachable from any device and returns the standard default backend - 404 error from Liferay Cloud’s load balancer.
Adding a Custom Domain to a Liferay Cloud Service
Once a domain is ready, you can add it to your environment’s services via the Liferay Cloud console or LCP.json files.
A maximum of 15 certificates and 250 custom domains can be added to an environment’s services. There are also a maximum of 98 Let’s Encrypt domains per certificate and a maximum of 498 total domains.
You can replace the domains that an environment’s service uses by adding the customDomains property to its LCP.json file. Add the property within an environments attribute for the specific environment:
{
  "id": "webserver",
  "environments":
  {
    "uat":
    {
      "loadBalancer": {
        "certs": [
          {
            "customDomains": ["acme.com", "www.acme.com"]
          }
        ]
      }
    }
  }
}
You must define a specific environment for each added custom domain. You cannot use the same custom domain for multiple environments (except for Disaster Recovery environments in different regions). This is necessary for Liferay Cloud to generate certificates properly and route users to the correct domain.
Once a custom domain is added to your service and your changes are deployed, Liferay Cloud handles the routing.
The number of custom domains can be capped by the quotas set during the provisioning process. Liferay Cloud restricts its own load balancer to 250 custom domains.
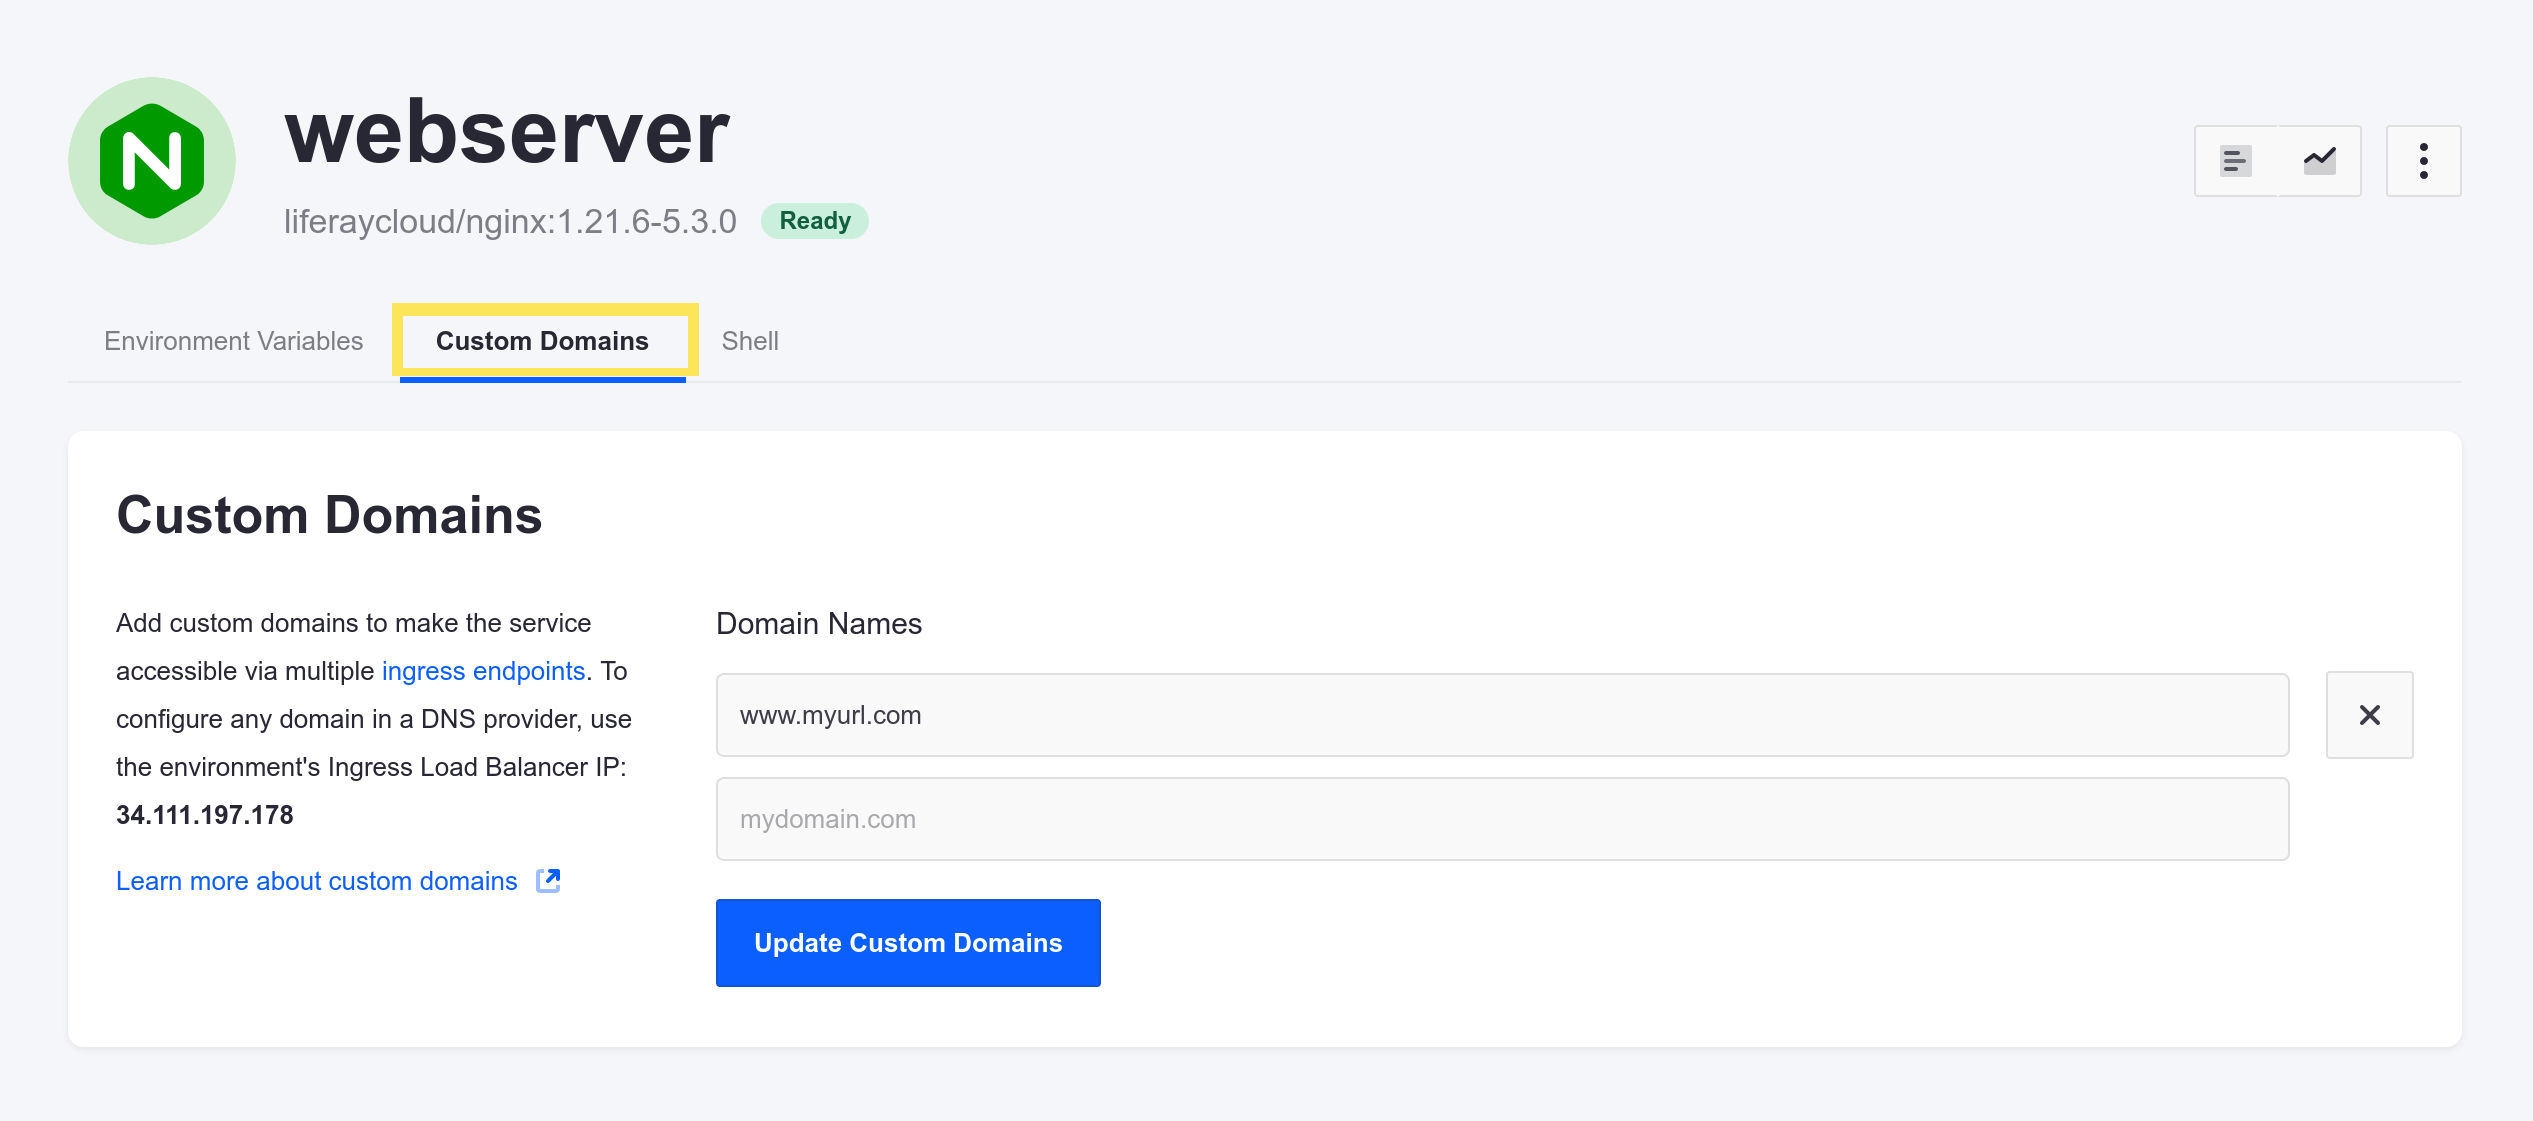
Adding a Custom Domain in the Console
This method of adding custom domains is deprecated.
Alternatively, follow these steps to add custom domains to environment services via the Liferay Cloud console:
-
Navigate to the desired environment.
-
Select the service to which you want to add a custom domain.
-
Click on the Custom Domains tab.
-
Enter any custom domains registered with your environment into the Domain Names field.
-
Click Update Custom Domains to finalize the addition.
Adding custom domains via the Liferay Cloud console uses a certificate provided by Let’s Encrypt by default. If you have custom SSL certificates for your domains, you must add them via the web server’s LCP.json file instead.
Verifying the Status of a Custom Domain
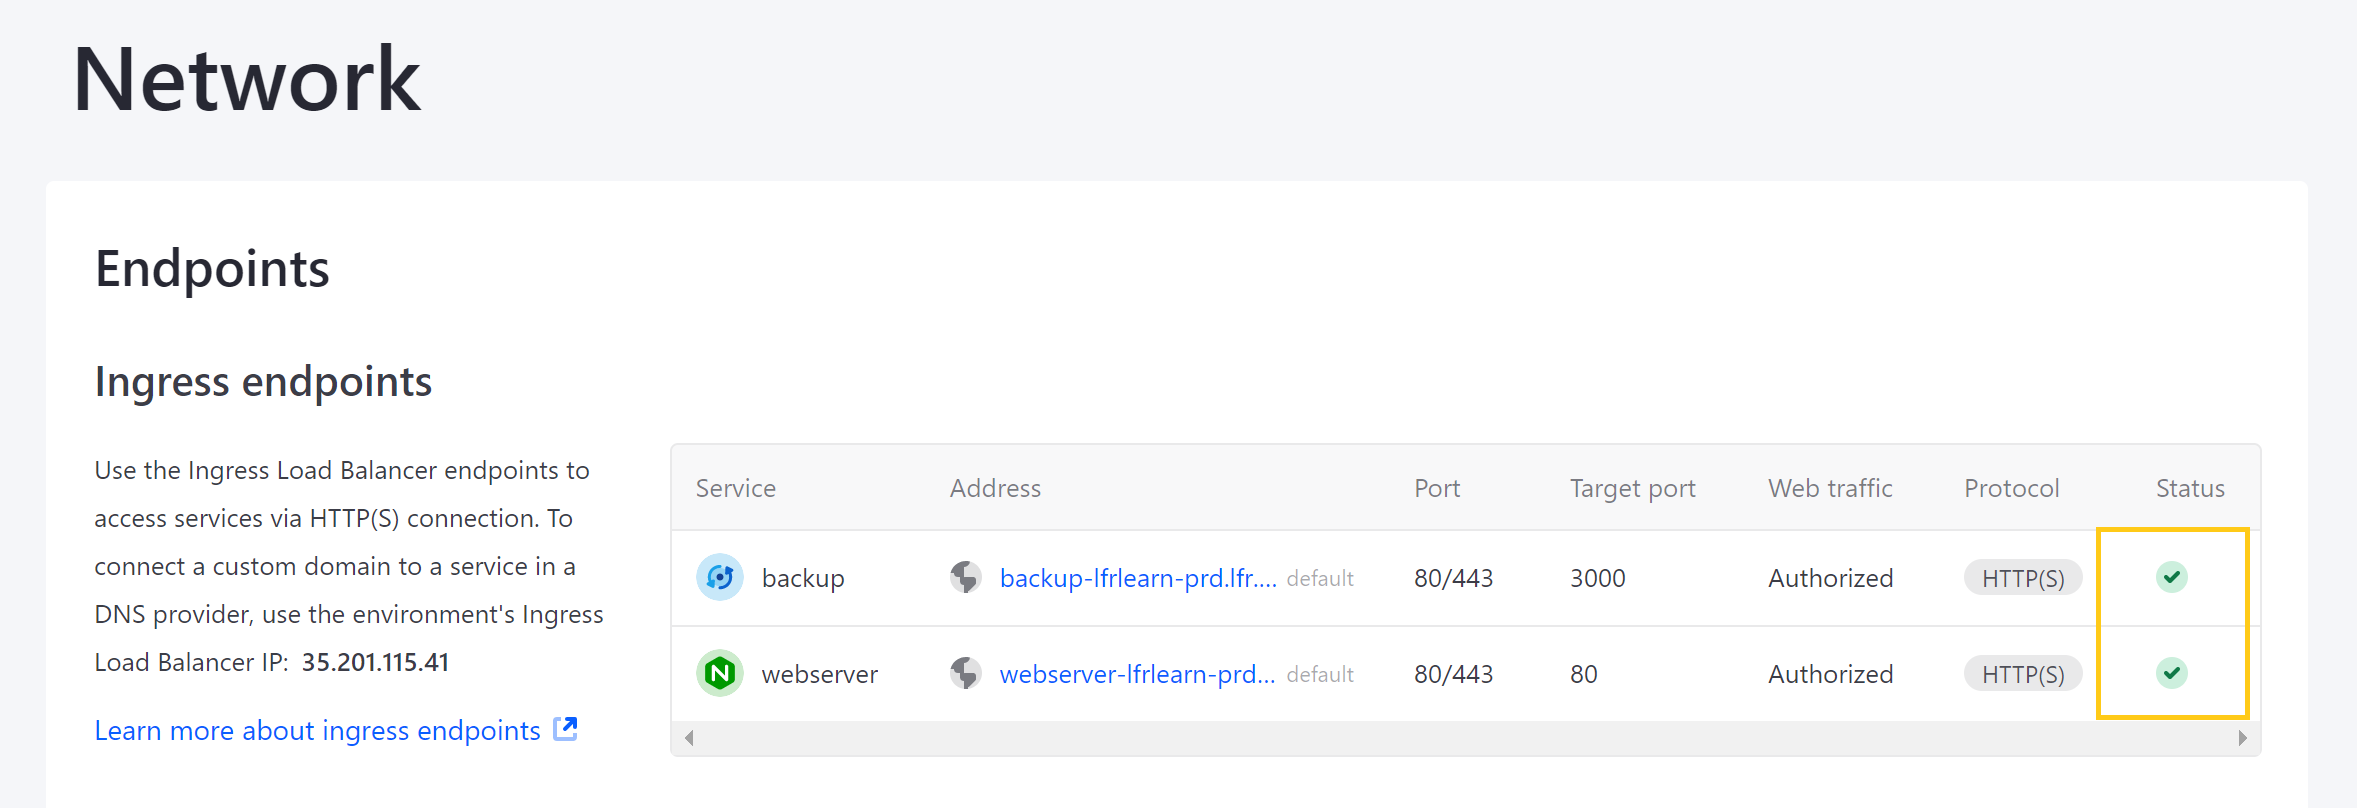
You can verify the status of your custom domain in two ways:
-
Open a browser and enter the custom domain. When the endpoint is ready, it no longer returns a
default backend - 404error or security warnings. -
Check the status of the service’s domain via the Liferay Cloud console by navigating to the environment’s Network page.
It may take some time to be able to verify a custom domain after configuration due to backend processes. Backend processes that impact the time for a custom domain to be verifiable include: adding a route to Liferay Cloud’s load balancer, requesting an SSL server certificate through Let’s Encrypt, receiving a challenge from Let’s Encrypt, and updating the load balancer with the certificate once it passes the challenge.
If a user attempts to reach the domain during the challenge process, the browser displays security warnings that can be safely ignored.
Once backend processes are complete, Liferay Cloud’s load balancer is updated with the SSL server certificate, and the service is reachable and secure.
See Load Balancer to learn more about SSL certificates in Liferay Cloud, including how to set up one or more custom SSL certificates.