初期設定の概要
Liferay Cloudの使用を開始するには、すべてのアカウント、環境、サービスが正常にプロビジョニングされ、インスタンスにデプロイされていることを確認する必要があります。 以下の手順で始めます:
- セットアップメールの確認
- Liferay Cloudコンソールへのアクセス
- プロビジョニングされたプロジェクトのソースコードへのアクセス
- CI と Liferay サービスにログインする
- セットアップの確認
セットアップメールの確認
Liferay Cloud のサブスクリプションに関連するメールアカウントで、セットアップメールを確認してください。 購入したLiferay Cloud環境ごとに、Liferay Cloudのオンボーディングメールと招待メールが届くはずです。
オンボーディングメールには、非本番環境でのJenkinsとLiferay DXPにアクセスするために必要な認証情報と、Liferay Cloudを使い始めるための重要なステップが記載されています。
各環境の招待は、購入した1つのLiferay Cloud環境へのアクセスを許可するものです。 すべての環境の招待を受けるようにしてください。
Liferay Cloudコンソールへのアクセス
復帰したユーザーは、 、既存のアカウントを使ってLiferay Cloud Console にログインすることができます。 新規ユーザーは、 Liferay Cloudのサブスクリプションに関連するメールアカウントを使用して、 アカウントを作成する必要があります。
ログインすると、Liferay Cloud Console のトップページ が表示されます。
ここから、環境やデプロイメントにアクセスして管理したり、他のチームメンバーを招待したりすることができます。
プロビジョニングされたプロジェクトのソースコードへのアクセス
新しいLiferay Cloudのプロジェクトは、 dxpcloud 組織にホストされた一時的なGitHubリポジトリにプロビジョニングされます。 このリポジトリには、Liferay Cloud 開発プロジェクトのテンプレートが含まれています。
新しいプロジェクトのリポジトリにアクセスするには、Liferay Cloud オンボーディングメールの指示に従って、その後の GitHub の招待を承諾します。
招待状を受け取ったら、プロビジョニングされたプロジェクトのリポジトリを探します。
-
GitHubにログインします。
-
dxpcloudを Your teams の検索ボックスで検索します。
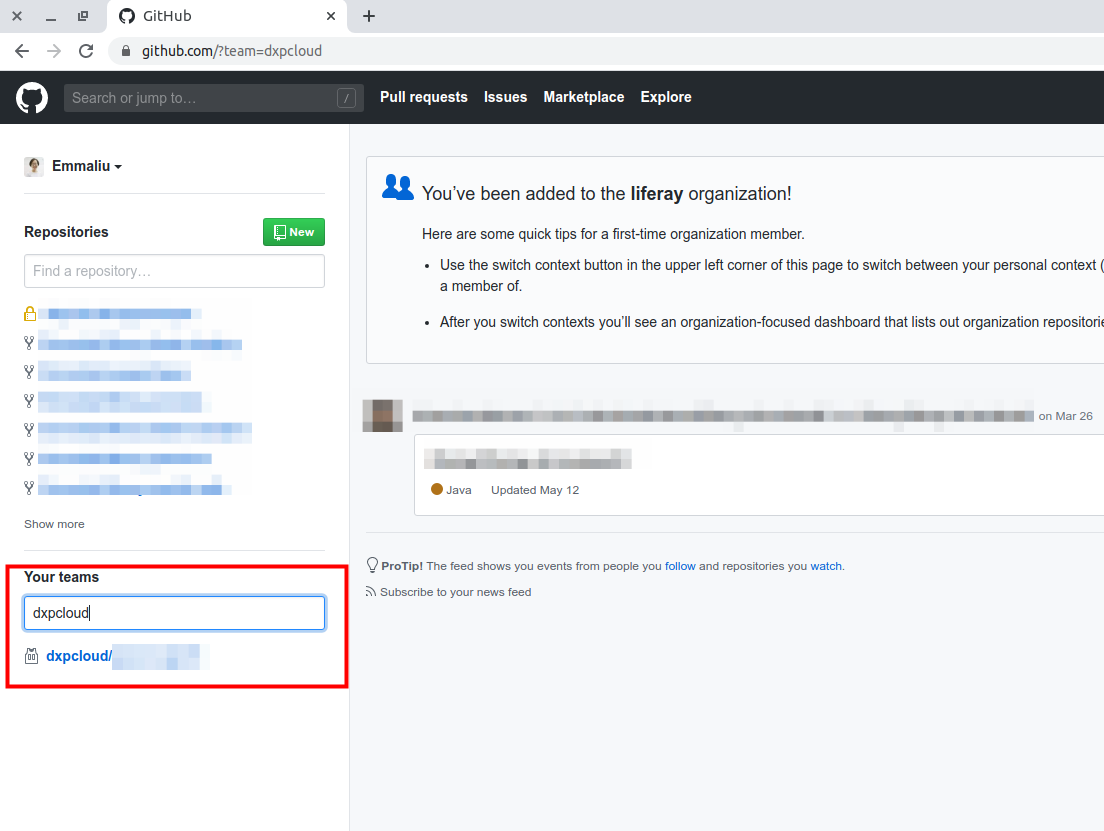
プロビジョニングされたリポジトリを見つけたら、次のことをしなければなりません。
-
プロビジョニングされたリポジトリのコンテンツを、プライベートなGitリポジトリに転送します。
-
プライベートリポジトリとLiferay CloudのJenkins(CI)サービスをWebhookで連携させます。
詳しい手順は、 GitHubリポジトリの設定 をご覧ください。
CI と Liferay サービスにログインする
Jenkins(CI)のWebインターフェースにログインし、Liferay DXPインスタンスの非本番環境(例: dev と uat)にアクセスできるようにログインしてください。
ログイン認証情報は、最初のオンボーディングメールで提供され、お客様の infra 環境の secrets として記載されています。
詳細な手順については、 Liferay Cloudサービスにログインする を参照してください。
セットアップの確認
Liferay Cloudでのデプロイを開始する前に、正しい環境とサービスが正常にプロビジョニングされデプロイされたことを確認してください。
環境の検証
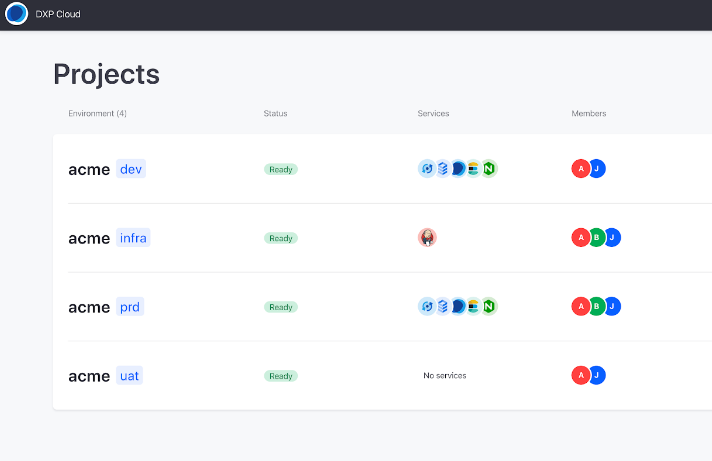
購入したすべての環境が、 Projects 下のLiferay Cloudコンソールの ホームページ に表示されていることを確認します。

すべての環境招待を受け入れた後に環境が見つからない場合は、Liferayサポートチームにお問い合わせください。
環境の場所を確認する
各環境のロケーションが、チームからリクエストされたロケーションと一致していることを確認します。
すべての環境ロケーションは、Liferay Cloudコンソールの ホームページ に記載されています。
また、環境の [概要] ページや [設定] ページに移動することで、環境の位置を確認することができます。
![図4:[Overview]ページで環境の位置を表示する。](https://resources.learn.liferay.com/images/liferay-cloud/latest/en/getting-started/initial-setup-overview/images/04.png)
環境の場所があなたのチームが要求した場所と一致しない場合は、 Liferayサポートチームに 連絡してください。
DXP Cloudスタックサービスの確認
Liferay Cloudのスタックサービスが正しくデプロイされていることを確認します。
-
Liferay Cloudコンソールから dev 環境にアクセスします。
-
Services ページに移動します。
![図 5:[Services]ページで Liferay Cloud Stackサービスのステータスを表示する。](https://resources.learn.liferay.com/images/liferay-cloud/latest/en/getting-started/initial-setup-overview/images/05.png)
適切にデプロイされると、5つのデフォルトクラウドスタックサービスのステータスがすべて ’Ready’になります。