Activating Workflow
You can activate a workflow process for an asset type either across the DXP instance or only on a specific site. When a workflow process is activated across the instance for a particular asset type such as Wiki Pages, all Wiki Page submitted for publication must go through the review process regardless of which Site the Wiki Page is created on.
Workflow cannot be used with Publications in Liferay 7.3.
You can enable or disable workflow on individual sites. By default, workflow is disabled on a site.
Activating Workflow Across a DXP Instance
Open the Product Menu (
 ) and click Control Panel.
Click Workflow then Process Builder.
Click the Configurations tab.
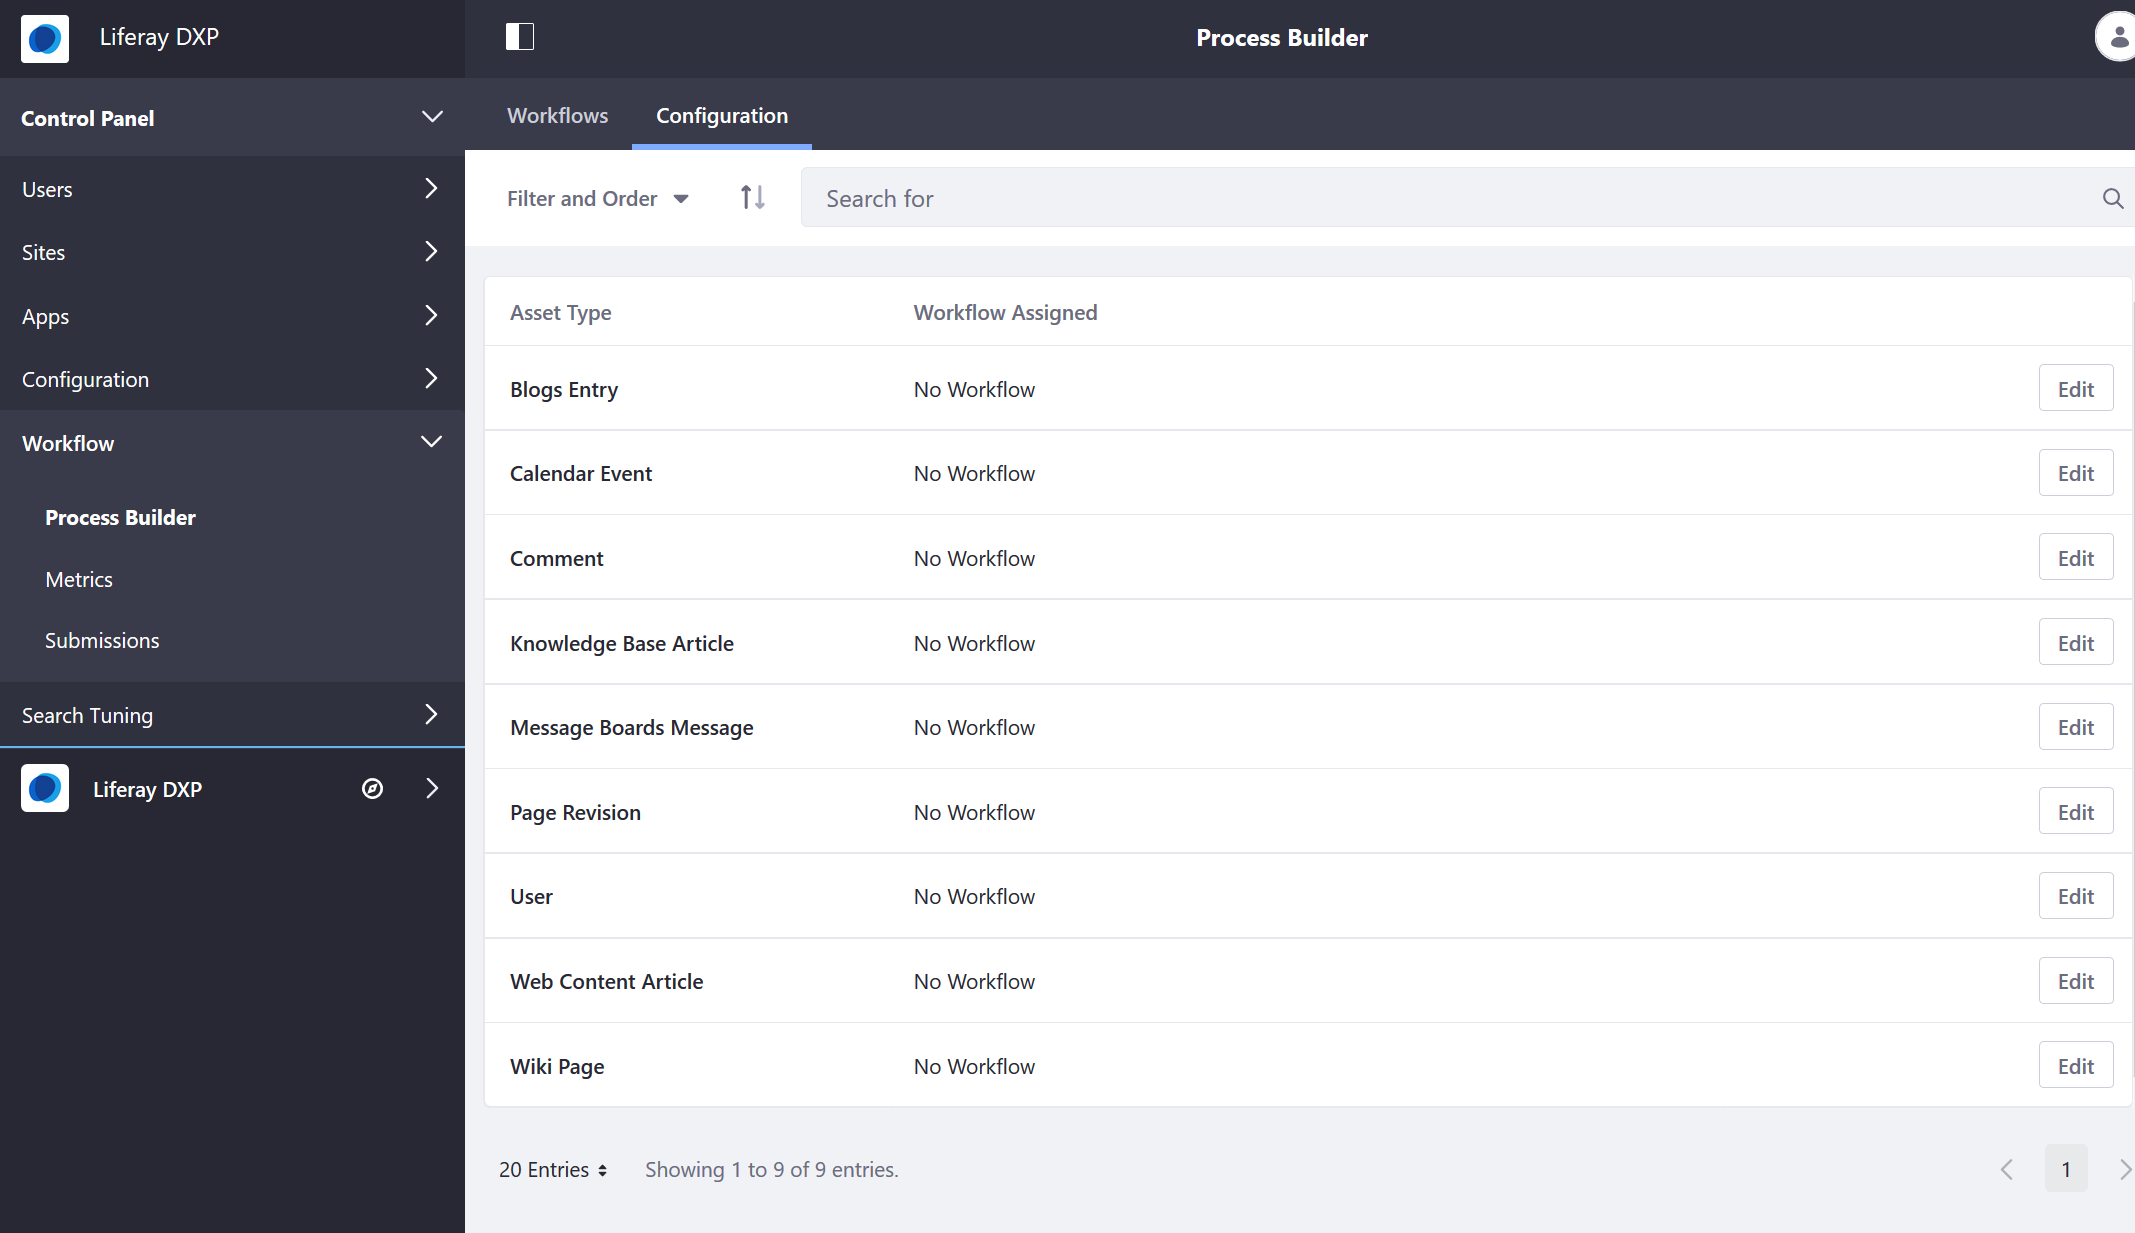
Click Edit next to the Asset Type which will go through the workflow process (for example, Knowledge Base Article).

Select the workflow desired for this asset type (Single Approver is available out of the box).
Click Save.
Repeat for all the other asset types which require workflow.
Activating Workflow on a Site
When a workflow process is enabled on a site, other sites on the same instances remain disabled. To enable a workflow process for each asset type per site:
Open the Product Menu (
) then click the compass icon ( ) on the Site Administration menu.
Select the site where the form will be created (for example, Community Site).
In the Site Administration menu, click Configuration → Workflow.
Click Edit next to the Asset Type which will go through the workflow process.
Select the workflow desired for this asset type.
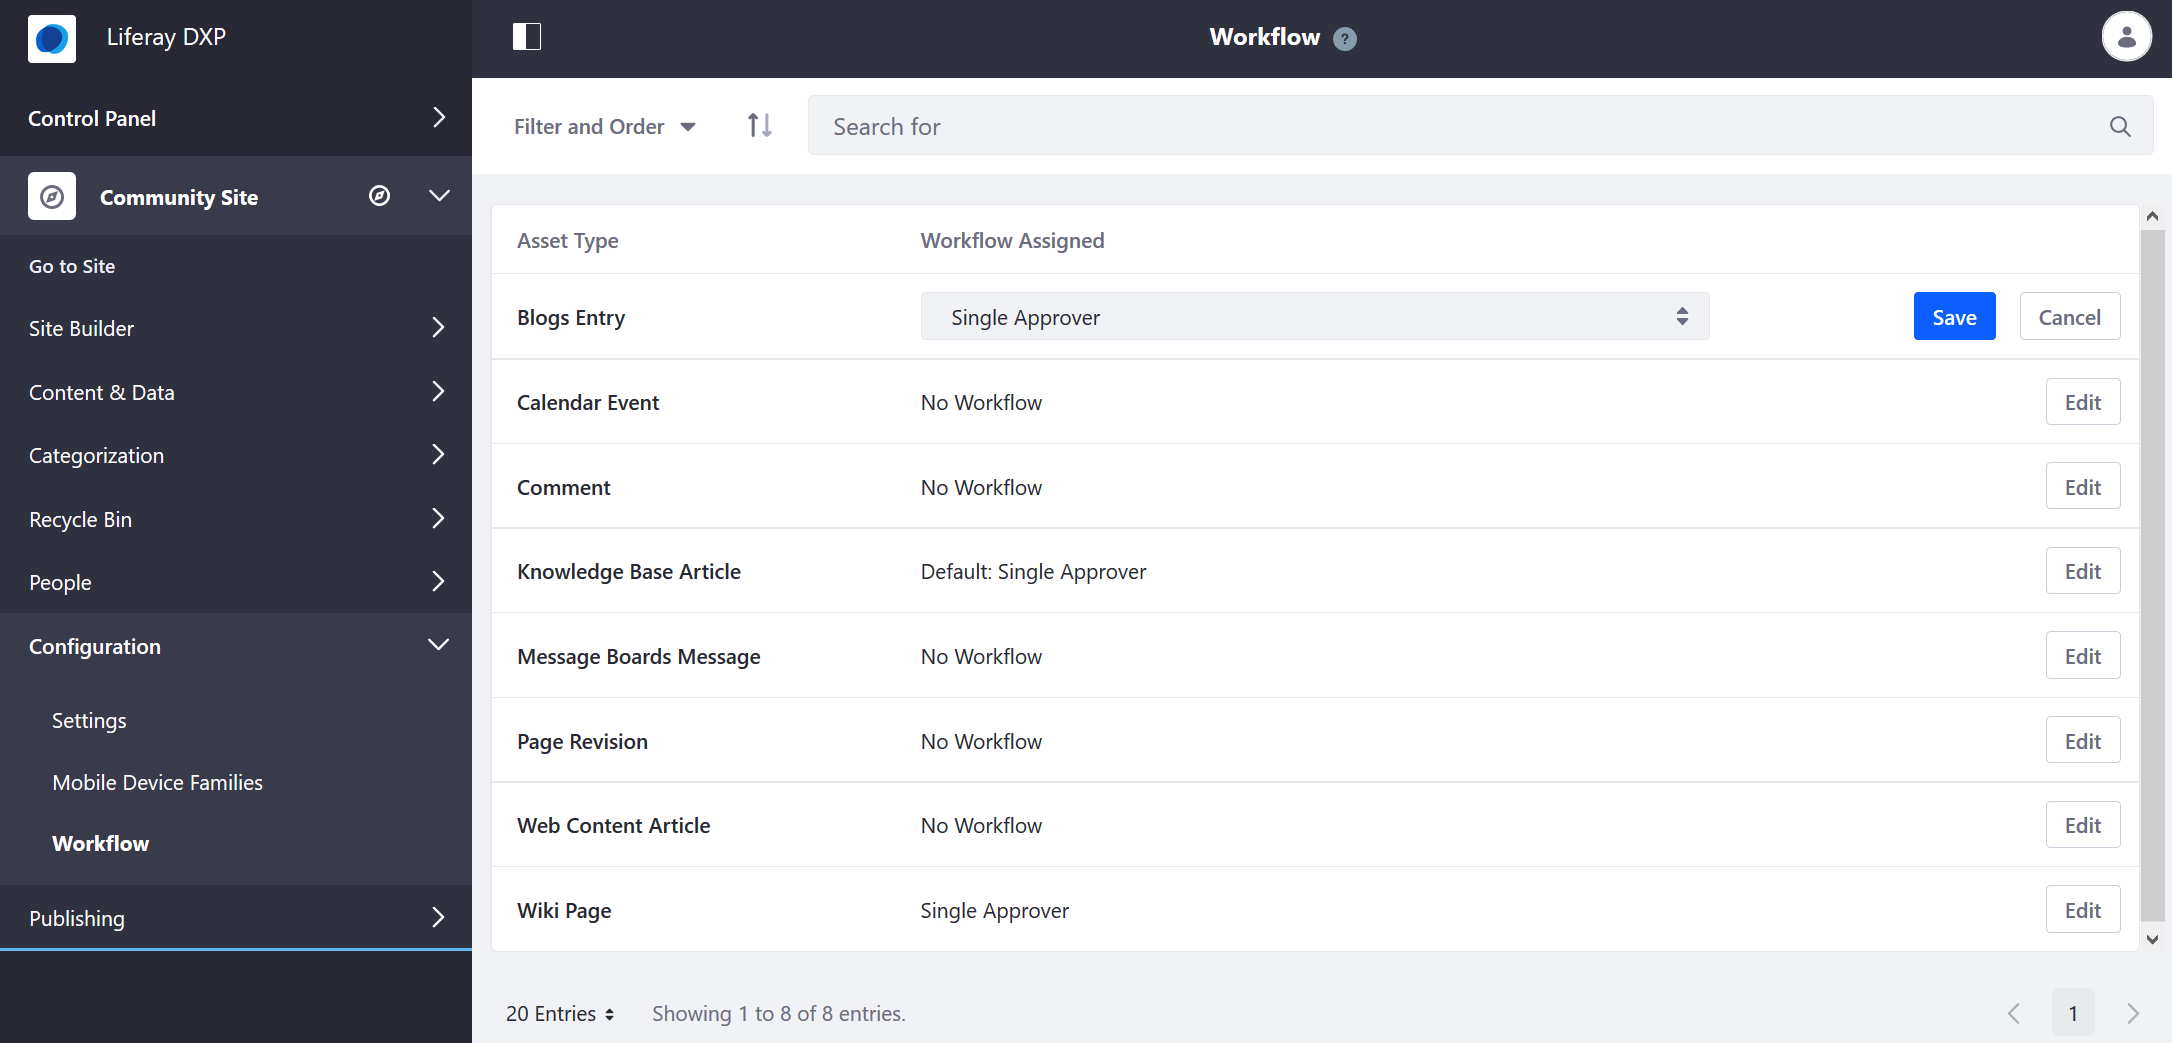
Click Save.
Repeat for all the other asset types which require workflow.
Once enabled, the selected asset types always require a review process before publication on this site. If you have previously activated workflow for a particular asset type, those settings are reflected here.
You can always disable workflow for an asset type on a site even if it was enabled instance wide.
Activating Workflow For Specific Applications
There are several assets types where workflow is enabled in their respective applications.
Web Content Folders
To activate a workflow for a Web Content Folder:
Navigate to the Site Administration menu for your site.
Click Content & Data → Web Content.
Click (
 ) then Edit next to the desired folder.
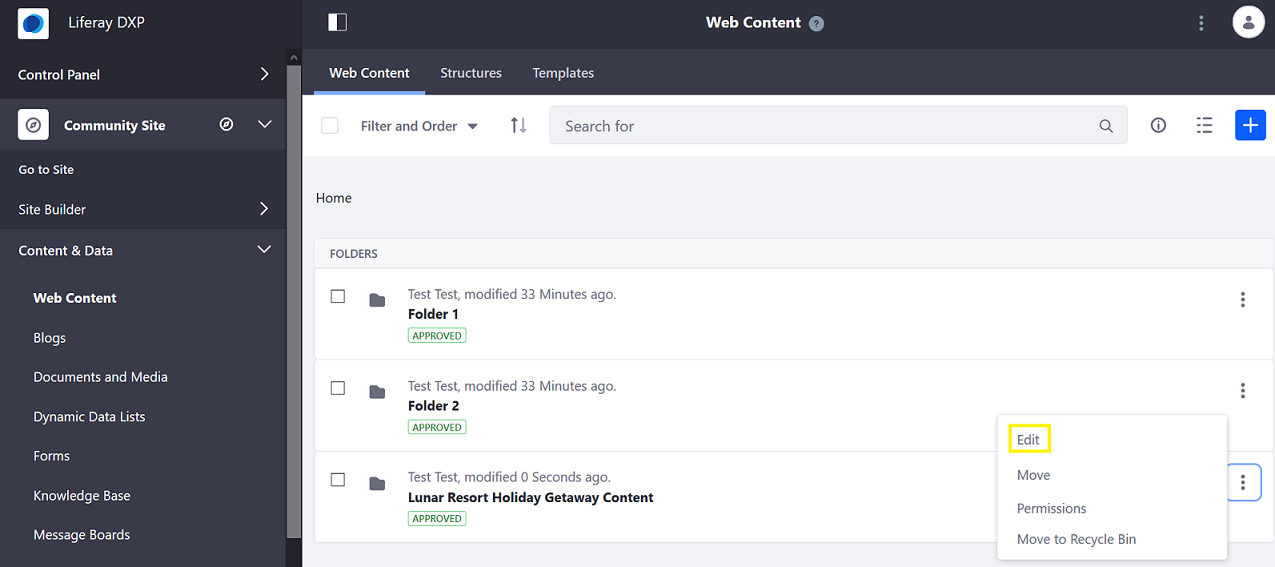
Expand the Structure Restrictions and Workflow menu.
Click the radio button for Default Workflow for This Folder (Lunar Resort Holiday Getaway Content).
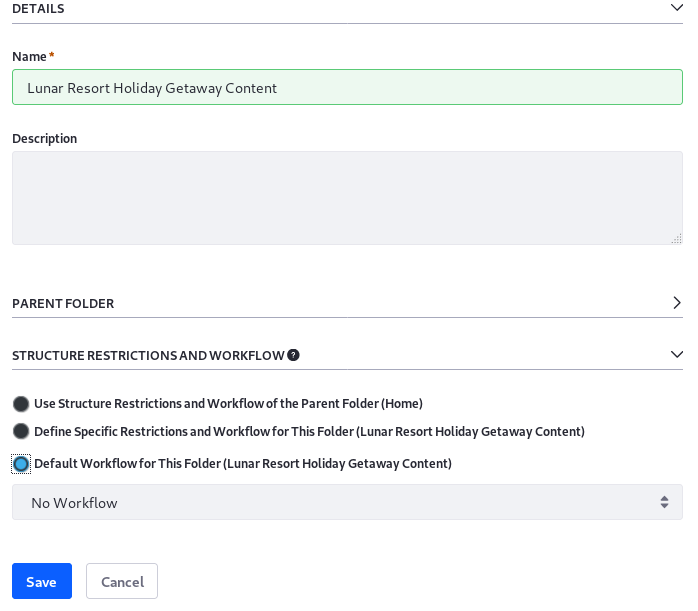
Select the workflow definition (for example, Single Approver).
Click the Save button.
Documents and Media Folders
Workflow can be enabled for the entire Documents and Media application in the Root folder or for individual folders.
To activate a workflow for a Documents and Media Folder:
Navigate to the Site Administration menu for your site.
Click Content & Data → Documents and Media.
Click (
) then Edit next to the desired folder.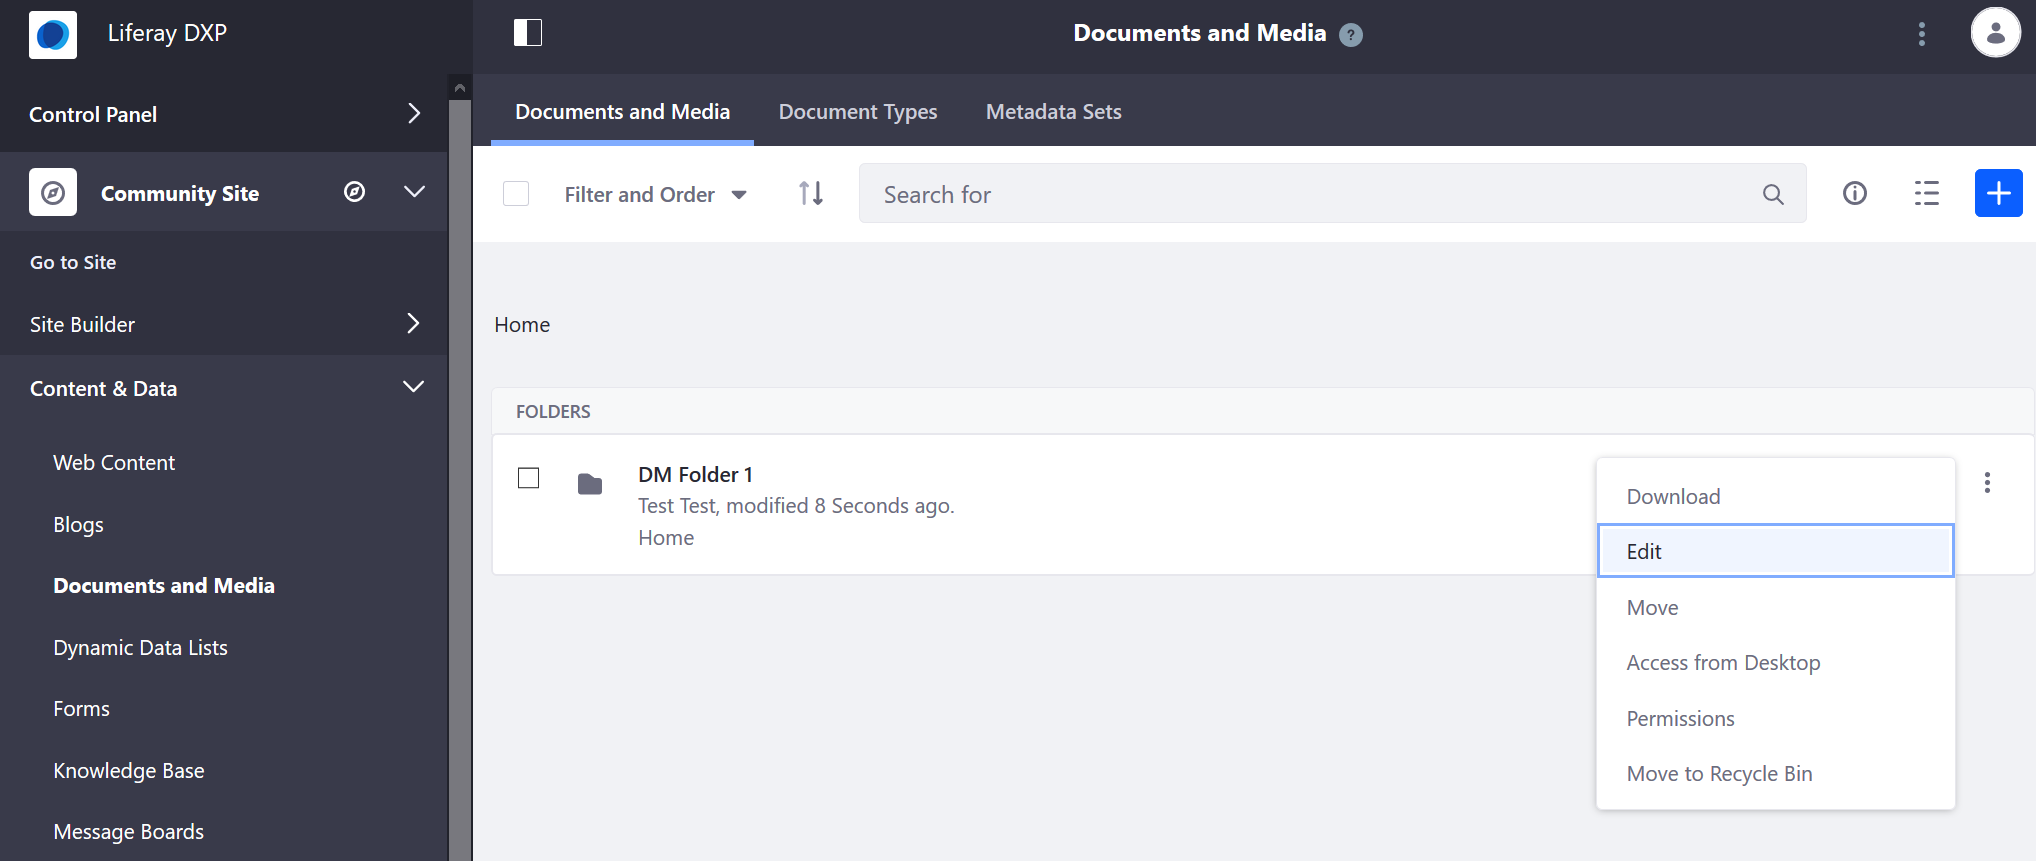
Expand the Document Type Restrictions and Workflow menu.
Click the radio button for Default Workflow for This Folder (DM Folder 1).
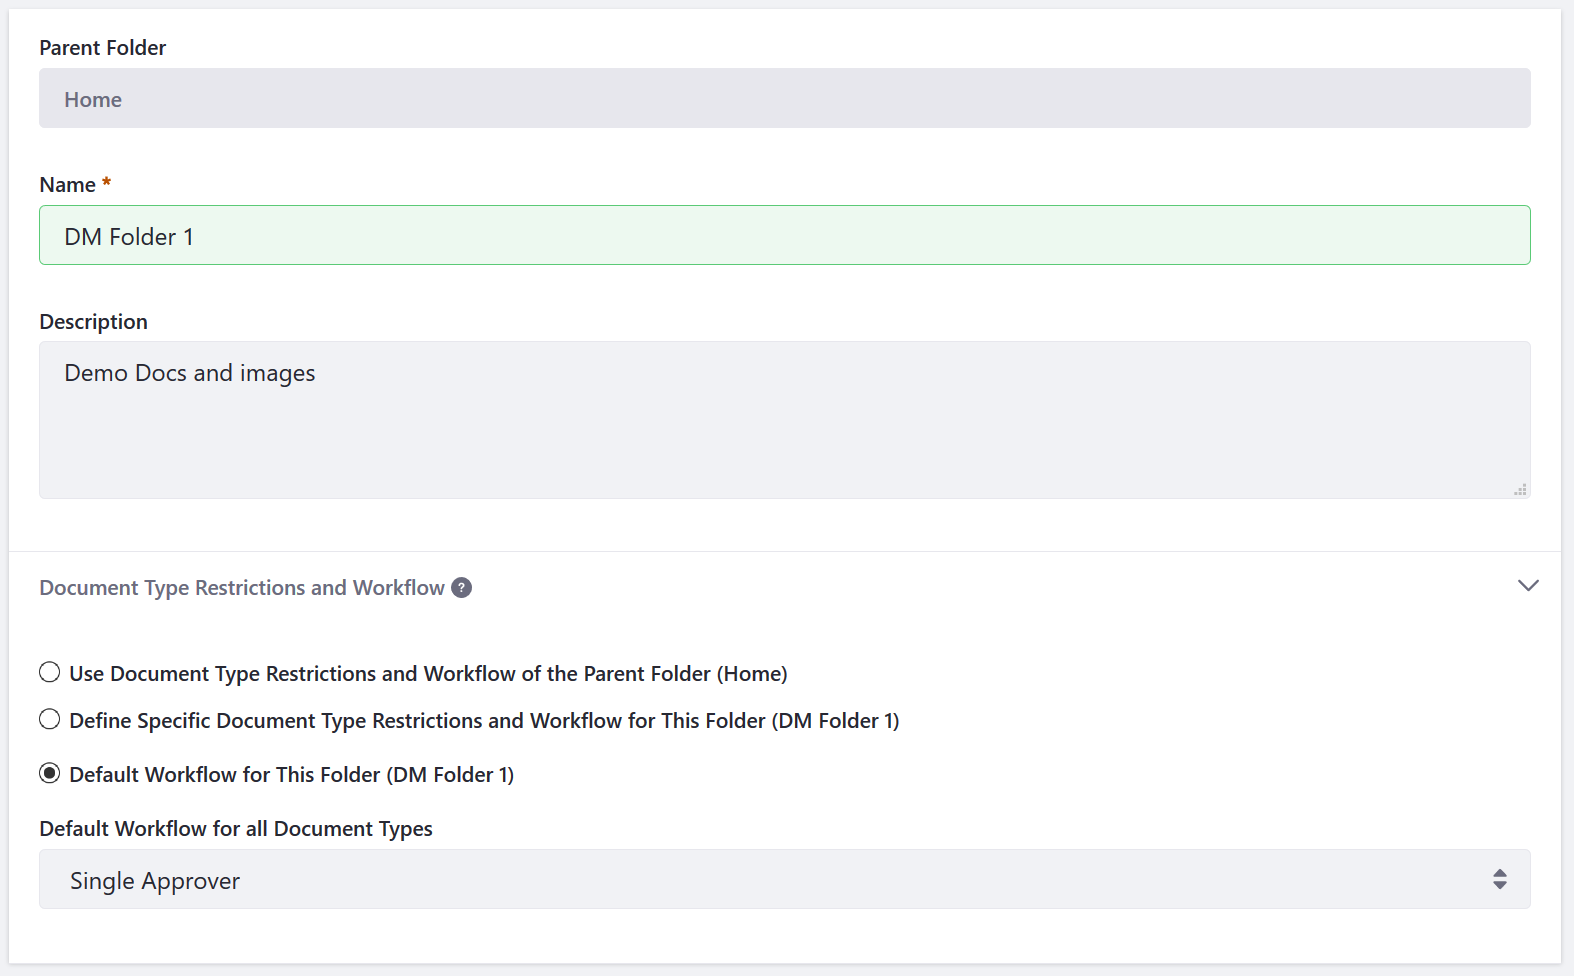
Select the workflow definition (for example, Single Approver).
Click the Save button.
Dynamic Data Lists
To activate a workflow for a DDL Form:
Navigate to the Site Administration menu for your site.
Click Content & Data → Dynamic Data Lists.
Click (
 ) to add a new form.
Enter a name for the DDL form.
Click Select to choose a Data Definition associated with this form.
Select the Data Definition (Contacts).
Under Workflow, select the desired workflow (Single Approver).
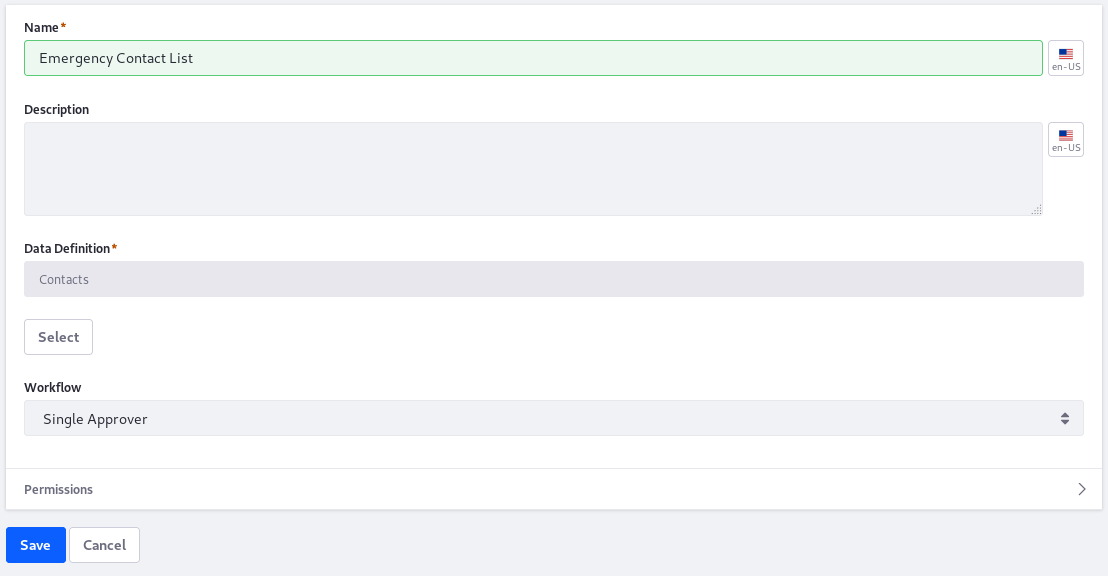
Click Save.
This particular DDL form now goes through the submission process.
Forms
To activate workflow for each individual form’s entries
Navigate to the Site Administration menu for your site.
Click Content & Data → Forms.
In the Form Builder view (it does not matter whether this is a new form or an existing one), click Options (
) then Settings.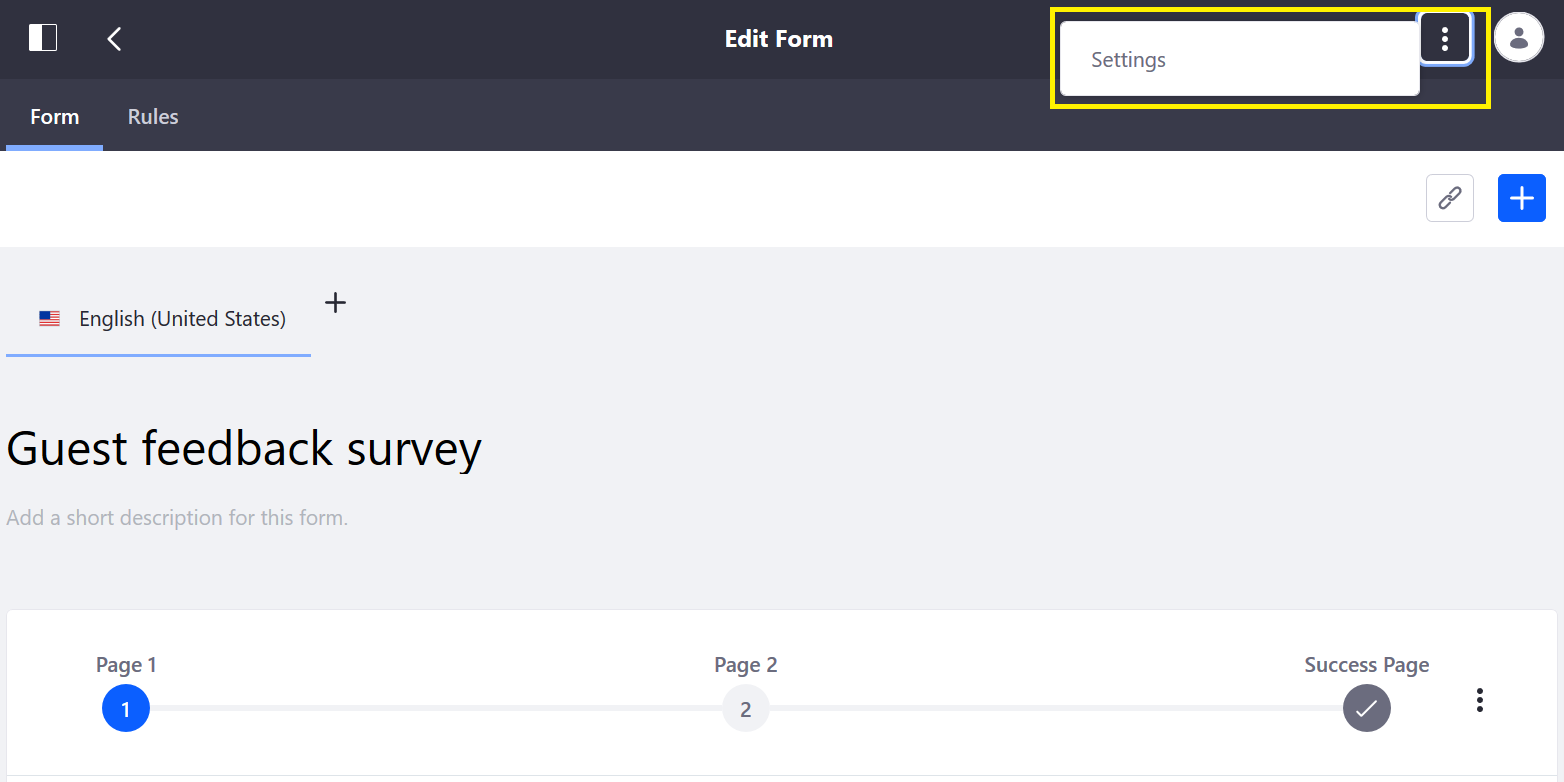
Under Select a workflow, select the desired workflow (Single Approver).
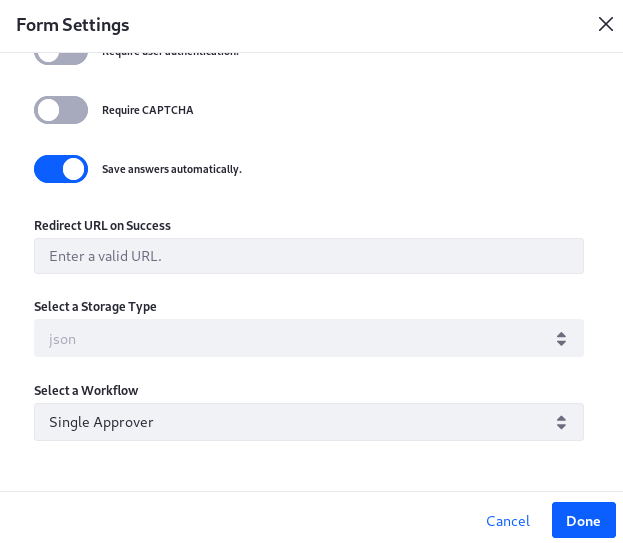
Click Done then close the dialog window.
The form now requires approval before the information is submitted.