Sharing Documents with Other Users
Using DXP’s Documents and Media app, users can share files directly with each other.
You can disable sharing. For instructions on this, see Enabling and Configuring Sharing.
When you share, you grant some of your own permissions for that file to the receiving user. There are some important caveats:
- You can only grant View, Comment, or Update permissions. For example, you can’t grant Delete or Override Checkout permissions even if you have those permissions on the file.
- You can only grant permissions you have on the file. For example, you can’t grant Update permission if you only have View and Comment permissions on the file.
- You must grant at least View permission.
- Traditional role-based permissions always take precedence over sharing permissions. So although sharing can extend permissions, it can’t remove those granted via Roles in the portal.
- By default, the Guest role has Add Discussion permission. This overlaps with the Comment permission in sharing. Therefore, all users can comment on a file regardless of whether the Comment permission was granted via sharing. You can change this by removing the Add Discussion permission from the Guest role.
Also, note that the receiving user must be part of the same instance, but doesn’t have to be a member of the same site.
Sharing Files in Documents and Media
To share a file, you must own that file or be an administrator. There are two ways to share a file: through the Documents and Media widget on a page, or in Site Administration. If using the latter method, ensure you have access to Site Administration.
Sharing a File on a Site Page
Navigate to the page where the Documents and Media widget has been deployed.
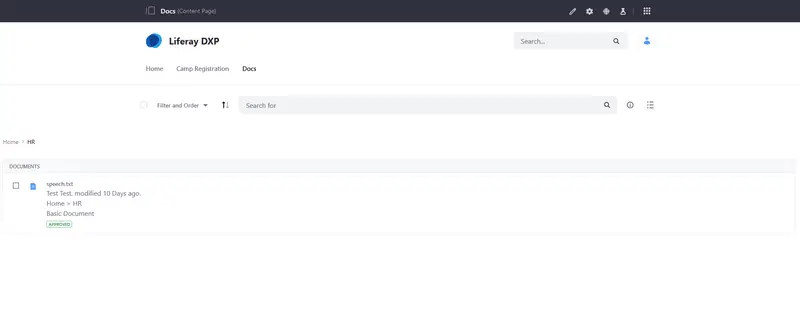
Click on the file to be shared (for example,
speech.txt).Click the Info button to expand the Info Panel.

Click Share.
Enter the email address of the collaborator. You can enter multiple addresses.
To let receiving users share the file, check the Allow the document to be shared with other users box.
Select the file permissions to grant to receiving users. Select a file permission to grant to receiving users:
- Update: View, comment, and update.
- Comments: View and comment.
- View: View only.
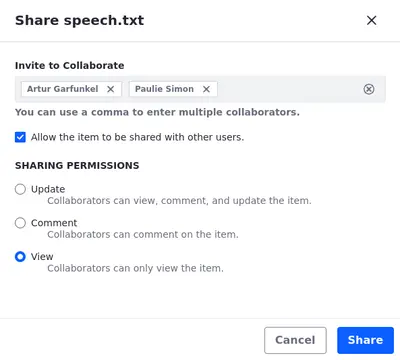
Click the Share button on the window pane.
The file has been shared.
Share a File Using Site Administration
To access Site Administration, open the Menu (
 ) and click your site’s name.
Click Content & Data → Documents and Media.
Navigate to the folder where the file to be shared is located (for example, the
HRfolder).Click the file’s Actions (
 ) and select Share.
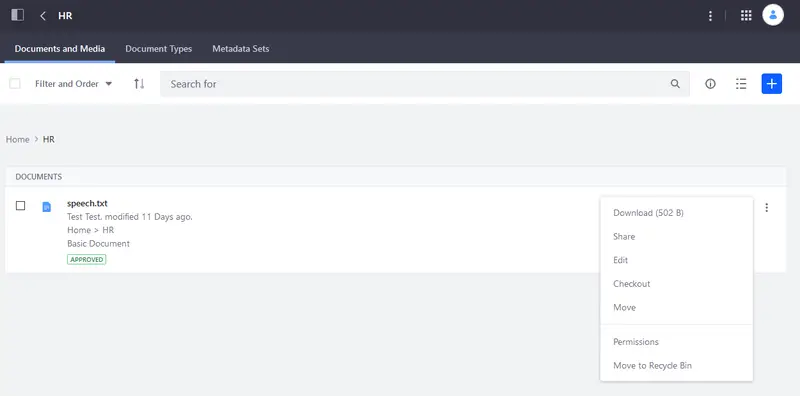
Enter the name or email address of the user you want to share the file with. To share the file with multiple users, enter each user’s email address in a comma delimited list.
To let receiving users also share the file, select Allow the document to be shared with other users.
Select the file permissions to grant to receiving users:
- Update: View, comment, and update.
- Comments: View and comment.
- View: View only.
Click Share.
Working with Shared Files
You can access files shared with you in three places:
The Documents and Media Library: Files shared with you are visible in their existing Documents and Media locations. For example, if someone shares a file with you that resides in the Documents and Media library’s Home folder, you can access the file in that folder.
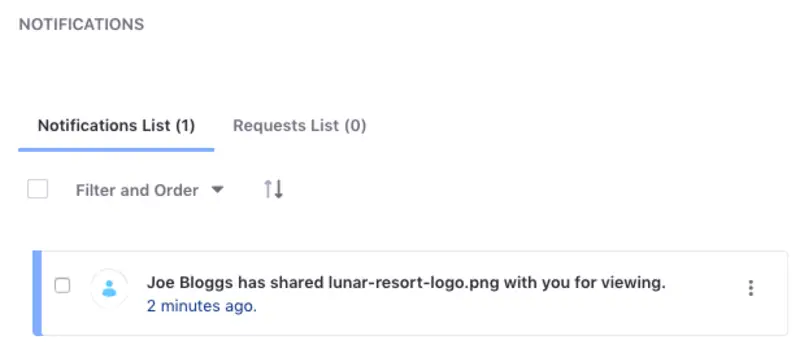
The Notifications app: When a file is shared with you, you get a notification. Clicking the notification takes you to the file in Documents and Media. For information on notifications, see Managing Notifications and Requests.
The Shared Content app: You can access this app from your user menu. It lists all the content shared with you and the content you shared. Each file has an Actions button (
) for performing permitted actions on the file (e.g., view, comment, update).
Managing Shared Files
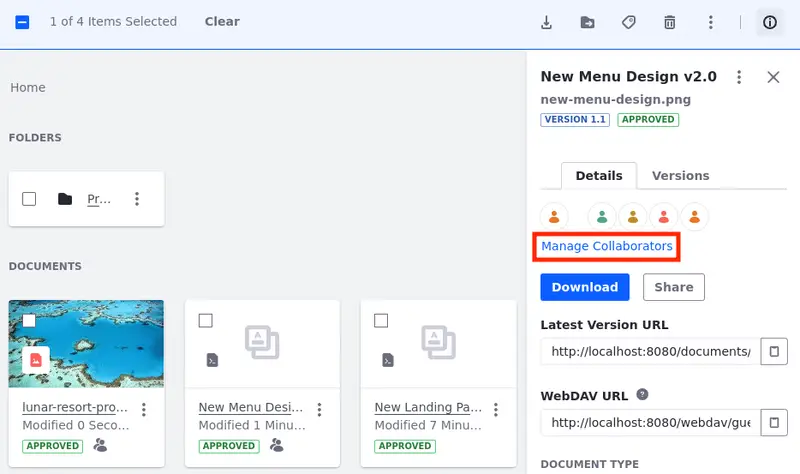
After sharing a file, you can un-share it or modify its permissions on a per-user basis. This can only be done by Administrators, the file’s owner, or any user with Update permission and permission to share the file. You can take these actions from the file’s Info panel in Documents and Media. Follow these steps:
Click the file in Documents and Media, then click Info (
 ) at the top-right. The file’s Info panel slides out from the right.
Click the Manage Collaborators link. This shows a list of the users you shared the file with and their file permissions.
Make any changes you want to the list of collaborators. To un-share the file with a user, click the
xicon next to that user. You can also change the file permissions via the selector menu for each user.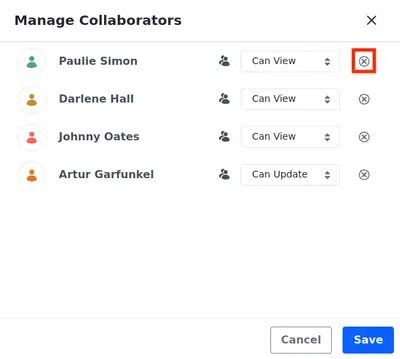
Click Save and close the dialog.
Related Topics
- Enabling and Configuring Sharing
- Documents and Media Permissions Reference
- Understanding Role and Permissions