Server Administration and Email
You can manage and monitor your Liferay instance from the server administration console. For example, you can view the current system or portal properties or configure logging and log levels. This is also where you can configure the email server for the whole system. See Using the Server Administration Panel to learn more.
Configure a mail server that is used for email notifications (e.g. user registration, password management, etc.). Follow the steps below to configure the mail server for Clarity Vision Solutions.
Configuring Mail in Liferay SaaS
If this wasn’t already configured for you, contact your Liferay Cloud support person.
Configuring Mail in Liferay PaaS or Self-hosted
In real life, you’d already have a mail server for Liferay to use. Here, you’ll simulate one.
Download FakeSMTP.
Unzip the file. Start the FakeSMTP mail server with the following command:
java -jar fakeSMTP-2.0.jarSet the listening port to
2525and click Start server.Note, if using a docker container, the following env variables must be included in the your run command.
--env LIFERAY_MAIL_PERIOD_SESSION_PERIOD_MAIL_PERIOD_SMTP_PERIOD_PORT=2525 \
--env LIFERAY_MAIL_PERIOD_SESSION_PERIOD_MAIL_PERIOD_SMTP_PERIOD_HOST=172.17.0.1 \
In Liferay, navigate to Global Menu (
 ) → Control Panel → Server Administration. Click the Mail tab.
Set the following configuration.
- Incoming POP Server:
localhost - Incoming Port:
110 - Use a Secure Network Connection: checked
- User Name:
support@clarityvisionsolutions.com - Password:
learn - Outgoing SMTP Server:
localhost - Outgoing Port:
2525 - Use a Secure Network Connection: checked
- User Name:
support@clarityvisionsolutions.com - Password:
learn
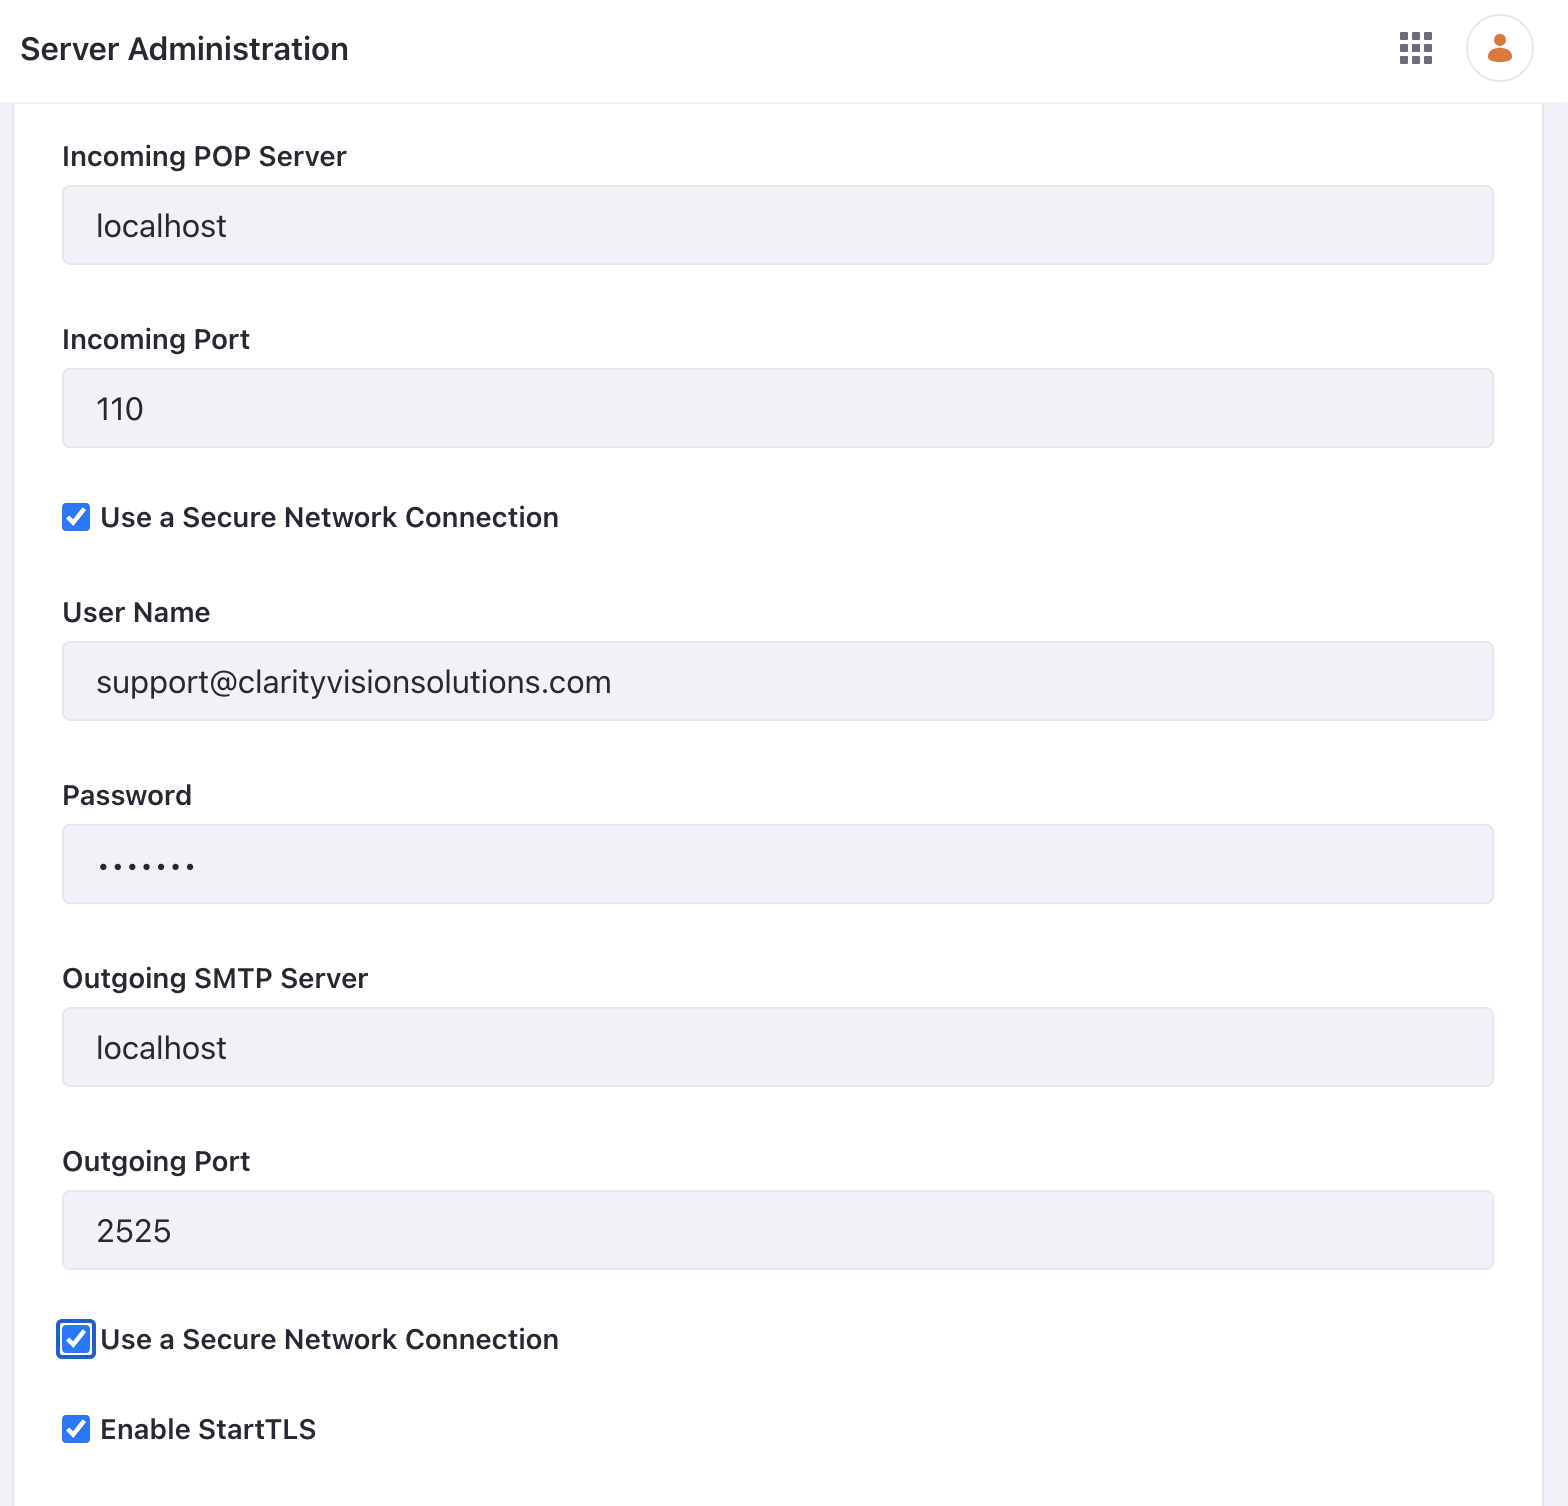
Click Save.
- Incoming POP Server:
Navigate to Global Menu (
) → Control Panel → Instance Settings. Click Email.In the left navigation, click Email Sender. Set the options below.
- Name:
Support - Address:
support@clarityvisionsolutions.com
Click Save.
- Name:
Navigate to Global Menu (
) → Control Panel → Users and Organizations. Click Add User ( ).
).Enter the following account information:
- Screen Name:
alan - Email Address:
alan@clarityvisionsolutions.com - First Name:
Alan - Last Name:
Adams - Job Title:
Sales & Marketing Manager
Click Save.
- Screen Name:
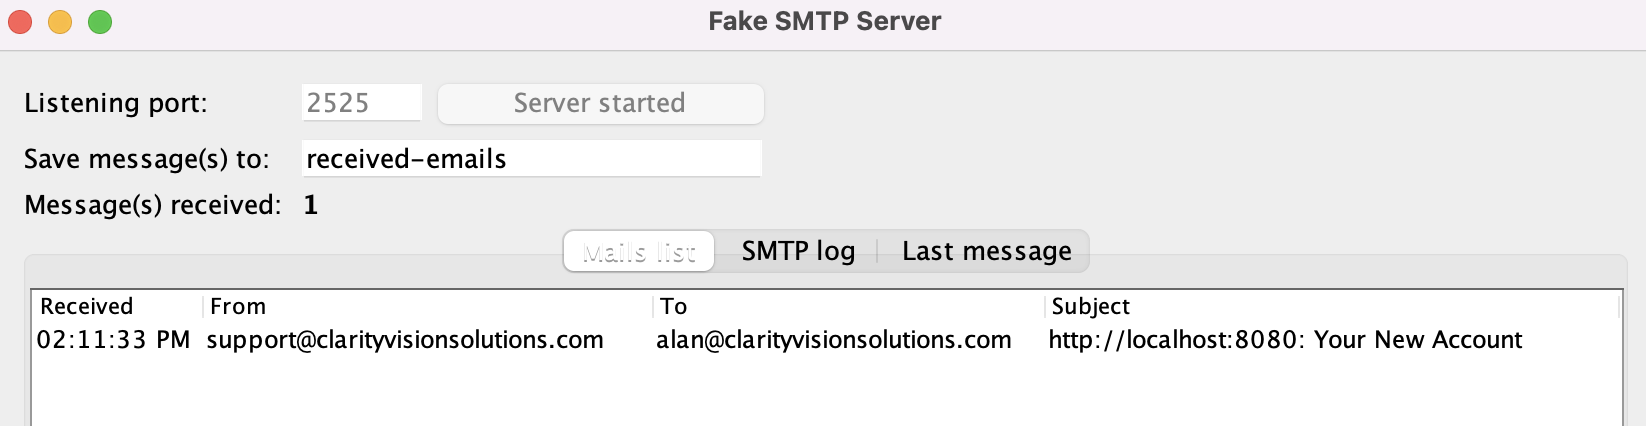
Liferay has sent a welcome email to Alan Adams.
Your Liferay environment is now configured with a mail server. You can further customize mail to configure different email senders and messages for each instance. See Instance Email Settings to learn more.